Friday, October 31, 2014

Stylin' Stampin' INKspiration: Family Halloween Fun!

I'm back!  There's so much fun with the Holiday I had to come back and share one more Halloween project.  Every holiday I like to send family and friends cards to let them know we're thinking of them so this is the card I made to send this year.  It was inspired by a card by Patty Bennett (loved how she created the tombstone using the Note Tag Punch).  Today over on the  Stylin' Stampin' INKspiration blog we're sharing Halloween projects and this was the second card I shared.

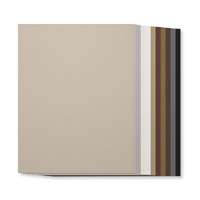
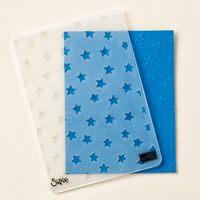
For this card I started with Sahara Sand for the cardbase.  Next I took a piece of Basic Black cardstock and used the Confetti Stars punch to punch the stars along the border and then added a piece of Crushed Curry cardstock behind the cardstock to create a starry sky.  I also added a piece of Motley Monsters Designers Series Paper along the bottom of the card.

I had lots of fun with punches and framelits to fill out this card.  I stated with the Note Tag Punch and punched out a piece of Smoky Slate cardstock and stamped the "fright night" and bat and stars from the Project Life Holiday Cheer stamp set before sponging around the edges with Basic Black Ink.  Next I used the Holiday Invitation stamp set to create the moon image by stamping the moon and stars on Crush Curry cardstock, punching it out with the 1" Circle Punch, and adding a small rhinestone for a little sparkle.

I love the little ghost and pumpkin and they are too cute, and super easy thanks to the Fun Fest Photopolymer stamp set and matching Fall Fun framelits.  I cut the ghost out of Whisper White cardstock and then used Momento Ink to stamp the ghost face.  For the pumpkin I used Stampin' Write Markers to color in the pumpkin before stamping it and then stamped the face in Black before cutting it out with the framelits.

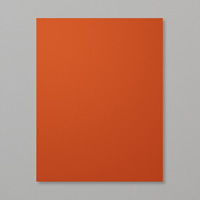
The final touch was to add the greeting.  For this I used the Bite Me Photopolymer stamp set (love that this set is still available).  I stamped the greeting in Tangerine Tango ink on Sahara Sand cardstock before punching it out with the Modern Label Punch.  Of course I had to sponge around the edges with Basic Black ink before attaching the greeting to the cardfront.

Below are easy ordering links for the products used in this card:

Built for Free Using: My Stampin Blog


Have a wonderful Halloween and enjoy all the festivities!

Diana
Pin It!

Sketch Frenzy Friday Card Sketch Challenge: Tee-Hee-Hee

Happy Halloween! I'm so excited that Halloween falls on a Friday this year so we can enjoy all the evening fun and not have to worry about getting up early for wok and school the next day, so much more relaxing.  This morning I'm sharing the card I made for this weeks Sketch Frenzy Friday card sketch challenge.  On the Stylin' Stampin' INKspiration blog we're also sharing Halloween cards so I'm sharing this card on that blog as well.  Of course I had to get in another Halloween card and I haven't shown the Tee-Hee-Hee stamp set nearly enough love this season.  I started with Smoky Slate for the cardbase and then added a piece of Motley Monster Designer Series Paper that was matted with Tangerine Tango cardstock.  Next I took a little strip of Whisper White cardstock and stamped the "EEK" all in a row with Momento Black Ink (I love that this set is Photopolymer so I have no issues lining things up perfectly!)  I also added a couple of flags of Hello Honey 3/8" Stitched Satin Ribbon that were tucked under the white stamped strip.

Next I used the Big Shot and Window Collection Framelits to cut out the accent piece in Smoky Slate cardstock and sponged around the edge with Basic Black ink.  The greeting was stamped in Tangerine Tango ink on Whisper White cardstock, punched out with the Large Oval Punch, and then sponge with Basic Black ink and attached with dimensionals.  The final, fun touch was to stamp the witches hat.  I stamped it in Momento Ink and then used Stampin' Write markers to color in the accents before cutting it out with Paper Snips and attaching it to the card front.

This card is lots of fun and cute, perfect for this fun holiday!


Below are easy ordering links for the products used on today's card:

Built for Free Using: My Stampin Blog


I have some added extra Halloween fun so make sure to check back on my blog later this morning for another card to share.

Enjoy,

Diana

Pin It!

Thursday, October 30, 2014

Halloween Treat to Impress!

Tomorrow is Halloween and one of the things I love about this holiday is of course of the tasty treats and candy (who doesn’t???)  Of course I can’t just give someone a piece of candy, I love to decorate and pretty it up so it’s a little more special.  Today I’m sharing several treats I’ve made to give to our little ghosts and goblins.

The first item is a treat bag for Aidan to give to some of his neighbor friends.  In the past the neighborhood “Booing” tradition has taken place but it’s kind of died down but Aidan really liked this idea.  We decided to make these little treat bags that Aidan can give to friends.  We used some small paper bags I had in my stash and stamped on them with the Gorgeous Grunge stamp set in Basic Black, Tangelo Twist, and Blackberry Bliss.  For the tag I used the Scalloped Tag Topper Punch (these punches are awesome!!!) and Very Vanilla Cardstock.  For the “Boo” and “to” images I used the September Paper Pumpkin stamps and the “You” is from the Merry Everything stamp set.  It’s great using Stampin’ Write Markers to only ink up part of the image for even more possibilities.  The spooky trees stamped along the bottom is also from the Paper Pumpkin kit as are the stickers and Orange Sequins.  I love how versatile the Paper Pumpkin kits are and you can use it for so much more than the initial kit projects.  The final step is to use the 1/8” Circle Punch and then attached the tag to the bag with Black Baker’s Twine (also from the Paper Pumpkin kit).  

 While there is so much candy already involved with Trick-or-Treating and other activities I still like
to give a little treat to Chris and Aidan, along with their holiday cards.  I found little bags of each of their favorite candies and have just decorated them.  For Aidan's I created my own DSP using the spooky faces from the Fall Fest stamp set and then matted it with Basic Black cardstock.  Next I wrapped a piece of Tangelo Twist Two Toned Trim around the treat and then frayed the edges for a fun effect.  The greeting is from the Frightful Wreath Photopolymer Stamp set and was stamped with Elegant Eggplant ink on Smoky Slate cardstock and then I stamped the splatter in Silver Encore ink.  The final touch is cute pumpkin using the Fall Fest stamp set and framelits.

For Chris' treat I decided to do a little recyclying and used some packing paper and used the fringe scissors and then crumpled it for a straw-like effect.  I added a belly band of Motley Monsters DSP and Basic Black cardstock in front of the packing paper.  I wrapped some Basic Black Baker's Twine around the treat to attach the tag that I made using the Note Tag Punch, and Project Life Holiday Cheer stamp set to create a tombstone and a Fall Fest Pumpkin.

I hope these have given you some cute treat ideas that you still have plenty of time to make before Halloween.

Easy ordering links for the products used in these projects are below:

Built for Free Using: My Stampin Blog


Enjoy!

Diana
Pin It!

Monday, October 27, 2014

Stylin' Stampin' INKspiration Masculine Monday: Lovely as a Tree

Happy Monday!  We had a wonderful weekend and today I'm starting the week over on the Stylin' Stampin' INKspiration blog where it's Masculine Monday so the designers are sharing great ideas for "dude" cards.  Today's card I made for my Grandmpa as he celebrates his 87th birthday.
I used Lost Lagoon for the cardbase and then added a piece of Soft Suede cardstock that was embossed with the Big Shot and Alphabet Press Embossing folder and then sponged over the cardstock with Soft Suede ink to help emphasize the embossed images.  Next I took a piece of DSP from the Color me Autumn Designer Series Paper and matted it with Cajun Craze cardstock.  I also added a piece of Lost Lagoon 3/8" Stitched Satin Ribbon and gathered it up using Sticky Strip to attach.
 
The stamped image is from the Lovely as a Tree and I used Stampin' Write Markers to ink the stamped image before stamping.  I used Crushed Curry cardstock for the mat and sponged around the edges of both layers with Soft Suede ink.  The greeting is from the Teeny Tiny Wishes stamp set and was stamped in Cajun Craze ink, punched out with the Word Window Punch and sponged with Soft Suede Ink.  I used the Modern Label Punch to punch the mat with Lost Lagoon cardstock and added a couple of pearls that I colored with the Crumb Cake Blendabilities markers to coordinate with the card.
 
This is a perfect card for those fall birthdays and other occasions and this stamp set is a classic!
 
Below are easy ordering links for the products used on today's card: 
 
Diana

Pin It!

Friday, October 24, 2014

Sketch Frenzy Friday Card Sketch Challenge: Mingle all the Way

Happy Friday!  It's been a great week and I'm looking forward to an eventful weekend.  The Marine Corp Marathon is Sunday and I'm running (my first full marathon) so most of the weekend is going to revolve around getting ready for, running, and then recovering from the race, we're even going to the First Timer's Pep Rally tonight which should be fun.  I'm very excited but also nervous.  Before I get started with all the race activities I had time to play in the studio and this is the card I made for this weeks Sketch Frenzy Friday card sketch challenge and I decided to turn to a Christmas card (really have got to get started with all my Christmas gifts, cards, and projects so I'm not stressed in a couple of months. 

The cardbase for this card is Pear Pizzaz cardstock and then I added a piece of Smoky Slate cardstock that's embossed with the Big Shot and Stylish Stripes Embossing folder.  Next I added a piece of All is Calm Specialty Designer Series Paper and wrapped a piece of Whisper White Baker's Twine and tied a All is Calm Snowflake Embellishment for some bling.

For the greeting I used the Mingle all the Way stamp set and used Stampin' Write Marker's to color in the stamp before stamping on Whisper White cardstock before punching it out with the 2" Circle Punch.  I created a mat for the greeting using Pear Pizzaz cardstock and the Big Shot and Window Frames Collection FramelitsDimensionals were used to attach the greeting to the cardfront for added texture.

This card is nice and simple but has just enough elements to make it really pop.  The other designers have some great cards to provide additional inspiration and then come play along with the challenge and share what you come up with.


Below are the easy ordering links for the products used on today's card:

Built for Free Using: My Stampin Blog


Have a great weekend and enjoy!

Diana
Pin It!

Wednesday, October 22, 2014

Paper Players Card Sketch: Bright & Beautiful with Lots of Bling!

Good morning!  This week is really flying by, my marathon is this Sunday so this week I've been focusing on getting ready for the big day and getting lots of rest (love an excuse for extra sleep)!  This also means I've had some extra time so I've been able to get some time in the studio to work on some projects on my to do list and just relax and play.  Today I'm sharing the card I made for this weeks Paper Players card sketch challenge, once I saw that the theme was Silver and Gold, I knew I had to play along.  I started with Lost Lagoon for the cardbase and then added a piece of Whisper White cardstock that was matted with Soft Suede cardstock.  I added a piece of Silver Fancy Foil Designer Vellum for the silver polka dots and then added a piece of Lost Lagoon 3/8" Silky Taffeta Ribbon around the cardfront. 
 
I used the Bright & Beautiful stamp set for the greeting (stamped in Lost Lagoon ink) as well as the stars.   For the star I stamped the medium size star with Soft Suede ink on Soft Suede cardstock.  I stamped the smallest star with Versamark Ink on Last Lagoon cardstock and then heat embossed it with the Heat Tool and Silver Embossing Powder.  Both these stars were cut out with the Big Shot and the Star Framelits.  I decided to add another star to the star stack and used some Silver Glimmer Paper for eve extra bling.  I used dimensionals between each star layer so it really has some dimension and texture.
 
I love the simplicity and elegance of this card and it has just the right amount of bling to help spread the holiday cheer.
 
Below are easy ordering links for the products used on today's card:
 
Built for Free Using: My Stampin Blog


I hope you enjoy and have a great day!
 
Diana 
Pin It!

Monday, October 20, 2014

Stylin' Stampin' INKspiration Scrapbook Sketch Challenge: Halloween Fun!

Good morning!  What a wonderful weekend, we had beautiful weather and while we were busy we enjoyed every moment, the highlight was a neighborhood Halloween party that was lots of fun.  I decided to use some of the pictures from the party for this months Stylin' Stampin' INKspiration scrapbook sketch challenge.  This is a great sketch that Jenn provided us and I let the pictures and patterned papers be the highlight.  This layout is fun with all the blocks so you can have just a couple or lots of pictures on the page, depending on what you need.
 
Usually the pages I make are going back to events so it was really fun to make a layout while it's so fresh in my mind.
Below is the supply list for today's page:

Background
     Color = 230,WATERMARK 255,255,255

Embellishments
    Chevron Ribbon - embellishments\Chevron Ribbon - calypso coral v (re-colored) Color = CAJUN CRAZE 170,66,37
    Natural Designer Buttons\Naturals Designer Buttons - large brown 1

Stamps
    _Designer Kits\Spooky Bats\Spooky Bats - oval, Color = 230,WATERMARK 255,255,255
    _Designer Kits\Wicked Cool\Wicked Cool - bats, Color = 0,0,0
    _Designer Kits\Wicked Cool\Wicked Cool - spider web, Color = 0,0,0
    _Designer Kits\Spooky Bats\Spooky Bats - oval, Color = 230,WATERMARK 255,255,255
    _Designer Kits\Wicked Cool\Wicked Cool - spider web, Color = 0,0,0
    Holiday Cheer Project Life\Holiday Cheer Project Life - bat, Color = 0,0,0
    Gorgeous Grunge\Gorgeous Grunge - grunge 2, Color = OLD OLIVE 138,151,71
    Gorgeous Grunge\Gorgeous Grunge - grunge 2, Color = OLD OLIVE 138,151,71
    Holiday Cheer Project Life\Holiday Cheer Project Life - fright night, Color = 0,0,0

Punches
    Basics\1.25 Square Punch,  Filled with: Designer Series Paper\_Designer Kits\Modern Medley - designer series paper\Modern Medley - 1
    Basics\1.25 Square Punch,  Filled with: Designer Series Paper\_Designer Kits\Frightful Sight - designer series paper\Frightful Sight - 9
    Basics\1.25 Square Punch,  Filled with: Designer Series Paper\_Designer Kits\Frightful Sight - designer series paper\Frightful Sight - 7
    Labels & Tags\Hooray For Tags - punches\Hooray For Tags - 3, Fill Color = SMOKY SLATE 180,176,173

Make sure to check out all the other layouts the design team is sharing and then come play along and share what you come up with, always love seeing how you can interpret a given sketch in a unique way.
 
Have a great day!
 
Diana
Pin It!

Friday, October 17, 2014

Triple Threat Sketch Challenge: Gorgeous Grunge Meets Paper Pumpkin

Happy Friday!  Boy this month is really sailing by, Halloween will be here before we know it and I read that there are only 10 more weeks until Christmas (I can't believe it!)  So I've been working a lot this week on Halloween projects so I can get everything finished and not wait until the last minute.  With Halloween on the mind, I decide to use it for the inspiration for today's Sketch Frenzy Friday Design Team card.  I decided to up the ante by using the Fab Friday Color challenge and the Gorgeous Grunge stamp set focus over on the Stylin' Stampin' INKspiration blog so it's a triple threat today!


I started with Smoky Slate for the cardbase and then added a piece of Blackberry Bliss cardstock that I embossed with the Big Shot and the Polka Dot Embossing Folder.  For the main stamped image I used the Gorgeous Grunge stamp set and stamped the lines and splatter with Basic Black, Tangelo Twist, and Blackberry Bliss cardstock (I kept the cardstock as one big piece and then cut it into the three panels after I had stamped everything.  The three stamped panels were matted on a piece of Basic Black cardstock before attaching to the cardfront.


I had last month's Paper Pumpkin kit sitting on my desk in the studio (it's so fun!!!) so I decide to use some elements from the kit to this card.  I used some of the Orange Sequin Trim along the bottom.  The greeting is also one of the stamps from the Paper Pumpkin kit and was stamped with Blackberry Bliss ink on Smoky Slate cardstock.  I used Paper Snips to trim around the greeting and then sponged around it with Tangelo Twist ink.  Dimensionals were used to attach the greeting for extra dimension.  The final touch was to take a couple of the cute stickers from the Paper Pumpkin kit for the bat and crow.

This card is so fun, I love how I could use so many different things and they all worked well together.  I also love that the Paper Pumpkin kits include extra elements so you can use them on other projects for added fun!

Below are easy ordering links for the products used on today's card:
Built for Free Using: My Stampin Blog


We have some fun planned this weekend, including Aidan's Tae Kwon Do Tournament, Halloween Party, and my last long run before race weekend.  I hop you're weekend is filled with lots of fun and family as well.

Have a great weekend and enjoy!

Diana
Pin It!

Monday, October 13, 2014

Stylin' Stampin' INKspiration Card Sketch Challenge: Mingle all the Way

It's the start of another week, and while I don't have today off for the holiday like the rest of the family, I'm still looking forward to a very productive day.  I had a great weekend which included some quality crafting time and an afternoon with some friends for card class, I just love getting together with the ladies and relaxing.  It's the second Monday of the month which means it's time for the   Stylin' Stampin' INKspiration card sketch challenge.  Bree created a great sketch for us this month that was a fun twist and a great way to let your designer series really shine.  I started with Soft Suede for the cardbase and added a piece of Color Me Autumn Designer Series paper that's attached at an angle (so fun!).   
 
For the stamped image I used the Mingle all the Way stamp set and used Stampin' Write Markers to color it in.  I used the Angled Tag Topper Punch on the top of the tag and then sponged around the edge with Cajun Craze ink.  A piece of Blackberry Bliss 3/8" Stitched Satin Ribbon is a perfect accent to the top of the tag.  I wanted to add some extra fun to the card so I used the Fall Fest Stamp set and coordinating framelits to make the pumpkin and leave accents.  Dimensionals were used to make the pumpkin and little leaf stand up.
 
I really like the colors and patterns in the fall paper, it's so beautiful I can't wait for our leaves to start changing here.  Make sure to check out the other cards the design team is sharing based on today's sketch and then come play along I'd love to see what you come up with.
 
Below are easy ordering links for the products used on today's card:
 
 
Diana


Pin It!

Saturday, October 11, 2014

Scrappy Saturday: First Day of School

Good morning!  It's time for another Scrappy Saturday.  Today's page is for the first day of school this year.  I always love the excitement for the first day of school and all the new adventures that await.  For today's page I used My Digital Studio and one of the predesigned pages from the Game Day Photobook.  This is such a versatile download with it's neutral pallet.  All I had to do was change some colors to match the Pennington colors as well as a couple of accents and text items.  I read somewhere about including your child's signature in the first and last days of school layout so you can see how your child's writing changes through the year.  To add Aidan's signature I had him sign a notecard and the scanned it and turned it into a jpeg so I could add and crop it just like any other picture.


Below are the items used on this page:

Background
     Color = SAHARA SAND 194,187,169

Stamps
    _Designer Kits/Game Day/Game Day - 4, Color = VERY VANILLA 254,249,232
    _Designer Kits/Game Day/Game Day - large dots, Color = VERY VANILLA 254,249,232
    _Designer Kits/Game Day/Game Day - splatter, Color = HANDSOME HUNTER 42,86,73
    _Designer Kits/Game Day/Game Day - large dots, Color = VERY VANILLA 254,249,232
    _Designer Kits/Game Day/Game Day - large dots, Color = VERY VANILLA 254,249,232
    _Designer Kits/Game Day/Game Day - splatter, Color = HANDSOME HUNTER 42,86,73
    _Designer Kits/Game Day/Game Day - tab, Color = VERY VANILLA 254,249,232
    _Designer Kits\My First Day\My First Day - first day of school, Color = 230,WATERMARK 255,255,255

Hope you enjoy your weekend and all the adventures that await!

Diana 
Pin It!

Friday, October 10, 2014

Sketch Frenzy Friday: Get Your Santa On!

Happy Friday!   I decided to take a break from Halloween and fall themed projects for this weeks Sketch Frenzy Friday card sketch challenge and give you a little Christmas fun.  I created the sketch that we're playing with and I decided to break out lots of fun new products from the Holiday catalog for today's card. 
 
I started with Smoky Slate for the cardbase and added a piece of Garden Green cardstock that's embossed with the Big Shot and the Lucky Stars Embossing Folder  Next I used the Trim the Tree Designer Series Paper Stack for both patterned pieces (this pack is awesome, it has 24 different patterns that all coordinate together for only $6.95, you’ll be crafting all holiday season!)  For the stamped image I used the Get Your Santa On (this set is too cute!!)  I stamped the image with Momento Ink on Whisper White cardstock so I had no problem coloring in the image with Stampin’ Write Markers.  I did use the Gold Stampin’ Dazzlin’ Marker to color in the candlesticks on the mantel for a fun touch.  I matted this piece with some Pistachio Pudding cardstock before attaching it to the cardfront. 

 For the greeting it’s from the same stamp set stamped with Cherry Cobbler ink on Smoky Slate cardstock and then punched out with the Artisan Label Punch.  As a stepped up accent I added a piece of Whisper White 5/8” Organza Ribbon that was folded over and trimmed for flag ends.  On top of that I added a Gold Basics Metal Button that has Cherry Cobbler Baker’s Twine threaded through the button holes.  I used glue dots to attach the button and it holds it really well.

 There’s a lot going on with this card but I really like how each element works with the others and it’s bright and cheery.  I also really like how this stamp set is Photopolymer it makes lining everything up a breeze and it costs less (bonus!!)  I definitely see more fun cards with this stamp set in my future, oh and gift tags also!  Please go and check out the other design team cards for even more inspiration and come play along with the sketch, I hope you like it!

Below are easy ordering links for the products used on today’s card:
 
Enjoy!

Diana

Pin It!

Search This Blog