Wednesday, August 31, 2016

Fab Friday Color Challenge: Jar of Love

Good morning!  How is the first week of school for your family?  Aidan is really enjoying starting middle school, I think the highlight has been getting assigned his first locker!!  While we were away on vacation last week one of my coworkers "fish sit" for Aidan's two Beta Fish (Captain America and Ironman) and they were a hit in the office getting lots of visitors to keep them company.  After picking them up we decided to do something special so we baked cookies and Aidan wrote a thank you card, which of course I had to make.  I decided to use the Fab Friday color sketch using two of the new 2016-2018 In Colors for this fun card.  I was so excited when I saw the fish image in the Jar of Love stamp set since was perfect for this occasion and the jars kind of remind me of the tanks the beta fish live it (their tanks are bigger though).

I started with Pool Party cardstock for the cardbase and then added a layer of Whisper White cardstock for the cardfront.  On this layer I used some Pool Party ink and the Playful Backgrounds stamp set to stamp the circle images which remind me of bubbles.  I also stamped the greeting from the Jar of Love stamp set using Dapper Denim.  I also added a strip of Peekaboo Peach striped paper from the 2016-2018 In Color Designer Series Paper Stack and matted it with Dapper Denim cardstock.

For the stamped image I started by stamping the medium jar image using Basic Black ink and cut it out with the coordinating framelits (this stamp set and framelits are available as a bundle for a discount).  Next I used a sponge and some Pool Party ink to lightly colorwash the background and then stamped the sample "bubble image" using Dapper Denim ink which was stamped off once to slightly lighten the color.  To make the lid for the jar I stamped it with Versamark ink and heat embossed it with Silver Embossing Powder and the Heat Tool.  For the fish, I used Stampin' Write Markers to color directly on the stamp and tried to blend the color a little to mimic the look of the fish.  I used a framelit to cut out the fish and then attached the fish and jar lid to the jar using dimensionals.  Before attaching the jar to the cardfront I took some silver thread and looped it behind the jar so it just peaks out for a little texture.

This card is so cute and I think is perfect for this occasion and to be given by Aidan, it's fun.  I love all the different options with the Jar of Love bundle, so many uses!

Below are easy ordering links for the products used on today's card:


Enjoy!

Diana
Pin It!

Monday, August 29, 2016

SSINKspiration Masculine Monday: Always an Adventure

Happy Monday!  All good things must come to an end and after a fabulous vacation it's back to work and the first day of school here in the Eichfeld house.  Today over on the SSINKspiration blog it's Masculine Monday and the design team is sharing some fun ideas for all the guys in our lives.  I had an extra piece of the mountains cut out from the Outdoor Adventures Framelits so I decided to use this piece and it became the inspiration for today's card.

I started with Crumb Cake ink and then added a piece of Cucumber Crush cardstock that was embossed with the Big Shot and Woodgrain Embossing Folder.  Next I added a piece of designer series paper from the Serene Scenery Designer Series Paper Stack.  I attached the mountains and added little peaks of snow using Whisper White cardstock (there is a die in the framelit set for the snow cap but I did a mix of that die and hand cutting just for some variety.

The greeting is from the Guy Greetings stamp set and was stamped using Soft Suede ink on Crumb Cake cardstock.  I used the Always an Adventure stamp set to stamp the little bear, sign post and clouds before cutting them out with the coordinating Outdoor Adventures Framelits.  Dimensionals were used to attach the bear and clouds for dimension.  The final touch as to add a double bow I tied with Baker's Twine (I used some extra twine I had from a past Paper Pumpkin kit but any of our baker's twine would work).

I had lots of fun making this card, it's too cute.  Make sure to check out the other cards the design team is sharing.

Below are easy ordering links for the products used on today's card:


Enjoy!

Diana
Pin It!

Friday, August 26, 2016

Thoughtful Branches Birthday Wishes

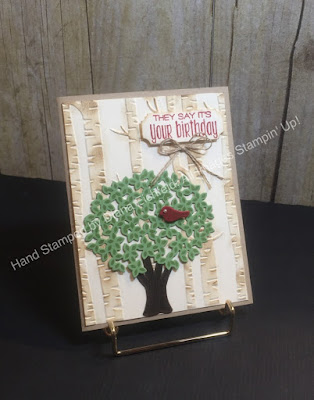
Happy Friday! Hopefully you’re having a great week and finally enjoying some cooler weather.  We’re wrapping up our trip out west and heading home tonight.  It’s been an amazing time, love all our crazy family adventures.  So the end of the month is rapidly approaching and I want to make sure your aware of the limited time stamp set and matching framelits Thoughtful Branches is only available this month so you have just a few more days to place this order for these great products (it’s also available as a bundle so you can save 10% when you purchase both items together).  To further tempt you I’m sharing another card I made using this fun bundle. 

I started with Crumb Cake cardstock for the cardbase and then added a layer of Very Vanilla cardstock that was embossed with the Big Shot and Woodland Embossing Folder (then I sponged it lightly with Soft Suede ink, I really like this technique to color the trees).  Next I used the Thoughtful Branches stamp set and coordinating framelist to make the tree trunk (Early Espresso) and tree leaves (Wild Wasabi), as well as the cute little bird (Cherry Cobbler).  After gluing the trunk and leaf piece to the cardfront I used piece of dimensional to attach the bird and then added a tiny pearl for his eye.

The greeting is from the Suite Sayings stamp set and was stamped with Cherry Cobbler ink on Very Vanilla cardstock before being cut out with the Big Shot and Project Life Cards and Labels Framelits.  I sponged around the edge of the greeting with Crumb cake ink and then attached it to the cardfront with dimensionals.  The final touch, a double bow I tied using Linen Thread and then attached with a glue dot.

This is a great masculine card but could easily work for ladies as well and I love how it’s really easy to put together once you stamp and cut all the pieces.  And the details are sure to impress whoever receives it (and it can be our secret to how quick and easy it is!!)  I’ve seen so many great ideas with the set you’ll definitely use it for all sorts of projects and occasions.

Below are easy ordering links to the products used on today's card:


Have a great weekend!

Diana
Pin It!

Wednesday, August 24, 2016

SSINKspiration Ronald McDonald House Charity Stamp: My Hero

Happy Wednesday! Stampin’ Up! works a lot with charitable organizations and supporting our communities.  One of their largest programs is their relationship with Ronald McDonald House Charities where we support the families and programs the Ronald McDonald House with donated time and money.  Did you know that every year Stampin’ Up! designs a special stamp set and $3 for the sale of each stamp set is donated to the Ronald McDonald House Charities?  This years stamp set is My Hero and it is great since it have images for lots of different occasions and fits several of our punches and framelits.  Today the SSINKspiration blog designers are showcasing this stamp set to help support this worthy organization.  Christmas will be here so I decided to make what may be my first Christmas card of the season.

I started with Cherry Cobbler cardstock for the cardbase and then added a layer of Garden Green cardstock that was embossed with the Big Shot and new Holly Embossing Folder and then sponged all over the cardstock with Garden Green ink (I really like sponging on embossed cardstock as it really helps the embossed image pop and is more dramatic).  Next I added a piece of This Christmas Specialty Designer Series Paper along the bottom.

I definitely went with circles as the theme for the layout of this card and started with a Whisper White Doily in the back (that was crumbled up and then sponged with Crumb Cake ink) followed by a piece of Cherry Cobbler cardstock that was cut with the Big Shot and Layering Circles Framelits (used the scallop circle) and then a piece of music sheet DSP from the same package (this piece was also crumbled and sponged with Crumb Cake).

The greeting is of course from the My Hero stamp set and I used Stampin’ Write Markers to ink the stamp before stamping on Very Vanilla cardstock.  This piece was also cut out with the Layering Circles Framelits and matted with Basic Black cardstock that’s a scalloped circle.  I only used dimensionals to attach the greeting circle (the rest are just attached with Tombow Adhesive).  The final touch was to add a nice big bow using Gold 5/8” Satin Ribbon and was attached with a glue dot.
I love all the textures and patterns that play with each other for a really elegant card (that isn’t over the top to make).  This stamp set is so versatile and would be perfect to have in your crafting toolbox, plus it helps the Ronald McDonald House Charities, so it’s a win-win!!

Below are easy ordering links to the products used on today's card:


Enjoy!

Diana
Pin It!

Monday, August 22, 2016

SSINKspiration Technique Challenge #SSINKTC36: Spotlighting Vintage Leaves

Good morning! What a wonderful weekend, lots of traveling, sightseeing, and we safe and sound “at home” at Disneyland and ready for a week full of new experiences.  It’s also so great to have the family all together again, traveling separately from different cities was interesting but thankfully all worked out.  Of course while I’m away I know you may still be looking for some inspiration so I have projects scheduled all week so you won’t miss out.  Today it’s time for this month’s technique challenge over on the SSINKspiration blog and we’re focusing on spotlighting which is fun but I don’t use very often.   This is a great technique to highlight just a portion of an image, or if you have a large image to color in but don’t want to take the time to color it all in, you can just do a portion and let it be the focus.  Even though it’s summer and still crazy hot I know fall will be hear soon so I decided to head in that direction for this card with a fall flair.

I started with Cajun Craze cardstock for the cardbase and then added a layer of Island Indigo cardstock as a mat for the Very Vanilla Cardstock.  On the cardfront I stamped leaves from the Vintage Leaves stamp set in Soft Suede ink.  I wrapped a piece of Delightful Dijon 5/8” Mini Striped Ribbon around the cardfront and then tied a knot.

I stamped one of the leaves as well on a scrap of Very Vanilla cardstock and colored it in with sponge daubers before cutting it out with the Big Shot and Layering Circles Framelits.  To help add more texture to the circle I scrunched it up and then flattened it and sponged lightly with Crumb Cake ink so it was aged and then matted it with a scalloped circle using Cajun Craze cardstock and the same framelit set and attached it to the cardfront with dimensionals.

The greeting is the Guys Greetings stamp set and was stamped on Crumb Cake ink with Cajun Craze ink before being cut out with the Big Shot and Layering Ovals Framelits and matted with Island Indigo cardstock (the greeting was attached to the cardfront with dimensionals). 

I forgot how fun and easy this technique is, will have to use it again, maybe in an upcoming class and the fall leaves and colors are a perfect reminder that summer is ending and we will eventually get a break from all the heat and humidity so we should enjoy these last days of summer to the fullest.  Make sure to check out the other design team members creations using this technique and then we would love for you to play along and share what you create using spotlighting.

Below are easy ordering links to the products used on today's card:


Happy Stamping!

Diana
Pin It!

Friday, August 19, 2016

Paper Players Color Challenge Meets SSINKspiration Back to School: Suite Sayings


Happy Friday! Just a few short hours until vacation officially begins (can you tell I’m just a little excited??) and I get to start by heading out to see Aidan who’s been at his grandparents this week.  I totally miss that kiddo!  Part of this week in addition to getting ready for vacation was trying to get things ready for school that starts when we get back so it was perfect timing for the SSINKspiration designers to focus on Back to School projects so I decided to make a card to go in Aidan’s backpack on his first day for a little surprise encouragement.  I also decided to use the Paper Players Color challenge which was just perfect for this occasion.
 
I started with Whisper White Thick cardstock for the cardbase and then added a layer of Pacific Point Designer Series Paper from the Brights Designer Series Paper Stack.  Next I took a piece of Basic Black cardstock and using the Writing Notes Background Stamp stamped using Whisper White Craft ink.  The greeting is from the Suite Sayings stamp set and was stamped using Basic Black ink on Daffodil Delight cardstock and then cut out with the Big Shot and Layering Ovals Framelits.  I attached just a small piece of a Silver Metallic Doily (the smaller one) behind the oval so it just peaks out and offers a touch of sparkle!
Next it was time for all the fun details…I used the Big Shot and Stars Collection Framelits and some Red Glimmer Paper to cut the large star and then cut out a smaller star for the center using the same framelits and some Pacific Point cardstock and then embossed it with the Confetti Embossing Folder (the smaller star was attached with a dimensional to pop up).  The final touch was to add a couple of Silver Metallic Enamel Stars to contrast the metallic doily.
I love how this card turned out, it just screams school and those bright colors are a perfect way to send some extra special vibes for the start of the new year.  Make sure to check out other projects the design team as created for even more inspiration if you’re looking to get ready for school in your house as well.
 
Below are easy ordering links to the products used on today's card:


Have a great weekend!

Diana
Pin It!

Wednesday, August 17, 2016

Holiday Catalog Sneak Peak: Basket of Wishes

Good morning! With Aidan away at his grandparents this week it’s a little quite around the house in the evening, which is perfect since my Holiday Catalog Preorder goodies have arrived and all I want to do is play.  Today I’m sharing a sneak peak of some of the products from the Holiday catalog and showing how they don’t need to just be used for the holidays, anytime will work.  When I saw the Basket of Wishes stamp set I knew it would be perfect for fall and Thanksgiving cards, and those will come, but I love sunflowers and was so excited that one of the options for the baskets base sunflowers so I decided to make a summery card using that, along with some “Christmas” paper, haha!

I started with Delightful Dijon cardstock for the cardbase and then took a piece of Crumb Cake card stock and ran it through the Big Shot with the Brickwall Embossing Folder.  I lightly sponged the embossed piece with Garden Green cardstock to mimic the look of brick that has some moss growing on it (don’t know if you can see it but that was the feel I was going for).  I stamped the greeting from the Basket of Wishes stamp set using Basic Black ink (I was careful and stamped after embossing but to make it easier stamp your greeting before embossing).  Next I added a piece of Warmth & Cheer Designer Series Paper (love that there are so many great prints in this pack that aren’t strickly holidayish) and matted it with Basic Black Cardstock.

For the stamped image I stamped the bushel basket and sunflowers using Basic Black ink on Whisper White cardstock and then colored them in with Stampin’ Write Markers.  I matted this with Garden Green cardstock and attaching to the cardfront with dimensionals.  The final touch was to add a bow I tied using some Delightful Dijon 3/8” Ribbon (from the 3/8” Ribbon Trio Pack, it’s in the new Petals and Paisleys Product Suite), it’s so soft and pretty, you’ll love it!

There are so many options with this stamp set having different types of baskets and fillers, you’ll definitely love this set and can use it for everything!  If you’re not a demonstrator you should be receiving your holiday catalog in the mail shortly (if you don’t and you don’t already have a demonstrator send me a note and I can get one in the mail to you).  This holiday catalog is over the top, amazing and I know you’ll love it as much as I do!  You can begin ordering on September 1 so start working on your wish list and get your order in so you can start working on all of your projects!

Also, I’ve already started planning my fall/winter class schedule showcasing the fabulous holiday catalog products so stay tuned my class calendar and invites will be going out soon.  There will be something for everyone!

Below are easy ordering links to the products used on today's card:


Enjoy!

Diana
Pin It!

Monday, August 15, 2016

Fab Friday Sketch Challenge: Confetti Celebration

Good morning! What an exhausting and enjoyable weekend.  Aidan is safe and enjoying time with the grandparents and Chris and I were able to enjoy “kidless” time which is rare, plus I had lots of fun stamping with my ladies yesterday (best way to spend a super hot day, in the cool studio creating!!)  It’s back to work today and I decided to play along with the Fab Friday Sketch Challenge to make a birthday card for a guy friend.  I tend to struggle with these since I enjoy them but I tend to use the same stamps and color themes so they get to be similar.  I liked thi sketch when I saw it as a great opportunity for a new design.

I started with Crumb Cake cardstock for the cardbase and then added a layer of Dapper Denim Cardstock as a matt for the Very Vanilla cardfront.  Along the side of the card front I used the Timeless Textures stamp set to stamp with Soft Suede ink along the left side of the cardfront.  Next I used the Playful Backgrounds stamp set and Dapper Denim ink to stamp the lines in the center of the card.

The greeting is from the Confetti Celebration stamp set and was stamped with Soft Suede ink on Crumb Cake cardstock.  For a little flair I took a piece of Soft Suede cardstock and ran it through the Big Shot with with one of the accent dies from the Mini Treat Bag Thinlits to cut out the strip of stars and then placed a piece of Gold Foil Paper behind it so the gold peeks through.  The final touch was to add a few gold sequins from the Gold Sequin Trim as fun accents to bring it all together.

I realize that I used 3 different stamp sets on this card but they worked so well and made the card come together really quickly which I like.  I’m going to have to remember this sketch for future cards as I like the minimalist look to it, and I’m sure our friend will enjoy his card!

 
Below are easy ordering links to the products used on today's card:


Happy Stamping,

Diana

Pin It!

Friday, August 12, 2016

SSINKspiration Stamp Set Focus: Thoughtful Branches

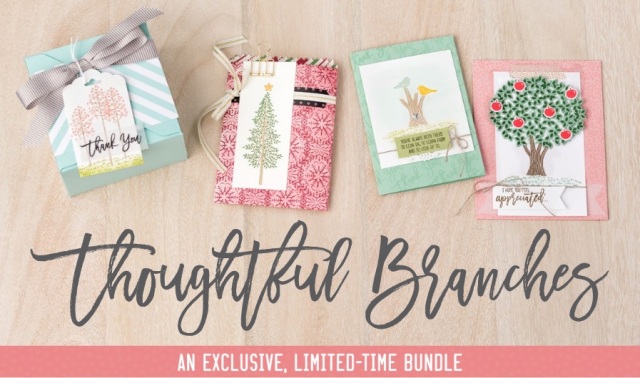
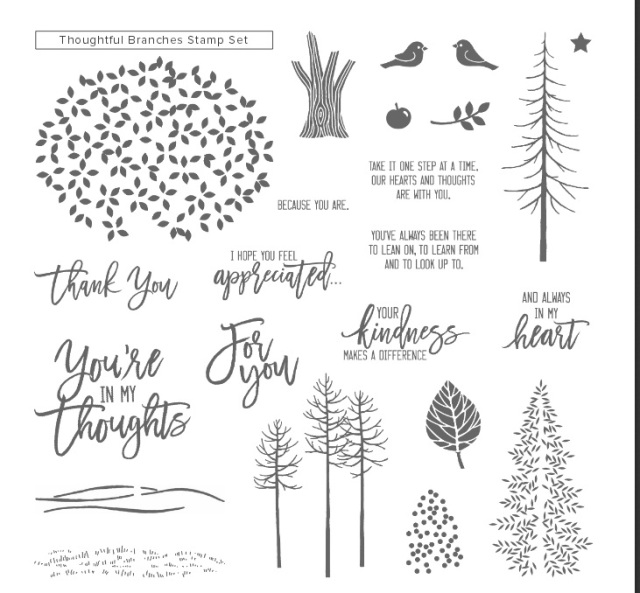
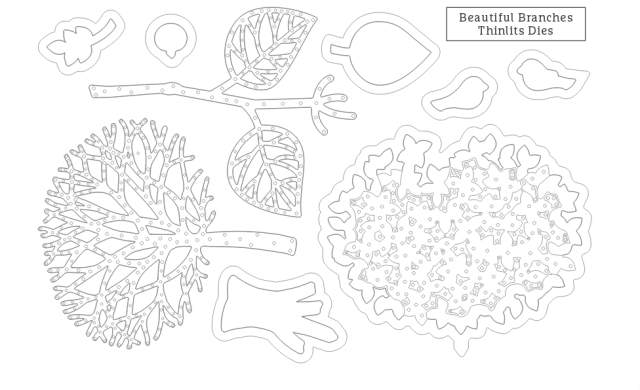
Happy Friday! It’s a busy day today, work this morning and then Aidan head out to Washington so he can spend a week with his grandparents while I head home where we’re going to have a quiet week at home (and work of course).  I’m so excited for Aidan he loves these visits with family and I wish he could spend more time.  Before all the craziness begins I wanted to share a fun card I made using the Thoughtful Branches stamp set and framelit bundle that’s a special right now and only available this month!  The SSINKspiration designers are sharing some fun ideas using this bundle today to provide a little inspiration and show how much you need this bundle in your crafting toolbox.

I started with Soft Sky cardstock for the cardbase and then added a layer of Early Espresso Cardstock that was a mat for my whisper White cardfront.  I decided to use the technique I showed previously to create a cloudy background by sponging with Soft Sky ink and using the Tree Builder Punch as the mask, see original post HERE.  Along the bottom of the cardfront for the grass I used the Work of Art stamp set and Wild Wasabi ink (of various strengths to add some dimension).  The base of the tree was cut using the framelits and Early Espresso cardstock. The leaves are on Whisper White cardstock with Wild Wasabi ink before being cut out (these framelits make these intricate cuts a breeze!  I added some apples and a bird using Cherry Cobbler to the tree with dimensionals for some height.  I used a tiny pearl for the eye of the bird for a fun touch.  A piece of 1/8” Gold Ribbon was tied into a bow and glued to the base of the tree (reminds me of the song around tying a yellow ribbon around an old oak tree).
The greeting is the same stamp set and was stamped with Cherry Cobbler ink on Whisper White cardstock.  The top greeting was cut out with the Big Shot and Layering Ovals Framelits, along with the Early Espresso scalloped oval for the mat.  The rest of the greeting at the bottom was punched out with the Classic Label Punch and trimmed along the right side.

I had so much fun playing with this bundle and making the fun background I can’t wait to use it some more and will be sharing some additional ideas soon to tempt you.

Below are easy ordering links to the products used on today's card:


Here's all the details on this great bundle, don't miss out!! 

thoughtful branches prices

thoughtful banner thoughtful branches 1 thoughtful pic


With coordinating Thinlits Dies

To print the flyer, click HERE


thoughtful branches dies


See the Pinterest Board SU created for this fun set here:

 
Have a great weekend!

Diana
Pin It!

Wednesday, August 10, 2016

Stylin' Stampin' INKspiration Blog Hop: ABC, 123 Fun!!


Good morning!  With summer rapidly coming to an end (much too soon in my opinion) I’m getting ready for my holiday catalog preorder to arrive (later this week) and know when it arrives I’m going to be completely distracted with new goodies so I’m continuing to enjoy all our great annual catalog items now.  Today over on the Stylin’ Stampin’ INKspiration blog it’s time for our monthly blog hop and this month’s theme is ABC, 123 which means making a project using one stamp set, two designer series paper, and three accessories.  One of the first sets I had to get was Marquee Messages and I had an idea for this card that is completely blinged out so I decided now was the perfect time.

As you hop along, please be sure to comment and show some love on every blog! We are always excited to hear from our followers! You should have just left stop number #6 on the Stylin' Stampin' INKspiration Blog Hop - Darcy at Dj's Stampin' Place. If so, you are in the right spot. If a link doesn't work or you get off track, you will find the full blog hop lineup below.

I started with Smoky Slate cardstock for the cardbase and then added a piece of DSP from the Pop of Pink Speciality Designer Series Paper package, what was matted with Emerald Envy cardstock.  Next I added another piece of Smoky Slate DSP from the Neutrals Designer Series Paper Stack.

For the stamped image I used the Marquee Messages stamp set and stamped the large image using Basic Black on Whisper White, Melon Mambo, and Emerald Envy cardstock and then used Paper Snips to cut out all three pieces.  A Smoky Slate Stampin’ Write Marker was used to color in the words on the Whisper White piece.  I used my Gold Wink of Stella Pen (love how easy it is to add a touch of bling with these pens) to color in the elements on the left side of the sign as well as one of the star bursts on the Emerald Envy piece.  I used dimensionals to attach the Melon Mambo sign arrow as well as a star cut out of Gold Glimmer Paper using the Big Shot and Stars Collection Framelits.  The final touch was to add rhinestones to each of the circles on the arrow to mimic the lights on a marquee sign and are really what puts this card over the top.

This card really brings a smile to my face and the sparkle and shine play a huge part (I know, big shocker!!) and will be great to just let that extra special person know how you feel about them.  I know if I received this card (or whenever I get a card with sparkle it seems extra special and makes me happy!

Below are easy ordering links for the products used on today’s project:


Make sure to check out the rest of the blog hop for lots of other great ideas.  If you click the “Next” button, you’ll go to Tobe’s site but you can also access any of the hopper’s site from the full blog list below.
http://yaplabs.com/thecraftsea/2016/08/09/ssink-august-blog-hop/


Blog Hop Participant List:

1. Diana at Stampin' Fun with Diana
2.
Tobe at The Craft Sea
3.
Jennifer at Jenny G Paper Stamps
4.
Jen at Faith.Grace.Stamp.
5.
Cheryl at Create with Cheryl
6.
Darcy at Dj's Stampin' Place

Have a great day,

Diana
Pin It!

Monday, August 8, 2016

Stylin' Stampin' INKspiration Card Sketch SSINKCS36: Suite Saying Basketball Wishes

Happy Monday!  After a wonderful on the go and relaxing visit to Williamsburg we're heading back home today and back to school and camp.  I have a little fun project to share with you today, it's time for this months sketch challenge over on the SSINKspiration blog.  I enjoyed using this sketch for a thank you card I needed for a thank your for Aidan's summer basketball coach for the end of season party.

I started with Pumpkin Pie cardstock for the cardbase and then added a piece of Crumb Cake cardstock as a mat for the Whisper White card front.  To the card front I added a piece of Basic Black cardstock that was embossed with the Big Shot and the Sparkle Embossing Folder. On top of that I added a strip of stripped DSP from the Neutrals Designer Series Paper Stack.  Next I took a piece of Crumb Cake cardstock and stamped it with the Hardwood stamp set, I stamped it off using Sahara Sand ink to mimic the hardwood of the basketball court.

For the greeting, I used the Suite Sayings stamp set and just inked the thanks before stamping on Whisper White cardstock.  For the net effect behind the greeting I used the Timeless Textures stamp set and used Basic Gray, stamping off first.  This layer was matted with Pumpkin Pie cardstock before attaching it, over a flag of 5/8" Burlap Ribbon.

The final touch was to add a basketball and since I don't have a current basketball stamp I had to get a little creative and cut out a piece of Pumpkin Pie cardstock using the Big Shot and Layering Circles Framelits then hand drew the lines using a Sharpie and then embossed it with the Softly Falling Embossing Folder before attaching to the card front with dimensionals.

This card was a lot of fun and I'm hoping coach appreciated it.  The other design team members have some great cards using this sketch so go check them out for further inspiration and then play along with this month's challenge for lots of fun.

Enjoy!

Diana
Pin It!

Friday, August 5, 2016

Fab Friday Color Challenge: Scenic Sayings

Happy Friday!  Today’s the start of our little mini getaway in Williamsburg and we’re all looking forward to a little downtime.  Of course I couldn’t leave you hanging for project so I’ve got some fun scheduled to keep you entertained.  Today I’m sharing a card I made for a friend using last weeks Fab Friday color challenge but with getting ready to leave I missed link up deadline but I thought you would still enjoy it.  When I saw these colors I immediately thought of Christmas, but then decided to work to come up with something that wasn’t holiday.

I started with Garden Green cardstock for the cardbase and then added a piece of Very Vanilla Cardstock that I embossed with the Big Shot and Woodland Embossing Folder and then sponged lightly with some Soft Suede ink to really help the trees pop.  Next I added a square of Garden Green DSP from the Regals Designer Series Paper Stack. 

The greeting is from the Scenic Sayings stamp set (and it was stamped in Cherry Cobbler ink on Very Vanilla cardstock before cutting out with Paper Snips and attaching with dimensionals.  The final touch was a double bow made from Cherry Cobbler Baker’s Twine that was attached with a Glue Dot.

Sometimes you need to send a card, just because, to let someone know you’re thinking of them and this does the job perfectly plus it has a bit of fall to it which will be here before we know it!

Below are easy ordering links for the products used on today’s card:


Enjoy and have a great weekend!

Diana
Pin It!

Wednesday, August 3, 2016

SSI Sympathy Meets Hand Stamped Sentiments Sketch Challenge: Lovely as a Tree

Good morning!  I'm so excited for the end of this week as it's a short week for us and we're heading out on a mini vacation, which is always a nice chance to relax and unwind.  Today the SSINKspiration blog is focusing on sympathy cards so I decided to combine that with the Hand Stamped Sentiments Sketch Challenge for this lovey card.

I started with Crumb Cake cardstock for the cardbase and then added a layer of Early Espresso cardstock behind the Garden Green cardstock that was embossed with the Big Shot and Boho Chic Embossing Folder.  Next I added a little strip of Very Vanilla cardstock behind a piece of Early Espresso designer series paper from the Neutrals Designer Series Paper Stack.  Then I added some Linen Thread wrapped around the layers and tied a bow.

Another piece of designer series paper, this time a piece of Garden Green from the Regals Designer Series Paper Stack (for both patterned pieces I sponged with Crumb Cake ink to mute the Whisper White pattern and make it fit with the Very Vanilla elements.  The main stamped image is from the Lovely as a Tree stamp set an I took the largest strip of tress and just inked up a couple of the trees for a smaller element using Stampin' Write Markers directly on the stamp before stamping on Very Vanilla cardstock.  I cut the trees out using the Big Shot and Layering Circle Framelits and lightly sponged around the edge before attaching it to the cardfront with dimensionals.

The greeting is from the Teeny Tiny Wishes stamp set and was stamped in Early Espresso ink on Crumb Cake cardstock before being cut out with the Big Shot and Layering Ovals Framelits before attaching with dimensionals.

This turned out being a more masculine card than I intended but's classic and would work with any occasion by changing  up the greeting.  Make sure to check out all the other great cards the design team is sharing and you may find the perfect inspiration for your next project.

Below are easy ordering links for the product's used in today's card:


Enjoy!

Diana
Pin It!

Monday, August 1, 2016

Stylin' Stampin' INKspiration Color Challenge SSINKCC36: Badges and Banners

Good morning!  What an interesting weekend, with the extended heat and humidity it was only a matter of time until we got some storms to help deal with that heat and it finally came Saturday and even, and came in with a bang.  Thankfully we were able to get all our activities in and I even got some relaxing stamping  time, which is just the frosting on the cake.  It's time for another color challenge over on the SSINKspiration blog and this time I decided to use another new stamp set, Badges and Banners (lots of fun elements and it's available as a bundle with the coordinating badge punch so you can save on both, whoo hoo!!)

I started with Pear Pizzaz cardstock for the cardbase and then adding a layer of Rich Razzleberry behind the Whisper White cardfront.  On the cardfront I used the Timeless Textures stamp set and stamp three different stamp images using each of the sketch colors (for the filigree image the center one is full strength ink and the two sides are stamped off once.  Then I added a piece of 5/8" Burlap Ribbon around the bottom.

For the main image I started by stamping the badge image from the Badges and Banners stamp set using Rich Razzleberry ink on Whisper White cardstock and then punched it out with the Badge Punch. Next I stamped the No. 1 image (from the same stamp set using Pear Pizzaz ink and then punched it out using the 1 3/8" Circle Punch and attached it with a dimensional.  Behind the badge image I added a silver Metallic Foil Doily for a little fun.  The final touch was to tie a bow using 3/8" Peekaboo Peach Ruched Ribbon.


It's fun to see how some of the new In Colors coordinate so well with our classic colors, nice and fresh.  The other design team members are sharing their takes on this color combo so go check it out and then we would love for you to join in the fun!

Below are easy ordering links for the products used on today's card:


Enjoy!

Diana

Pin It!

Search This Blog