Showing posts with label Treat Bag. Show all posts

Friday, December 15, 2017

SSINKspiration Christmas Bags and Tags: Carols of Christmas

Good morning!  How is it possible that Christmas is only 10 days away?  In my house we haven't just been counting down to Christmas, but also the release of the new Star Wars movie and today's the day so we have a fun evening out getting our geek on that I excited about.  Today the SSINKspiration designers are sharing gift bags and tag ideas to help you with all your last minute package needs.  I always hold a holiday gift packaging class earlier in the season to help my customers to be ready and not as stressed.  Today I'm sharing a super fun and easy bag that is sure to match the great gift you'll put inside.

I started with a kraft gift bag (not Stampin' Up!) and used the Snowflake Sentiments stamp set and Whisper White Craft Ink to stamp the snowflakes all over the front of the bag.  Next I took a Striped Treat Bag and took it apart and used just the front of the bag as the base decoration (and it adds my first layer of bling!)  I layered a piece of Merry Music Speciality Designer Series Paper over the top (I love the prints in this package as the musical theme is perfect for the holidays).

The greeting is from the Carols of Christmas stamp set and was stamped with Basic Black ink on Whisper White cardstock before being cut out with the Big Shot and Stitched Shapes Framelits.  I used the Layering Circles Framelits to cut out the scalloped circle mat using Cherry Cobbler cardstock and then attached the piece to the gift bag with dimensionals.  To add a little more sparkle I added a couple of Black Rhinestones and a Gold Metallic Enamel Dot.

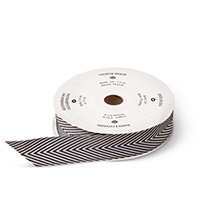
As the final touch for the bag I dies a bow using the 7/8" Striped Ribbon and then took one of the Green Sprigs and applied Embossing Paste lightly on the tips to flock it and then once it was dry (didn't take very long) I pushed the stem into the center of the bow and it holds it just right!

This bag looks really detailed because of the all the embellishments but is really easy to make (just make sure leave time to let the craft ink dry completely).  I'm hoping to make a few more of these for gifts I need to give so we will see how I do for time.

Below are easy ordering links for the product's used in today's project:

Product List

Have a great weekend!

Diana
Pin It!

Friday, March 17, 2017

SSINKspiration St. Patrick's Day: Pot of Gold Tasty Treats

Good morning and Happy St. Patrick's Day (and a Friday, whoo hoo!)  This morning I'm heading out for a fun shamrock filled race weekend with friends but I couldn't headout without leaving my guys a little shamrock treat for the occasion.  Today on the SSINKspiration blog we're sharing St. Patrick's Day or green cards and while this isn't a card I decided it was too cute not to share.  We're big chocolate and peanut butter fans in our house (it really is perfection!) so this is my husband's treat and uses peanut butter M&M's in out 2"x8" cello bags (I got the M&M's on clearance after Christmas and just picked out the green ones).
I used a piece of the gold 3/8" Metallic Ribbon from SAB combo pack to tie the bag shut.  For the tag I used a piece of Whisper White cardstock and used the Scallop Tag Topper Punch to punch the top including the hole to thread the ribbon through.  To make the rainbow I used one of the paint images from the Painter's Palette stamp set using a rainbow of colors.  The greeting is from the Teeny Tiny Wishes stamp set and was stamped in Cucumber Crush and then I cut it out with the Big Shot and the Project Life Labels and Cards Framelits set (a little sponging around the edge with Basic Black ink help sets it off against the tag).
 
Now you know I'm not a punch art person, it's not one of my gifts so I did quite a bit of searching on Pinterest for ideas and came up with this super easy idea for a pot of gold.  I used a 1 1/4" Circle Punch that was slightly trimmed down on one side as well as a couple pieces punched out with the Word Window Punch (retired, sorry) to make the top of the pot and it's legs.  To make the gold I used the 1/2" Circle Punch and Gold Foil Paper as well as some sequins from the Gold Sequin Trim.
 
I have to admit this came out really cute and I was happy with my punch art, even in it's simpliest forms and I'm sure hubby will enjoy it (at least for as long as the candy lasts which means it'll be gone by Sunday!)
 
Below are easy ordering links for the products used on this project:


Have a great weekend!
 
Diana

Pin It!

Friday, February 26, 2016

Star Wars Fun on a Disney Cruise

Good morning!  We have been having a wonderful time on our Disney cruise and yesterday was our Star Wars Day at Sea which was a lot of fun to see Star Wars characters, activities, etc. as well as so many guests on the cruise really getting into the fun and dressing up.  As in past cruises the cast members on the ship have really gone above and beyond to make our vacation truly magical so we like to give gifts to the different staff, specifically our dining room team, stateroom host, and the kid’s club staff and candy is a little something special we can offer since they spend so much time on the ship working.  Since this was a Star Wars themed cruise I decided to make the packaging all Star Wars themed, thanks to the fabulous inspiration from Tami White (see her projects and tutorial HERE).  I am not a punch art expert by any means but using Tami’s guide I was able to adjust the size of my Death Star and Millennium Falcon’s to fit my packaging (given Aidan’s birthday party was Star Wars themed and all the gifts for the cruise I made about 45 Death Star and Millennium Falcon’s for different items, oye!


The first project was little kraft bags and I stamped the background using the Gorgeous Grunge and Timeless Texture stamp sets and the greeting is from Sassy Salutations.  I used the XL Oval Punch to punch out the greeting and attached the elements with dimensionals and used some retired ribbon to tie up the bag.


The second project is a larger bag of treats for the kid’s club staff and I used one of our gusseted bags and then made a tag, using all the same supplies (made a smaller Death Star) and cut the tag out with the Big Shot and Chalk Talk Framelits.
This is a fun, easy card that is great if you need to make multiples and is nice and flat to make the post office happy.  You could easily change the greeting to make this a Christmas card as well (there’s plenty of time to still make your holiday cards this year if you haven’t started yet).


Below are easy ordering links for the products used on today’s projects:


I hope you enjoyed a little bit of our fun and have a great weekend!

Diana
Pin It!

Wednesday, March 25, 2015

Easter Class and Teacher Gifts: For Peeps Sake

Good morning!  Only a few days left before we start spring break and we’re all getting excited.  I’m a person that loves to celebrate most holidays Aidan always takes treats into his teachers and class for most holidays but with Easter being early this year and school being out for Spring Break the week before my deadline to get these finished in time to give was rapidly approaching I knew I needed to whip up some cute gifts that didn’t take a lot of time so they would be ready before the break.  I earned a couple of packages Best Day Ever Designer Series Paper for FREE during Sale-a-Bration so I had plenty for these cute gifts. 

For Aidan’s teachers gifts we decided to give little bags of treats and since I had a few baggies from the January Paper Pumpkin Kit (one of my all time favorites!!) I decided to use the bags and gold clips from the kit and then use the idea of the elements and recreate them using Easter colors and themes.  The fold over tag uses the Best Day Ever Designer Series Paper I scored it with the Simply Scored Board and then used my retired Ticket Punch to punch the corners on the front side.  For the greeting I used the For Peeps Sake stamp set and after stamping the greeting and easter egss I punched it out with the Extra Large Oval Punch and then added some Ribbon tails from the Best Day Ever Designer Accessory Package.  These really were so easy; I was able to make 8 of them in probably ½ hour and are super cute.
Close-up of the Bag Tag

For Aidan’s classmates I decided to use bags of Fun Sized M&M’s that I already had in my candy stash (saves money, reduces sweet treat temptations, and covers allergy issues in the class, triple score!)  I found these really cute matchbook treats on Becky Roberts blog, see here’s HERE so I used this idea (I did have to adjust the width of mine my increase it ¼” to make sure it fully covered the M&M packages).  By using the Best Day Ever Designer Series Paper I didn’t have to worry about stamping or decorating the matchboxes, and used up some of my paper stash and the Simply Scored Board made scoring all the pieces fast.  I did use the Mini Stapler (this tool is AWESOME!!! I could see using it in the office as easily as crafting) to attach the M&M baggies to the package so they didn’t fall out.   I used the same stamp set for the tag on these and used Stampin’ Write Markers to ink the stamp before stamping on Sahara Sand cardstock.  I used the Ornate Tag Topper Punch to punch the tops of each tag and added some ribbon from the Best Day Ever Designer Accessory Package to dress it up.  I did attach the tag with dimensionals to the matchbook.  Once again, I was able to make 27 of these little treats from start to finish in less than two hours (the longest time being coloring in the tag. 
 
Matchbook Treat Open
 
I know my days are numbers of Aidan wanting to give treats to his class and teachers so I’m enjoying it while it lasts.  If you didn’t have classmates to give treats to this could easily work for neighbors, grandkids, coworkers (yes even adults like treats), etc. and would certainly brighten someone’s day.
 Below are easy ordering links for the products used on today’s projects:

Built for Free Using: My Stampin Blog


You still have time to whip little gifts for Easter that will certainly impress! 

Happy crafting,

Diana
Pin It!

Thursday, October 30, 2014

Halloween Treat to Impress!

Tomorrow is Halloween and one of the things I love about this holiday is of course of the tasty treats and candy (who doesn’t???)  Of course I can’t just give someone a piece of candy, I love to decorate and pretty it up so it’s a little more special.  Today I’m sharing several treats I’ve made to give to our little ghosts and goblins.

The first item is a treat bag for Aidan to give to some of his neighbor friends.  In the past the neighborhood “Booing” tradition has taken place but it’s kind of died down but Aidan really liked this idea.  We decided to make these little treat bags that Aidan can give to friends.  We used some small paper bags I had in my stash and stamped on them with the Gorgeous Grunge stamp set in Basic Black, Tangelo Twist, and Blackberry Bliss.  For the tag I used the Scalloped Tag Topper Punch (these punches are awesome!!!) and Very Vanilla Cardstock.  For the “Boo” and “to” images I used the September Paper Pumpkin stamps and the “You” is from the Merry Everything stamp set.  It’s great using Stampin’ Write Markers to only ink up part of the image for even more possibilities.  The spooky trees stamped along the bottom is also from the Paper Pumpkin kit as are the stickers and Orange Sequins.  I love how versatile the Paper Pumpkin kits are and you can use it for so much more than the initial kit projects.  The final step is to use the 1/8” Circle Punch and then attached the tag to the bag with Black Baker’s Twine (also from the Paper Pumpkin kit).  

 While there is so much candy already involved with Trick-or-Treating and other activities I still like
to give a little treat to Chris and Aidan, along with their holiday cards.  I found little bags of each of their favorite candies and have just decorated them.  For Aidan's I created my own DSP using the spooky faces from the Fall Fest stamp set and then matted it with Basic Black cardstock.  Next I wrapped a piece of Tangelo Twist Two Toned Trim around the treat and then frayed the edges for a fun effect.  The greeting is from the Frightful Wreath Photopolymer Stamp set and was stamped with Elegant Eggplant ink on Smoky Slate cardstock and then I stamped the splatter in Silver Encore ink.  The final touch is cute pumpkin using the Fall Fest stamp set and framelits.

For Chris' treat I decided to do a little recyclying and used some packing paper and used the fringe scissors and then crumpled it for a straw-like effect.  I added a belly band of Motley Monsters DSP and Basic Black cardstock in front of the packing paper.  I wrapped some Basic Black Baker's Twine around the treat to attach the tag that I made using the Note Tag Punch, and Project Life Holiday Cheer stamp set to create a tombstone and a Fall Fest Pumpkin.

I hope these have given you some cute treat ideas that you still have plenty of time to make before Halloween.

Easy ordering links for the products used in these projects are below:

Built for Free Using: My Stampin Blog


Enjoy!

Diana
Pin It!

Thursday, August 21, 2014

Disney Cruise Treats, Inspired by a Card: Merry Everything

Happy Thursday!  I'm so excited, we're officially on vacation and get to board the Disney Dream in just a few short hours.  I have to say our family loves all things Disney, and especially Disney Cruising, it really is relaxing and magical!!  One thing that really sets Disney apart is the service they provide, the Castmembers (CM), aka cruise staff, really go above and beyond to make your trip special.  In return we really like to do a little something for our dining room staff, stateroom host, and the kid's club personnel to let them know we appreciate their efforts.  For this trip I made these little treat bags filled with goodies (since we've been told the CM's don't have a lot of space and access to everyday items).  Of course I had to decorate it up and I received a wonderful card from my friend Michelle Suit, and knew it would be perfect for the cruise.  I used the Gorgeous Grunge stamp set to stamp on the bag and then used lots of different punches to make the pirate Mickey.  The tag is a sneak peak of the new Merry Everything stamp set and matching punch (which will be released next month in the Holiday catalog).  Then I just used some Basic Black Chevron Ribbon (and retired Real Red Grosgrain ribbon) to make a cute little knot.

Here's a picture of Michelle's original card, isn't it beyond cute?  I kept the colors and most elements the same since they were perfect but I did downsize the punches to make the Mickey head a little smaller for the bag.  You could easily use these bags for birthday or holiday treats, or just to let someone know you're thinking of them.

I know the CM's will love the treats and we're looking forward to a fabulous time.


Below are easy ordering links for the products used on today's project:

Pin It!

Search This Blog