Showing posts with label Holiday Invitation. Show all posts

Friday, December 12, 2014

Sketch Frenzy Friday Sketch Challenge: Holiday Invitation

Happy Friday peeps!  Are ready for the weekend?  This is a big weekend….for the holidays I love to bake cookies and give them as gifts so I designate one weekend as my baking weekend and make anywhere from 6-8 different types of cookies and candies, package them up and then deliver them to friends, neighbors, and coworkers.  So I’ll be a busy chickee.  Before I get started on all the holiday fun, it’s time for our weekly Sketch Frenzy Friday Sketch challenge.  This week we were given a really fun sketch which is great for showing off all our fabulous designer series paper and how they coordinate together.  I started with Garden Green for the cardbase and then added a piece of Whisper White cardstock that is the base for all my DSP panels.  I used the Trim the Tree Designer Series Paper Stack for this card, such traditional Christmas colors, it’s perfect and the stack as so many different patterns it will fit all your needs (not just for the holidays!)
After attaching all the DSP panels I added the greeting, which is from the Holiday Invitation stamp set, stamped in Cherry Cobbler ink on Whisper White cardstock and cut flag tails on one end.  For the embellishment I decided to use the Wonderous Wreath Framelits and the Big Shot to cut the bow out of Gold Glimmer Paper (it’s just the perfect blingy touch).  I did add a red star to the center of the bow using Red Glimmer Paper and the star punch from the Itty Bitty Accent Punch Pack.
This is such an easy card to make if your still working on your holiday cards this may be a perfect layout for you, plus it’s mailable which the postman appreciates.  And you can use up lots of those DSP scraps that you’ve been holding on to so it’s cost effective and cleaning up your crafting space.


Below are easy ordering links for the products used on today’s card:

Built for Free Using: My Stampin Blog


Have an enjoyable Friday and hope you get some crafting time!

Diana


Pin It!

Monday, December 1, 2014

Stylin' Stampin' INKspiration December Color Challenge: Holiday Invitation

Good morning!  How was your holiday weekend?  We had a fabulous time and were definitely able to relax and enjoy.  Now we're back and in the full swing of things for Christmas.  Over on the Stylin' Stampin' INKspiration blog it's time for this months color challenge so I decided to use it for a quick and easy Christmas card.  This time of year we're all busy trying to get everything done on our To Do list so anything you can make quick and easy but still gives you a WOW statement is money.  I was recently browsing around the internet and found this great card on Shelli Gardner, Stampin' Up!'s CEO blog that I just loved so I CASEd it for today's card.

The cardbase is Cherry Cobbler and then I added a piece of Basic Black cardstock underneath my Whisper White cardstock.  For the stamping, first I stamped the "merry" image from the Seasonally Scattered stamp set in Lost Lagoon ink.  Next I took a piece of 1 1/4" Burlap Ribbon and trimmed off both sewn edges and the removed some of the strings on all four sides of the ribbon for a more distressed look (and makes the ribbon thinner to just cover the words on the stamped image).  Next I took a piece of Cherry Cobbler cardstock and stamped the "Be Merry" greeting from the Holiday Invitation stamp set (I have to admit this is an overlooked stamp set and it is awesome, it has greetings for several holidays as well as little images perfect to coordinate so you can use it for much more than making invitations!).  I used Paper Snips to make flags on both sides of the cardstock and attached it on top of the ribbon.  The final touch was to add some rhinestones in the snowflakes for a little sparkly bling (a little holiday twinkle). 

You could certainly whip up lots of these cards in no time and they are super "mailable" for your holiday cards.  Make sure to check out all the other awesome design team cards and then come play along with us and share you're creations (can't wait to see them!).  Also wanted to give you a little reminder that there are some new doorbuster bundles being offered today only as part of the Online Extravaganza that's currently going on so make sure to place your orders soon so you don't miss out on these sales (they're only available while supplies last!).

Below are easy ordering links to the products used on today's card:

Built for Free Using: My Stampin Blog


Have a fabulous day and enjoy the first day of December!

Diana

Pin It!

Friday, October 31, 2014

Stylin' Stampin' INKspiration: Family Halloween Fun!

I'm back!  There's so much fun with the Holiday I had to come back and share one more Halloween project.  Every holiday I like to send family and friends cards to let them know we're thinking of them so this is the card I made to send this year.  It was inspired by a card by Patty Bennett (loved how she created the tombstone using the Note Tag Punch).  Today over on the  Stylin' Stampin' INKspiration blog we're sharing Halloween projects and this was the second card I shared.

For this card I started with Sahara Sand for the cardbase.  Next I took a piece of Basic Black cardstock and used the Confetti Stars punch to punch the stars along the border and then added a piece of Crushed Curry cardstock behind the cardstock to create a starry sky.  I also added a piece of Motley Monsters Designers Series Paper along the bottom of the card.

I had lots of fun with punches and framelits to fill out this card.  I stated with the Note Tag Punch and punched out a piece of Smoky Slate cardstock and stamped the "fright night" and bat and stars from the Project Life Holiday Cheer stamp set before sponging around the edges with Basic Black Ink.  Next I used the Holiday Invitation stamp set to create the moon image by stamping the moon and stars on Crush Curry cardstock, punching it out with the 1" Circle Punch, and adding a small rhinestone for a little sparkle.

I love the little ghost and pumpkin and they are too cute, and super easy thanks to the Fun Fest Photopolymer stamp set and matching Fall Fun framelits.  I cut the ghost out of Whisper White cardstock and then used Momento Ink to stamp the ghost face.  For the pumpkin I used Stampin' Write Markers to color in the pumpkin before stamping it and then stamped the face in Black before cutting it out with the framelits.

The final touch was to add the greeting.  For this I used the Bite Me Photopolymer stamp set (love that this set is still available).  I stamped the greeting in Tangerine Tango ink on Sahara Sand cardstock before punching it out with the Modern Label Punch.  Of course I had to sponge around the edges with Basic Black ink before attaching the greeting to the cardfront.

Below are easy ordering links for the products used in this card:

Built for Free Using: My Stampin Blog


Have a wonderful Halloween and enjoy all the festivities!

Diana
Pin It!

Friday, October 3, 2014

Stylin' Stampin' INKspiration Blog: Halloween Boxes, Bags, and Tags Oh My!

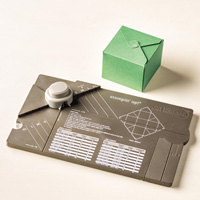
 Yeah, I'm back with a bonus post today for extra fun.  Today over on the Stylin' Stampin' INKspiration Blog the designers are sharing lots of great boxes, bags, and tags perfect for Halloween (plus remember you can always change up an idea for another holiday or event just by changing colors, DSP, and stamps.  I love Halloween and I'm in the middle of making lots of gifts for Aidan's teachers, class, family and friends so this is perfect.  I adore candles and Bath and Body Works has these great candles in canning jars (that are so popular right now) and will fall scents I will be using these for gifts but I need the perfect packaging, and the new Gift Box Punch Board comes to my rescue.  This board can make lots of different sized boxes perfect for what you need, in this case my finished box is 3 1/4 x 3 1/4 x 4.  After scoring following the boards instructions I just folded on all the score lines and my box popped into shape.
 
To decorate the box I used some Motley Monsters Designer Series Paper on all four sides.  The tag is made using the Mingle all the Way stamp set and was stamped on Sahara Sand cardstock with Momento Ink before punching it out with the 2 1/2" Circle Punch.  I used the Big Shot and Window Collection Framelits to make a mat out of Tangerine Tango Cardstock.  I added a piece of Basic Black Chevron Ribbon to one side for a fun accent.  The final touch was to use the Holiday Invitation Stamp set and I stamped the moon and bat image on Crushed Curry cardstock (I added a couple extra bats for fun) and punched it out with the 1 1/4" Circle Punch.  I used some rhinestones for a little bling and to mimic the stars before attaching the circle the front of the box with dimensionals
 
 
I wanted to show you what the box looks like inside, the cool thing about this is that if your giving these as gifts and traveling you can completely make and decorate the box and keep it flat to travel and then just fold the box up and add the candle at your destination so nothing gets crushed (awesome for the holidays!!!)

I definitely see lots more of these boxes in my future, I love how easy they are and versatile.  Please go check out the other projects the designers are sharing, I love them all!!

Below are easy ordering links for the products used on today's project:
Have a wonderful weekend!

Diana
Pin It!

Search This Blog