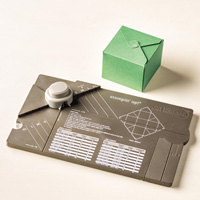
Yeah, I'm back with a bonus post today for extra fun. Today over on the Stylin' Stampin' INKspiration Blog the designers are sharing lots of great boxes, bags, and tags perfect for Halloween (plus remember you can always change up an idea for another holiday or event just by changing colors, DSP, and stamps. I love Halloween and I'm in the middle of making lots of gifts for Aidan's teachers, class, family and friends so this is perfect. I adore candles and Bath and Body Works has these great candles in canning jars (that are so popular right now) and will fall scents I will be using these for gifts but I need the perfect packaging, and the new Gift Box Punch Board comes to my rescue. This board can make lots of different sized boxes perfect for what you need, in this case my finished box is 3 1/4 x 3 1/4 x 4. After scoring following the boards instructions I just folded on all the score lines and my box popped into shape.
To decorate the box I used some Motley Monsters Designer Series Paper on all four sides. The tag is made using the Mingle all the Way stamp set and was stamped on Sahara Sand cardstock with Momento Ink before punching it out with the 2 1/2" Circle Punch. I used the Big Shot and Window Collection Framelits to make a mat out of Tangerine Tango Cardstock. I added a piece of Basic Black Chevron Ribbon to one side for a fun accent. The final touch was to use the Holiday Invitation Stamp set and I stamped the moon and bat image on Crushed Curry cardstock (I added a couple extra bats for fun) and punched it out with the 1 1/4" Circle Punch. I used some rhinestones for a little bling and to mimic the stars before attaching the circle the front of the box with dimensionals.
I wanted to show you what the box looks like inside, the cool thing about this is that if your giving these as gifts and traveling you can completely make and decorate the box and keep it flat to travel and then just fold the box up and add the candle at your destination so nothing gets crushed (awesome for the holidays!!!)
I definitely see lots more of these boxes in my future, I love how easy they are and versatile. Please go check out the other projects the designers are sharing, I love them all!!
Below are easy ordering links for the products used on today's project:
Have a wonderful weekend!
Diana






These are so cute! It didn't look that big all assembled; thanks for showing it open!
ReplyDelete