Showing posts with label Boys will be Boys. Show all posts

Thursday, May 19, 2016

SSINKspiration Kids Birthday: Boys will Be Boys

Good morning!  We've made it through the halfway point of the week and finally we're getting a break from the rain and looking forward to a couple nice days.  Today over on the SSINKspiration blog we're showcasing kid's birthdays and by know you know one of my favorite stamp sets (and so sad it's retiring, boo!) is the Boys will be Boys set so I had to take it out to make one last project to share (don't worry this set isn't going any where since my kiddo loves all things boy and especially Legos).

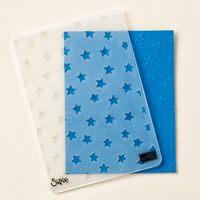
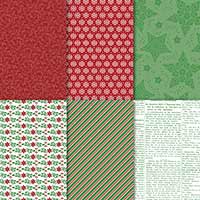
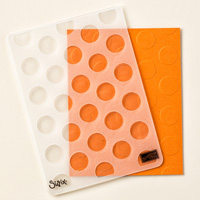
I started with Pacific Point cardstock for the cardbase and used the Project Life Corner Rounder Punch to punch the corners (actually used the corner rounder punch on all the layers of this card so I'm just putting it out there now).  Then I embossed a piece of Daffodil Delight cardstock with the Big Shot and Confetti Embossing Folder for the cardfront.  I added a piece of designer series paper from the Go Wild Designer Series Paper Stack (retiring) and matted that with Real Red cardstock and then wrapped a piece of Pacific Point 3/8" Stitched Satin Ribbon around the cardstock and tied a bow before adding it to the cardfront.

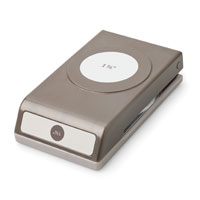
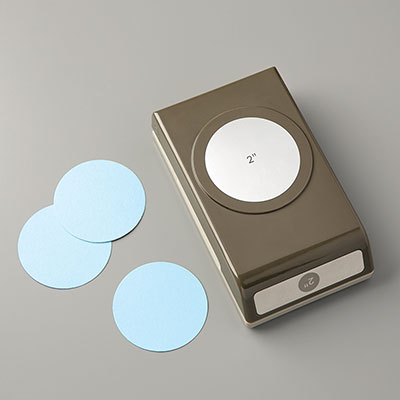
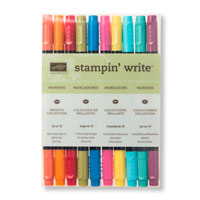
For the stamped image, I used the Boys will be Boys (retiring) stamp set to stamp the Lego image on Whisper White cardstock using Tuxedo Black Ink and then colored it in with Stampin' Write Markers and then punched it out with the 1 3/8" Circle Punch.  I matted that with a piece of Daffodil Delight cardstock that was punched out with the 2" Circle Punch and then a piece of Basic Black cardstock punched out with the 2 3/8" Scalloped Circle Punch (retiring) before attaching the whole piece with dimensionals to the cardfront.  The greeting is from the same stamp set and was tamped in Real Red ink and then punched out with the Washi Label Punch (retiring) and sponged around the edge with Pacific Point ink before attaching it with dimensionals as well. 

This card has all the classic Lego colors which makes it perfect for kids (of any age) and a perfect way to celebrate birthdays.  Make sure to check out the other fun cards the design team is sharing for more kid's birthday inspiration.

Below are easy ordering links for the products used on today's card:


Enjoy!

Diana
Pin It!

Wednesday, April 6, 2016

Retro Sketchs Sketch Challenge: Giggle Greetings

Good morning!  It’s been a super stressful week with a major family issue we’ve been dealing with and I have to admit, I’ll be very happy once it’s resolved.  I was able to get a little time in the studio last night and found this fun sketch challenge over on the Retro Sketches blog so I decided to play along.  I was looking through my stamp collection and realized I haven’t been showing a lot of love to some of my stamp sets from the main catalog and since we’ll be starting to think about next years catalog soon I decided to show some love to some of these great stamp sets. 

I started with Pool Party cardstock for the cardbase and then took a piece of Basic Gray cardstock for the cardfront and embossed it with the Big Shot and Chevron Embossing Folder.  Next I decided to use the School House Designer Series Paper (love this paper!!) and cut a large oval using the Big Shot and Oval Collection Framelits and then layered three different strips of the coordinating DSP in different lengths and dimensions for a fun focal effect.

For the main stamped image I used the Giggle Greetings stamp set but just wanted the image and not the words so I inked the stamp up with my Basic Black Stampin’ Write Marker and stamped it on Whisper White cardstock and punched it out with a 2” Circle Punch.  I used blender pens and Stampin’ Write Markers to color in the cute little dog.   I added a piece of Pacific Point 3/8” Stitched Satin Ribbon and folded it over for a couple of flags under the greeting.  The greeting is from the Boys will be Boys stamp set (another one of my favorites!!) and it was stamped using Basic Gray ink on Tangelo Twist Ink.  The greeting and the circle stamped image were both attached to the cardfront with dimensions.

For the final element I wanted to add a button accent but there isn’t a yellow button in the Bights Button Package so I used the Crushed Curry button from the Regals Buttons Package and it coordinates perfectly and Basic Black Baker’s Twine was used to tie a bow in the button before attaching it to the cardfront.

The colors as so fun and cheery I love it and it using so many of my favorite stamps and products, it just makes me smile.  Now to figure out the perfect person to give this card to….

Below are easy ordering links for the products used on today's card:


Enjoy,

Diana
Pin It!

Monday, February 8, 2016

Hand Stamped Sentiments Sketch Challenge 230: Boys will be Boys

I’m back!!  I was having so much fun working on cards for upcoming birthdays that I have a bonus card to share with you today.  February is another big birthday month so I needed a card for one of Aidan’s friends and decided to use this weeks Hand Stamped Sentimentssketch challenge as inspiration for the layout (once Aidan picked the image for the card!)  This is a nice, simple sketch that really gives you lots of options.

I started with Marina Mist cardstock for the cardbase and embossed the front of the card using the Big Shot and Honeycomb Embossing Folder.  Next I took a square piece of Whisper White cardstock and used the Project Life Corner Rounder Punch on all the corners before starting to color the background.  I started at the top with the lighter colors first and using sponge daubers started applying ink to create a skyline (used Soft Sky, Marina Mist, Wild Wasabi, and Old Olive inks).  Once I had the background the way I wanted I used the Boys will be Boys stamp set to stamp the army man using Tuxedo Black Ink.  I had a little boo-boo with my stamping so to help cover it I used some Stampin’ Write Markers to hand draw in some grass and bird type lines.  Next I added a piece of Silver Foil Paper as a flag peeking out behind the stamped image.

The greeting is from the same stamp set and was stamped on Soft Sky cardstock, punched out with the Washi Tape Punch, and attached to the cardfront with dimensionals.  As the final touch I added 3 candy dots along the bottom of the image using the colors from the stamped piece so it all ties together.

I had some fun playing with the coloring on this card and hope it’s appreciated (bet mom will more so but Aidan thought the idea was pretty cool.  This stamp set is lots of fun and it doesn’t have to be for little boys, I know lots of men who still love them so it’s all good!


Below are easy ordering links for the products used on this afternoons card:

Built for Free Using: My Stampin Blog


Enjoy the rest of your afternoon!

Diana
Pin It!

Wednesday, August 19, 2015

Fab Friday Sketch Challenge Meets SSINKspiration Stamp Set Focus: Writing Notes

Good morning!  The arrival of Wednesday always makes me a little happy since I know I can see the weekend on the horizon, and we have vacation coming up so while there’s a lot to do, I can’t wait.  Today I decided to do double duty and combine this weeks Fab Friday Sketch Challenge with the Stylin' Stampin' INKspiration blog stamp set focus, on background stamps.  With all our fabulous designer series paper sometimes our background stamps set overlooked but I love them and today I used one of my favorites Writing Notes.  This set is perfect for all sorts of projects, especially related to school and all the associated fun.

I started with Basic Gray cardstock for the cardbase and then added a piece of Schoolhouse Designer Series Paper (the colors and prints in this pack are so fun, I’m in love!!) and then layered a piece of Whisper White cardstock on top that was stamped with the Writing Notes background stamp (I used Real Red and Pacific Point Stampin’ Write Markers to color in the stamp so you get the classic look of ruled paper.  Along the bottom I added a piece of Pacific Point 3/8” Stitched Satin Ribbon that was ruffled up, along with a star strip that was cut out using Daffodil Delight cardstock and one of the thinlits from the Mini Treatbag Thinlits set.  I also added a red star using a die from the same set and some Real Red Glimmer Paper.

The greeting is from the All Boxed Up stamp set (a new one in my collection), you know I love WhooHoo so this stamp is perfect!  For some added fun I stamped some Legos from the Boys will be Boys stamp set on a piece of scrap paper and after coloring them in cut them out with Paper Snips and then attached them to the cardfront with dimensionals.

I absolutely love how this card turned out and how I could use several different stamp sets and they all worked out, and the colors just scream school (I may have to keep this in my stash to give the little man when we have something to celebrate or just to lift his spirits!!  I had a sneak peak at some of the other design team cards and I love how we used such a variety of background stamps so you’ll get lots of great ideas.

 
Below are easy ordering links for the products used on today’s card:

Built for Free Using: My Stampin Blog


Happy Stamping,
Diana
Pin It!

Monday, July 13, 2015

Stylin' Stampin' INKspiration/Hand Stamped Sentiments Card Sketch Challenge: Boys will Be Boys

Good morning!  After a weekend full of travel Aidan is safe visiting his grandparents and having and blast and I'm back home and enjoying a little time with just Chris (doesn't happen very often).  Today I decided to combine a couple challenges, the Stylin' Stampin' INKspiration blog card sketch and Hand Stamped Sentiments Inspiration Challenge.  I love when I can combine things and get twice the bang for the effort.  Bree gave us a fun sketch this month and I decided to stick pretty close to the sketch and try cutting out the angled shape, it took a little time to figure out, especially the mat but in the end I really liked the effect.

I started with Pacific Point cardstock for the cardbase and then added a piece of Whisper White cardstock that was embossed with the Big Shot and Lucky Stars Embossing Folder.  Next I took a piece of Real Red DSP from the Brights Designer Series Paper Stack and trimmed it down using my paper trimmer (I used my ruler to mark the center point on the sides of the DSP and then trimmed 1/2" down).  Then I took a piece of Pacific Point cardstock for the mat and attached it to the DSP and then trimmed it down to match.


For the greeting I used the Boys will be Boys stamp set and stamped it with Pacific Point ink and punched it out with the new Washi Label Punch (I love this punch and it's perfect for greetings!)  I did also sponge around the edges with Real Red ink.  The final touch was to add a piece of Pacific Point 3/8" Stitched Satin Ribbon (love this ribbon!!!)


I loved the Red, White, and Blue inspiration from Hand Stamped Sentiments and it worked perfect for this card.  I actually made this card for Aidan to leave in his suitcase as a little remember while he's away (unfortunately, I forgot that the card was in my backpack until he was gone so I'll have to drop this in the mail, good intentions!)

The designers have made some great cards today so go check them out and play along, you never know what you'll come up with.


Below are easy ordering links for the products used on today's card:

Built for Free Using: My Stampin Blog


Have a wonderful day!

Diana
Pin It!

Monday, June 22, 2015

SSINK Masculine Monday: Boys will be Boys

Good morning!  Did enjoy celebrating all the fabulous Father's in your life yesterday?  We had a great time, which included relaxing which is always a hit for my hubby.  Today we're extending the appreciation for guys since it's Masculine Monday over on the Stylin' Stampin' INKspiration blog.  Since I've been making lots of cards recently for the older guys in our lives I thought it was time for a card for the younger guys, which is always fun.

For today's card I started with Daffodil Delight for the cardbase and then added a piece of Whisper White cardstock that was stamped with the new, Writing Notes background stamp (I had inked it so I could recreate how notebook paper is colored.   The greeting is from the Boys will be Boys stamp set and was stamped in Cucumber Crush ink.

For the main stamped image I stamped the Legos from the Boys will be Boys stamp set in Tuxedo Black Momento Ink and was colored in with Stampin' Write Markers.  Then I cut out the image using the Big Shot and Circle Collection Framelits and made a mat using the 2" Circle Punch and some Daffodil Delight cardstock.  To add a little punch of color I added two flags, using the new Banner Triple Punch, one using the Brights Designer Series Paper Stack and a second in Cucumber Crush cardstock that was embossed with the Big Shot an Arrows Embossing Folder.

This card is so fun and simple that's just right and I love combination of these stamp sets, won't be the last time I use them.  The designers are also sharing some additional cards for inspiration on masculine cards so go check them out!

Below are easy ordering links for the products used on today's card:

Built for Free Using: My Stampin Blog


Have a great day!

Diana
Pin It!

Friday, June 12, 2015

Sketch Frenzy Friday Sketch Challenge and SSINK Product Suite Focus: Bravo

Good morning!  Friday is here and it’s going to be a great weekend (other than the heat and humidity) since it’s time for our 8th Annual Neighborhood BBQ where we have between 80-100 of our friends and neighbors over for a great afternoon (really evening, early morning) time that we look forward to all year.  Of course there’s still a lot to do to get ready but Chris and & are also taking time out tonight for a date and are heading to the movies (without Aidan) so I’m excited.  The weekend is going to be capped off with a card class where we’re going to be making lots of cards for the guys in our lives (today is the last day to RSVP for the class so don’t miss out!!)  Before we get started with all the weekend activities since it’s Friday it’s time for this weeks Sketch Frenzy Friday sketch challenge and I decided to combine this one with the product focus (Cherry on Top Product Suite) over on the Stylin’ Stampin’ INKspiration blog.

I started with Crushed Curry cardstock and then added a piece of Whisper White cardstock and stamped the greeting from the Bravo stamp set using Stampin’ Write Markers to ink up the stamp.  Next I took a piece of Tip Top Toupe and attached three different patterns of the Cherry on Top DSP for the panels.  Before attaching this piece to the cardfront I added a piece of 1 ¼” Bermuda Bay Striped Grosgrain Ribbon for a flag.

For a fun accent I used the Boys will be Boys stamp set (I’ve been working on a lot of boy themed projects lately so all those sets are out on my desk) and stamped the legos in Tuxedo Black Momento Ink on Whisper White cardstock before coloring them in and punching them out with the 2” Circle Punch.  The final touch was to cut a mat using the 2 ½” Circle Punch and Watermelon Wonder cardstock and attaching this piece to the cardfront with dimensionals.

This card is fresh and fun (love the addition of the new colors along with some of our classics) and I’m thinking may be perfect to let a little student I know how proud we are of all his hard work this school year (less than a week to go!!)  The only think I don’t know is if this tips to the more feminine side with the addition of the Watermelon Wonder ink, what do you think?  I like this so much a version of this card will probably be one of our projects for Sunday’s class.  Make sure to check out the other design team members created for inspiration and then play along for some fun this weekend. 

Below are easy ordering links for the products used on today’s card:

Built for Free Using: My Stampin Blog


Have an enjoyable weekend and wish me luck!

Diana
Pin It!

Monday, February 23, 2015

Stylin' Stampin' INKspiration Masculine Monday: Boys will be Boys

Good morning!  It’s Monday and we’re heading home today so I can’t really call it “Happy Monday” since it’s always sad leaving Disney but we’ve had a fabulous time with the races and celebrating Aidan’s birthday, lots of memories!  Today over on the Stylin' Stampin' INKspiration blog it’s Masculine Monday and you know it’s fun to work on those dude cards.  So today I decided to do something different and make a card for the “little dudes” since they’re just as important.  When the Boys will be Boys stamp set was released I had to have it since it’s so perfect for all the boys, you and young at heart.  This card is also bright and cheery and with a little metallic the guys will love it.

I started with Real Red cardstock and then added a piece of the Irresistibly Yours Specialty Designer Series Paper (another SAB freebie!!)  I used sponges and a rainbow of colors to create the rainbow effect on the paper and once I rubbed the paper with a paper towel to remove the excess ink the printed stars stay while and really pop against the colors.  I decided to mat this layer with Whisper White cardstock to help it really pop against the cardbase.

For the main stamped image I stamped the robot on Whisper White cardstock with Memento Black ink and then colored it in with my Stampin’ Write Markers (I could have used blendabilities but I was worried with all the small spaces I wouldn’t be able to really color like I wanted).  I punched the robot out with the 2” Circle Punch and then matted it with a piece of Pacific Point that was cut out with the Big Shot and Starburst Framelits.  For some accents to kind of look like cogs I cut out a coup of different size starburst using Silver Foil cardstock.  For the larger piece I layered it with a piece of Old Olive cardstock that was punched with the 1” circle Punch.  For the other I cut the inside of the silver starburst out with the ½” Circle Punch (hint:  punch the center out first and then you can center the starburst framelit so the hole is in the middle).  I used dimensionals to attach the smaller cog for dimension.

The greeting is from the same stamp set and was stamped on Pumpkin Pie cardstock.  To cut it out I used the Big Shot and Apothecary Accent Framelits (I just centered my strip so I just cut the decorative pieces on the edges of the greeting) and then attached it with dimensionals.

This card is so fun, it can’t help but brighten your little one’s day.  Make sure to check out the other design team creations for further inspiration.
Below are easy ordering links for the products used on today's card:
Built for Free Using: My Stampin Blog


Enjoy!

Diana
Pin It!

Monday, February 9, 2015

Stylin' Stampin' INKspiration Card Sketch Challenge: Boys will be Boys

Happy Monday!  What a wonderful weekend, a hint of spring to come which is so nice.  Aidan had a friends birthday sleepover this weekend so I decided to use this months Stylin' Stampin' INKspiration blog card sketch for the birthday card. All kids love Legos so the Boys will be Boys stamp set is so perfect (and it's one of the Weekly Deals this weeks so it's the perfect time to add it to your stamp collection.

I started with Daffodil Delight cardstock for the cardbase and then added a piece of Whisper White cardstock that has the Lego images from the Boys will be Boys stamp set stamped all along both edges using Black Memento Ink.

I used Real Red, Daffodil Delight, and Pacific Point Stampin' Write Markers to color in the Legos (these are classic Lego colors).  Next I added a piece of Basic Black Chevron Ribbon in the middle.  The greeting is from the same stamp set and was stamped with Memento Ink before being cut out with the Big Shot and Project Life Cards and Labels Framelits.  I sponged around the edge of the greeting with Pacific Point ink to help define the edges before attaching it to the card with dimensionals.  The final touch as to add a single Lego that I stamped, colored, and then cut out with Paper Snips before attaching it with dimensionals.

This is a great sketch that really provides lots of options and flexibility that you can use for any type of project.  Make sure to check out the other design team cards and then play along and share your card so we can all enjoy.

Below are easy ordering links for the products used on today's card:

Built for Free Using: My Stampin Blog


Enjoy!

Diana
Pin It!

Friday, October 3, 2014

Sketch Frenzy Friday Sketch Challenge: Boys Will be Boys, Lots of Lego Fun!


Happy Friday!  It's officially the start of race season for me and I'm looking forward to running my first half marathon since June, it' a new race and I'm running with friends so it should be fun.  Before we get started with all the weekend fun I wanted to share my design team card for this weeks Sketch Frenzy Friday sketch challenge.  This was a fun sketch and I used it for a birthday card we needed for one of Aidan's friends.  The Boys will be Boys stamp is perfect if you have boys in your life who also have friends that love Legos, army men, robots, etc.  too fun!

For this card I started with Smoky Slate for the cardbase and added a piece of Basic Black cardstock that I embossed with the Big Shot and the Lucky Stars Embossing Folder and matted that piece with some Pacific Point cardstock.  The red DSP is from the Maritime Designer Series Paper and I added three stars that were punched out of Silver Glimmer Paper with the star punch from the Itty Bitty Accents Punch Pack (even guys like the bling).

For the main stamped image I used the Legos from the Boys will be Boys stamp set and stamped it all over the Whisper White cardstock with Momento Ink and colored it in with Stampin' Write Markers before matting it with Daffodil Delight cardstock.  The greeting is from the same stamp set and is punched out with the Modern Label Punch and attached to the cardfront with dimensionals.

The birthday boy is a big Lego fan so I know this card was a hit.  I stayed pretty true to the sketch provided and really let the colors and patterns be the focus.  Make sure to check out the other great ideas the designers are sharing and come an play along with this weeks challenge, this will definitely help you get your creativity started to make something unique to you.


Below are easy ordering links to the products used on today's card:

Diana
Pin It!

Thursday, August 14, 2014

Stylin' Stampin' INKspiration August Blog Hop: SSI Team Convention Swaps


Good morning!  It's that time again, time for this month's Stylin Stampin' INKspiration Blog hop.  This month all the designers are sharing the cards we made for a swap we have during convention last month.  It was so fun seeing several of the ladies at convention since most of us we only know from online and the ladies are so fabulous they really had some beautiful cards.

As you hop along, please be sure to comment and show some love on every blog! We are always excited to hear from our followers! You should have just left stop number (#5) on the Stylin' Stampin' INKspiration Blog Hop - Kim R. of Stamping with Kim.  If so, you are in the right spot. If a link doesn't work or you get off track, you will find the full blog hop lineup below.

So you may know by know that one of the stamp sets in the new catalog that I was o excited to see was the Boys will be Boys stamp set (I love the Lego image and all the other "boy" images).  For my swap card I decided to use this set and the Legos but use some non-classic colors to change things up.  I started with Hello Honey Cardstock for the cardbase and I embossed it with the Big Shot and the Polka Dot Embossing Folder.  Next I added a piece of Confetti Celebration Designer Series Paper that was matted with Tangelo Twist cardstock. I used some Strawberry Slush Thick Baker's Twine to wrap around the DSP.

For the main stamped image I used Momento ink to stamp the Legos on Whisper White cardstock (I love this ink as it's great for watercoloring to ensure no bleeding).  I colored in the Legos with Stampin' Write Markers and then punched it out with the 1 3/4" Circle Punch and made a mat with Tempting Turquoise cardstock and the Big Shot and Circle Collection Framelits.  The greeting is from the same stamp set, stamped in Strawberry Slush ink and punched out with the Modern Label Punch and was attached to the card front with dimensionals.

This card is so fun and perfect for someone who's a kid at heart, no matter the age.  I hope you enjoyed my project and easy ordering links for all the products used on this card are below:

Make sure to continue on the hop, Tonya is next and you can get to her blog by clicking the "next" button below.

http://stampinwithtonya.blogspot.com/2014/08/august-blog-hop.html


Don't worry if you missed out on any of the blogs, you can access them all from the links below.  Enjoy the hop and all the beautiful cards!

Blog Hop Participant List:
  1. Darcy J. of DJ's Stampin' Place
  2. Donna S. of Organized Chaos
  3. Cynthia R. of Ink-A-Doodle Creations
  4. Jennifer C. of Happy 2 Scrap 4 Life
  5. Kim R. of Stamping with Kim
  6. Diana E. of Stampin' Fun with Diana
  7. Tonya B. of Stampin' with Tonya
  8. Shellie G. of Craft Smashup
  9. Kathy P. of Katrina P's Creative Corner
  10. Bree R. of Craft-Somnia
  11. Heidi B. of Stuck on Stampin'
  12. Pam S. of Stampin' in the Sun
  13. Darla R. of Stampin' with Darla
  14. Erica B. of Stamping Starlette
Pin It!

Tuesday, July 22, 2014

Convention 2014 Organized Swaps

One of the fun parts of convention (or any gathering of Stampin' Up! demonstrators) is swapping.  Basically, we make multiples of the same card, or 3D item and then swap them with other demonstrators so we have lots of great new project ideas, techniques, etc. to show our customers and use on future projects.  This week I'm sharing the cards I made for this years event.  Today's posts are all the projects I made for organized swaps (which means we actually presign up for the swaps based on themes, stamp sets, etc).  This year I participated in 4 cards and a 3d sweet treat swap throughout the week.
 
Remember, this Saturday is my annual, "My Husband's Away, Let's Play Just Cards Class" we're we'll be making 5 of the swap cards I'm sharing this week (I made more than 5 so it'll be a surprise exactly which one's you'll be making).  The class is Saturday, July 26 at 1:00 PM and you need to RSVP by Thursday July 24 to save you're spot. Don't miss out on this opportunity to make these over the top cards to be ready for your future card sending needs.
 
Enjoy!
 
Stamp Set(s):  Big News

Stamp Set(s):  Hip Notes
 
Stamp Set(s):  Boys will be Boys

Stamp Set(s):  Chalk Talk, Hardwood

Stamp Set(s):  Label Love
Pin It!

Thursday, June 12, 2014

Stylin' Stampin' Squad Blog Hop: New Catalog Items


Good morning and welcome to the monthly Stylin’ Stampin’ Squad Blog Hop.  June is an exciting time, not only is it the unofficial start of summer but it’s also the release of the new Stampin’ Up Annual catalog so for this month’s hop we’re all sharing projects using our favorite new catalog items.   As you hop along, please be sure to comment and show some love on every blog! We are always excited to hear from our followers! You should have just left stop number 2 on the Stylin' Stampin' Squad Blog Hop - Cynthia R. of Ink-A-Doodle Creations, I just love Cynthia's projects. If so, you are in the right spot. If a link doesn't work or you get off track, you will find the full blog hop lineup below.
 
I have to admit, I’m over the moon with this catalog (even more so than usual) and my Wish List is longer than my arm but one of the first stamp sets that made it to my “must have” list was Boys will be Boys.  As a mom to a son I’ve long believed we needed more stamp sets to make “little dude” cards and this set is perfect (hello, Legos, army men, blocks, etc.) and even though Aidan is 9 I know this set will definitely get a lot of action in my studio.  I decided to make two projects using the same stamp set and color combination so they match, in this case Brights since these colors scream classic Legos to me.

First, I’m showing the birthday card I made.  I started with a cardbase of Pacific Point and then added a layer of Whisper White Cardstock that was matted with Basic Black.  I stamped the greeting in Pacific Point.  For the decorative panel, I decided to stamp color on color with Real Red to kind of create my one DSP.  This piece was matted with Daffodil Delight cardstock and I wrapped a piece of Basic Black Chevron Ribbon around the entire panel.  For a fun decorative element I took a piece of Whisper White Baker’s Twine and tied a knot around the Chevron Ribbon.  To cover up the know I stamped a little star from the Something to Say stamp set and punched it out with the Itty Bitty Accents Punch Pack (I love stars!)

 For the main stamped piece I stamped the Lego image on Whisper White Cardstock with Basic Black ink before coloring in the blocks with Stampin’ Write Markers.  I used the Big Shot and Circle Collection Framelits to cut out the stamped image and then used the new 2” Circle Punch (you know we’ve been waiting for a 2” Circle Punch for years and was so excited to see it in the new catalog) to make the mat with Pacific Point and attached this piece to the cardfront with dimensionals.
 
For my second project I decided to make a coordinating treat holder using the new Hamburger Box Bigz XL Die and Big Shot.  This box was super simple since the die cuts and scores all at once.  The box is in Real Red and before I assembled the box I stamped around the edge with the Chalk Lines stamp set in Real Red ink (I love that this stamp set is photopolymer, it makes it so easy to stamp and have no question where your image will be.  I did use Tombo Adhesive to assemble the box (the next time I make it I’ll probably use Sticky Strip, instant attachment).  I embossed the piece of Daffodil Delight cardstock with the  Big Shot and the Tiny Triangles Embossing Folder.  For the tag I made it exactly the same way as the card above.  A piece of Linen Thread was wrapped around the box a couple of times to attach the tag to the box.  For a final element I stamped the greeting and punched it out with the Word Window Punch and used the Modern Label Punch and Basic Gray for the mat (once again dimensionals were used to attach the greeting so it pops up). 

 These boxes when they’re assembled will hold quite a bit which I really like, endless possibilities. I hope you enjoyed these projects and it's help you fall in love with some of the great products in the new catalog.  Now it's time to head off to the next stop on the hop, you won't want to miss what Tonya's sharing so make sure to click the "next" button below.
 
 
http://stampinwithtonya.blogspot.com/2014/06/new-catalog-blop-hop.html

Below is a list of all the blog hop participants so you can easily stop by every designers page.

Blog Hop Participant List:
  1. Darcy J. of DJ's Stampin' Place
  2. Cynthia R. of Ink-A-Doodle Creations
  3. Diana E. of Stampin' Fun with Diana
  4. Tonya B. of Stampin' with Tonya
  5. Donna S. of Organized Chaos
  6. Kim R. of Stamping with Kim
  7. Pam S. of Stampin' in the Sun
  8. Bree R. of Craft-Somnia
  9. Rose C. of Stampin' with Rose
  10. Heidi B. of Stuck on Stampin'
Below is a list of all the products used on these projects with easy ordering links so you can shop anytime!
 
Enjoy and happy stamping!
 
Diana
Pin It!

Search This Blog