Showing posts with label Something to Say. Show all posts

Wednesday, August 26, 2015

SSINKspiration Mystery Supply Challenge: Remarkable You

Good morning!  We made it to Vero Beach last night and after several days of being on the go all day, we’re starting the relaxing part of our vacation and looking forward to several days of beach and pool fun.  Today over on the Stylin’Stampin’ INKspiration blog we’re we decided to change things up and do a Mystery Basket Challenge.  This is kind of like “Chopped”, each designer that wanted to participate signed up and we were randomly assigned another designer and we mailed the designer 3 items, could be a stamped image, DSP, ribbon, etc. and incorporating those three items the designer needs to complete a project.  Jenn Campbell was the designer who mailed me my mystery basket and I will admit she stumped me at first with the two metallic items (you know I love my bling but I usually only use one item of bling on each card so I had to think on this one for awhile).

I started with Calypso Coral cardstock for the cardbase and then added a piece of Basic Black cardstock that I embossed with the Big Shot and the Decorative Dots Embossing Folder. I added a piece of Watermelon Wonder paper from the 2015-2017 In Colors Envelope Paper and matted it with Cucumber Crush cardstock and wrapped the 1/8” Silver Taffeta Ribbon around the DSP layer before attaching it to the cardfront.

Jenn had already provided the stamped flower image (from the Remarkable You stamp set) and I colored it in using Calypso Coral, Watermelon Wonder, and Cucumber Crush Stampin’ Write Markers.  I used the Big Shot and Oval Collection Framelits to cut out the image and attached it to the cardfront with dimensionals.  I took the piece of Silver Sequin Trim and folded it in half and tucked it behind the flower piece for the added bling.  The final element was to add the greeting, using the Something to Say stamp set and stamped it in Watermelon Wonder ink, punched it out with the 1 ¼” Circle Punch and then matted it with a Cucumber Crush piece that was punched out with the 1 3/8” Circle Punch and attached with dimensionals.

Adding all the pops of color and splash of black really helped offset the Silver and white elements that was blending with my eye.  I also really enjoyed coloring in the flower since I don’t have this stamp set, thanks Jenn for the challenge.  Make sure to check out the other cards the design team shared.  We had a lot of fun with this “mystery basket” and I can’t wait to do it again.

Below are easy ordering links for the products used on today’s card:

Built for Free Using: My Stampin Blog


Have a great Wednesday and I hope you enjoyed today’s card!

Diana
Pin It!

Sunday, July 5, 2015

Can You Case it? Design Team - Sketch Challenge CYCI #77

Good morning!  Hope you had an enjoyable 4th of July.  We had a nice and relaxing day with the family and it was raining and cool compared to most years so it was really enjoyable when the rain cleared.  We don't have a lot planned for today and I'm hoping to get some time in the studio to start working on convention swaps.  This morning it's time for the Can You Case It? sketch challenge and Carolyn gave us this great classic sketch (maybe I'll use this as inspiration for one of my swaps, haha!!)

I started with Calypso Coral cardstock for the cardbase and then added a piece of Pacific Point cardstock.  I added three different patterns from the Pretty Petals Designers Series Paper Stack (the mix of graphic prints and soft feminine prints is a lot of fun!)  I also wrapped a piece of Gold Baker's Twine around the whole cardfront once I attached the DSP panels.

For the greeting I used the Something to Say stamp set and stamped with Memento Tuxedo Black ink on Very Vanilla cardstock.  I stamped the small butterfly from the Kinda Eclectic stamp set in Calypso Coral ink (stamped off first so the butterfly was softer).  I cut out the greeting and the Old Olive mat using the Big Shot and Circle Collection Framelits before attaching it to the cardfront with dimensionals.

I love the different colors used in this DSP, it's not something I would have thought of but it does work, go figure?  This is also a great way to show off lots of different DSP prints for a quick card, which we all need at times.


Below are easy ordering links for the products used on today's card:

Built for Free Using: My Stampin Blog


Enjoy the rest of your weekend!

Diana
Pin It!

Monday, November 10, 2014

Stylin' Stampin' INKspiration November Card Sketch Challenge: Many Merry Stars

It's the start of the another week, can you tell me where that weekend went?  We had a great time in Annapolis checking out the city and my friend and I ran the Across the Bridge 10K run over the Bay Bridge it was a beautiful race that a lot of runners got to enjoy!)  It's the second Monday of the month which mean's over on the Stampin' Stylin' INKspiration blog it's time for the monthly card sketch challenge.  Bree gave us another fun layout and the designers really out did themselves with great inspiration ideas.  I decided to combine this challenge with my 30-Day Gratitude card challenge (I'm doing that a lot this month) and decided to use some Christmas products that are new and haven't seen a lot of love yet.

The cardbase is Garden Green and I added a piece of DSP from the Trim the Tree Designer Series Paper Stack (love all the different colors and patterns in this pack which means lots of fun!)  Next I added a piece of Cherry Cobbler 1" Sheer Linen Ribbon that was attached to the cardfront with Sticky Strip so I could get the ruffled effect.  For the stamped image I used the new Many Merry Stars stamp set from the Holiday Supplement (products in this mini catalog are only available while supplies last) and the medium star was stamped with Garden Green ink on Pistachio Pudding cardstock before being cut out with the Big Shot and Star Collection Framelits.  I stamped the filler star inside with Pistachio Pudding ink.  The greeting is from the Something to Say stamp set and is stamped in Cherry Cobbler Ink.  I attached the star to the cardfront using dimensionals (I actually stacked dimensionals to get extra height to reach over the ribbon).  I used some Cherry Cobbler Baker's Twine to tie a bow for the top of the star and attached it with a glue dot.  For a little touch of bling I punched a small star out of Gold Foil Paper using the star punch from the Itty Bitty Accents Punch Pack and attached it to the cardfront .

I love how each element of this card turned out.  Make sure to check out all the other cards the design team is sharing and then come play along with us.

Below are easy ordering links for all the products used on today's card:

Built for Free Using: My Stampin Blog


I hope you enjoy and remember, it's never too early to start working on your holiday projects (it'll help you not feel as stressed as the holidays approach so you can enjoy this special time).

Diana
Pin It!

Tuesday, November 4, 2014

30-Day Gratitude Challenge: Day 4

I'm back and it's time for today's gratitude card.  I decided to change things up (I've noticed I tend to lean towards fall themed cards so I thought I would take a break) and show a really simple and fun single layer card.  I started with Whisper White cardstock and I used the Project Life Corner Rounder Punch to punch all the corners of the card. I used Gorgeous Grunge and Coastal Cabana ink.  The greeting is from the Lots of Thanks stamp set and is stamped in Strawberry Slush.  I added lots of stars, one stamped with the Something to Say stamp set in Pistachio Pudding and one using Baked Brown Sugar Designer Series Paper that were punched with the star from the Itty Bitty Accents Punch Pack.  A larger star is punched out of Gold Glimmer Paper with the star from the Circle Card Thinlits die and the Big Shot.  All the stars are popped up with dimensionals and I added a few gold sequins from the Gold Sequin Trim for extra bling.

I love the simplicity of this card and may be making several more to have on hand for birthdays, etc., and it's very "mailable" which the post office will like.

Below are easy ordering links for the products on this card:

Built for Free Using: My Stampin Blog


Enjoy!

Diana
Pin It!

Friday, July 18, 2014

Sketch Frenzy Friday Card Sketch Challenge: Something to Say

Happy Friday!  What an amazing week!  I'm having such a wonderful time, so inspiring and fun, I can hardly contain myself.  Stampin' Up! really does know how to throw a party and I can't wait for all that's in store for us in the next year.  Aidan and my mom have also arrived and it's so great to see them (they're going to enjoy exploring the city while I'm at meetings, they have lots of fun playing around).  Before we started with today's activities I wanted to share with you the card I made for this weeks Sketch Frenzy Friday card sketch challenge.   I really like the sketch we were provided, it's open to lots of interpretation. 

For this card I started with Old Olive for the cardbase and then added a piece of Pumpkin Pie cardstock that's embossed with the Big Shot and the Tiny Triangles Embossing Folder. I wrapped some Whisper White Baker's Twine around the cardstock and then tied a knot so it would come together in the center. Next I used the Starburst Framelits and some Sweet Taffy Designer Series Paper for the three different circles, it's fun playing with all the different patterns and colors and letting them be the star.

The greeting is from the Something to Say stamp set and was stamped in Tempting Turquoise.  I cut with little flag tails on the ends.  The final touch was to add a little star in Old Olive from the same stamp set that was punched out with the Itty Bitty Accent Star Punch and attached with dimensionals.

This card is so bright and cheery it really helps celebrate that special event.  Make sure to check out all the other cards the design team is sharing and we would love for you to play along with us.

Have a great Friday and weekend!

Diana


Pin It!

Thursday, June 12, 2014

Stylin' Stampin' Squad Blog Hop: New Catalog Items


Good morning and welcome to the monthly Stylin’ Stampin’ Squad Blog Hop.  June is an exciting time, not only is it the unofficial start of summer but it’s also the release of the new Stampin’ Up Annual catalog so for this month’s hop we’re all sharing projects using our favorite new catalog items.   As you hop along, please be sure to comment and show some love on every blog! We are always excited to hear from our followers! You should have just left stop number 2 on the Stylin' Stampin' Squad Blog Hop - Cynthia R. of Ink-A-Doodle Creations, I just love Cynthia's projects. If so, you are in the right spot. If a link doesn't work or you get off track, you will find the full blog hop lineup below.
 
I have to admit, I’m over the moon with this catalog (even more so than usual) and my Wish List is longer than my arm but one of the first stamp sets that made it to my “must have” list was Boys will be Boys.  As a mom to a son I’ve long believed we needed more stamp sets to make “little dude” cards and this set is perfect (hello, Legos, army men, blocks, etc.) and even though Aidan is 9 I know this set will definitely get a lot of action in my studio.  I decided to make two projects using the same stamp set and color combination so they match, in this case Brights since these colors scream classic Legos to me.

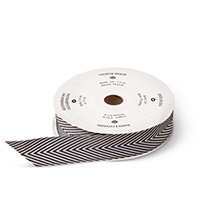
First, I’m showing the birthday card I made.  I started with a cardbase of Pacific Point and then added a layer of Whisper White Cardstock that was matted with Basic Black.  I stamped the greeting in Pacific Point.  For the decorative panel, I decided to stamp color on color with Real Red to kind of create my one DSP.  This piece was matted with Daffodil Delight cardstock and I wrapped a piece of Basic Black Chevron Ribbon around the entire panel.  For a fun decorative element I took a piece of Whisper White Baker’s Twine and tied a knot around the Chevron Ribbon.  To cover up the know I stamped a little star from the Something to Say stamp set and punched it out with the Itty Bitty Accents Punch Pack (I love stars!)

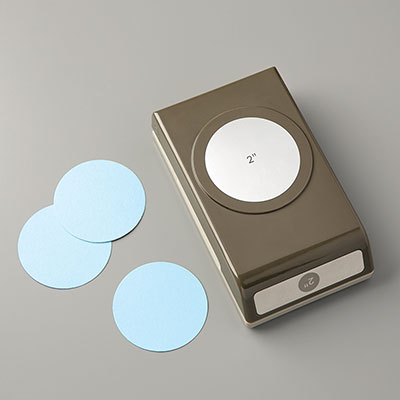
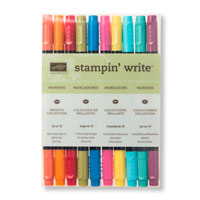
 For the main stamped piece I stamped the Lego image on Whisper White Cardstock with Basic Black ink before coloring in the blocks with Stampin’ Write Markers.  I used the Big Shot and Circle Collection Framelits to cut out the stamped image and then used the new 2” Circle Punch (you know we’ve been waiting for a 2” Circle Punch for years and was so excited to see it in the new catalog) to make the mat with Pacific Point and attached this piece to the cardfront with dimensionals.
 
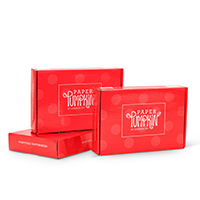
For my second project I decided to make a coordinating treat holder using the new Hamburger Box Bigz XL Die and Big Shot.  This box was super simple since the die cuts and scores all at once.  The box is in Real Red and before I assembled the box I stamped around the edge with the Chalk Lines stamp set in Real Red ink (I love that this stamp set is photopolymer, it makes it so easy to stamp and have no question where your image will be.  I did use Tombo Adhesive to assemble the box (the next time I make it I’ll probably use Sticky Strip, instant attachment).  I embossed the piece of Daffodil Delight cardstock with the  Big Shot and the Tiny Triangles Embossing Folder.  For the tag I made it exactly the same way as the card above.  A piece of Linen Thread was wrapped around the box a couple of times to attach the tag to the box.  For a final element I stamped the greeting and punched it out with the Word Window Punch and used the Modern Label Punch and Basic Gray for the mat (once again dimensionals were used to attach the greeting so it pops up). 

 These boxes when they’re assembled will hold quite a bit which I really like, endless possibilities. I hope you enjoyed these projects and it's help you fall in love with some of the great products in the new catalog.  Now it's time to head off to the next stop on the hop, you won't want to miss what Tonya's sharing so make sure to click the "next" button below.
 
 
http://stampinwithtonya.blogspot.com/2014/06/new-catalog-blop-hop.html

Below is a list of all the blog hop participants so you can easily stop by every designers page.

Blog Hop Participant List:
  1. Darcy J. of DJ's Stampin' Place
  2. Cynthia R. of Ink-A-Doodle Creations
  3. Diana E. of Stampin' Fun with Diana
  4. Tonya B. of Stampin' with Tonya
  5. Donna S. of Organized Chaos
  6. Kim R. of Stamping with Kim
  7. Pam S. of Stampin' in the Sun
  8. Bree R. of Craft-Somnia
  9. Rose C. of Stampin' with Rose
  10. Heidi B. of Stuck on Stampin'
Below is a list of all the products used on these projects with easy ordering links so you can shop anytime!
 
Enjoy and happy stamping!
 
Diana
Pin It!

Monday, June 9, 2014

Stampin' Stylin' INKspiration Blog Card Sketch Challenge: Paper Pumpkin Father's Day

Good morning, I hope you had an enjoyable weekend!  Our weekend was full of baseball, neighbors, and friends, and relaxing, so perfect but I will admit I'm beyond exhausted.  It's the second Monday of the month which means it's time for a new sketch challenge over on the Stylin' Stampin' INKspiration blog and Jenn really gave us a good sketch that is nice and versatile.  The cardbase is Hello Honey and I added a piece of Sahara Sand card stock that was embossed with the
Big Shot and the Alphabet Press Embossing Folder (I also sponged all over the cardstock with Sahara Sand ink to help really make the letters pop).
 
For the greeting I used the stamp from the May Paper Pumpkin Kit (I love that the stamps in the kits are unique and you can only get them by being a member and do you know if you buy a prepaid subscription you can add those to workshop and party orders now and earn hostess benefits?  Plus subscriptions for 6 and 12 months and you save over a monthly subscription) stamped in Hello Honey on Whisper White Cardstock.  I matted that with Blackberry Bliss cardstock.  The two stars are from the Something to Say stamp set and are punched out with the new Itty Bitty Accents Punch and then attached with dimensionals so they pop off the card.  The little flags are from Moonlight Designer Series Paper stack (love all the different patterns) and were punched out with the Banner Punch.
 
You'll notice I did decide to flip the sketch on it's side, it's all about inspiration and then showing your take on based on the idea and it's fun to see so many great options.  We would love for you to come and play along with us, time to get those fingers inky!


Below are easy ordering links for all the products used in today's project:
 
 
Pin It!

Search This Blog