Showing posts with label Remembering Your Birthday. Show all posts

Tuesday, February 16, 2016

SSINKspiration: Kid's Birthday

Good morning!  It seems like winter has definitely decided that it’s not ready to say goodbye for the year so we got to enjoy another round of snow yesterday, Aidan was really excited especially since it was his birthday yesterday (can’t believe he’s 11 already!!)  It’s perfect timing since today over on the SSINKspiration blog we’re sharing kid’s birthday cards so I decided to share what I made for Aidan.  Just like his mom he loves the glitter and bling so of course I had to make sure this card had plenty.

I started with Whisper White Thick cardstock for the cardbase (this is a really great new option for when you want white for the cardbase since it’s thicker than our traditional cardstock).  Next I took a piece of Pacific Point cardstock and matted it with Real Red.  I used the Gorgeous Grunge stamp set to stamp some splotches and lines (a little hard to see) on the background first.  Next I took a piece of Basic Black cardstock and punched it using the Confetti Stars Punch and then added some Red Foil Paper behind so the foil starts show through.  The greeting is from the Remembering Your Birthday stamp set and I used my Stampin’ Write Marker to color just the part of the greeting I wanted and then used the Big Shot and Project Life Labels and Cards Framelits to cut the edges of the greeting, sponged the edges with Basic Gray ink and then attached it to the cardfront with dimensionals.

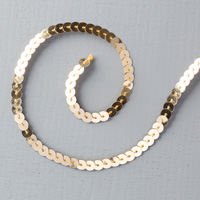
Now it was time to amp things up with lots of stars and bling.  I used the Big Shot, Star Collection Framelits, and Gold Glimmer Paper to just cut the outline of the start and in the center I used the Little Numbers Framelits and Black Glimmer Paper (retired) for the numbers.  I cut out a smaller star using the smallest star from the Framelits set and some Real Red Designer Series Paper, from the Brights DSP Stack and made sure to line it up so “awesome” and “best were the words you could see in their entirety (this star was attached with dimensionals).  The final touch was to add some star shaped sequins from the Metallic Sequin Assortment (the fine tip glue pen works perfect to attach these).

I had lots of fun making this card and Aidan loved it (he really likes when you personalize things just for him, don’t we all!!)  You could certainly change up the colors to match your recipients preferences for a perfect fit!!

Below are easy ordering links for the current products used on today’s card:

Built for Free Using: My Stampin Blog


 Enjoy!

Diana
Pin It!

Monday, January 18, 2016

Paper Craft Crew Sketch Challenge: 2016 SAB and Remembering Your Birthday

Good afternoon!  Oh boy, the week is starting off crazy, I completely forgot to schedule today’s post and I always like to provide some Monday inspiration so I figure better late than never.  I decided to use this weeks Paper Craft Crew sketch challenge as the inspiration for a super fun and cheery birthday card (perfect since it’s super cold today to help brighten the day), it also uses some of the beautiful designer series paper you can earn FREE during Sale-a-bration, which is awesome and makes is easy to pull together a beautiful card in no time!

I started with Calypso Coral cardstock for the cardbase and then added a piece of Botanical Gardens Designer Series Paper (FREE during Sale-a-bration).  Next I took a piece of Hello Honey cardstock and cut it out with the Big Shot and the Floral Frames Framelits and then embossed it with the Delicate Dots Embossing Folder as a base before adding another strip of coordinating Designer Series Paper.  The greeting is from the Remember Your Birthday stamp set and was stamped in Old Olive ink on Whisper White cardstock and attached it to the cardfront with dimensionals. 

I added a couple fun elements to finish off the card, a small banner at the bottom left of the greeting using the Banner Punch and the same designer series paper package.  In the top right of the design element I cut a circle using the 7/8” Scallop Circle Punch and Calypso Coral cardstock as a mat for an Old Olive Button (from the Brights Designer Buttons) and tied a bow using Crushed CurryBaker’s Twine.  The final touch was to add a few rhinestones around the design element (you know me and my need for bling!)

I don’t know about you but I’m always in need of birthday cards (frequently at the last minute) so it’s good to have a variety in my card stash ready to go and this card will be perfect for anyone of the springtime birthday’s I have coming up!

Below are easy ordering links for the current products used on today’s card:

Built for Free Using: My Stampin Blog


 Have a great evening!

Diana


Pin It!

Monday, December 14, 2015

Stylin' Stampin' INKspiration Card Sketch SSINKCS28: Lovely as a Tree

 Good morning!  What an amazingly fun and crazy weekend!  There's only one more weekend before Christmas and this one was full of Christmas parties and fun, cookie baking, as well as my last stamp class of the year (loved spending time with the ladies yesterday afternoon).  It was all a lot of fun and I'm glad I was able to get some things crossed off that To To list.  Today over on the SSINKspiration blog it's time for the monthly card sketch and I decided change things up and show how to use something that was designed for Christmas in a non-Christmas use, in this case the designer series paper.

I started with Delightful Dijon cardstock and sponged around the edge with Cherry Cobbler ink.  Next I took some Season of Cheer Designer Series Paper (currently on sale as part of the Year end sale) and sponged all over with Soft Suede ink to antique it and then matted it with Night of Navy cardstock.

For the stamped image I went to the classic, Lovely as a Tree and stamped the tree in Mossy Meadow ink on Soft Sky cardstock and then used the Soft Suede Stampin' Write marker to color in the trunk of the tree before cutting it out with the Big Shot and Deco Label Framelits.  I also used the soft Suede ink to sponge around of the label piece before attaching it to the cardfront with dimensionals.

For the greeting I used the Remembering Your Birthday stamp set and used my Cherry Cobbler Stampin' Write marker so I could just ink part of the greeting and stamped it on Very Vanilla cardstock, sponged around the edge with Night of Navy ink and used dimensionals to attach the greeting.  For a little extra texture I took a piece of Natural 5/8" Chevron Ribbon and used my ribbon scissors to trim the edges and then frayed it before folding it over for a stack ruffled effect.

It was fun to use this "Christmas" paper for a non-Christmas card, and a masculine one at that, go figure.  The other designers are sharing some great cards for inspiration so please, go check them out and then come play along and share what you come up with!

 Below are easy ordering links for the products used on today card:

Built for Free Using: My Stampin Blog


Enjoy,

Diana
Pin It!

Friday, October 23, 2015

Sketch Frenzy Friday Sketch Challenge: Remembering Your Birthday


Good morning and Happy Friday!  I know I have had holidays on the brain lately which has been influencing my creative projects lately (and let’s be honest will continue to) but we all know that people have birthdays year round so I decided to take a break and work on a birthday card for this weeks Sketch Frenzy Friday Sketch Challenge so I’m ready to go.  Elizabeth gave us this fun sketch that’s a great way to either showcase a large stamped image or some fabulous designer series paper (you know I love my DSP).  I decided to go bright and cheery using the Pretty Petals Designer Series Paper Stack and all it’s wonderful colors. 

I started with Mint Macaron cardstock for the cardbase and then added a piece of Basic Black cardstock that was embossed with the Big Shot and the Brickwall Embossing Folder (who says bricks can’t be non-standard colors?).  I added a large piece of the Pretty Petals Designer Series Paper and matted it with Pacific Point cardstock.  For a fun, shiny accent I used half of a silver foil doily (one of the small ones) at the bottom of the DSP piece.  For the greeting I used  the Remembering Your Birthday stamp set and I stamped it in Basic Black ink on Calypso Coral cardstock.  I cut tails on the ends of the greeting piece and then folded the end inside so it looks like a ruffled piece and dimensionals help make the greeting really pop up off the cardfront.


This birthday stamp set is really a must have and remember, today is the last day to save 15% off all stamp sets.  I was so happy to get some of the stamp sets that have been on my wish list for awhile (sets from the Annual Catalog and Holiday catalog are part of this sale, whoo hoo!)


Below are easy ordering links for the products used on today’s card:

Built for Free Using: My Stampin Blog


Have a great weekend,

Diana
Pin It!

Friday, July 10, 2015

Sketch Frenzy Friday: Remember your Birthday Washi Wishes

Good morning!  It’s another Friday and today is going to be crazy.  After work Aidan and I are flying out to Seattle so he can spend a couple of weeks with his Grandparents (he looks forward to this every year) then I’m flying back Saturday morning so let’s just say me and the airplane seat are going to become good friends for several hours (thankfully I have lots of projects planned to help keep me occupied).  For this weeks Sketch Frenzy Friday sketch challenge Kim gave us a unique layout that’s great for using Washi tape (or scraps of DSP) and I decided to use this sketch as inspiration for a birthday I have coming up.


I started with Mint Macaron cardstock  for the cardbase and then added a piece of Very Vanilla cardstock and stamped the greeting from the Remembering Your Birthday stamp set using Calypso Coral ink .  Next I took several pieces of the Pretty Petals Designer Series Paper Stack that were cut at varying lengths and used Paper Snips to trim the edges of the DSP in different patterns to mimic tears on washi tape.  I added three flowers that I punched out use the flower from the Itty Bitty Accents Punch Pack (using Mint Macaron and Calypso Coral cardstock) attached them to the cardfront and bent the petals up for dimension.  I added pearls to the center of each flower and then used my Old Olive Stampin’ Write Marker to draw lines down from the flowers to mimic stems.  The final touch was to add a bow I tied with a couple pieces of Basic Black Baker’s Twine.

I was worried about this card when I first saw the sketch but using the different DSP patterns was a lot of fun and made this card come together in a flash (perfect for those last minute needs!!)

Below are easy ordering links for the products used on today’s card:
Built for Free Using: My Stampin Blog


Have an enjoyable weekend and wish me luck with our travel adventures!
Diana
Pin It!

Wednesday, March 11, 2015

Project Life for Quick and Easy Cards

Good morning!  It’s amazing to me how quickly we seemed that we are wrapping up winter and spring is starting to finally come around, the longer daylight and warmer weather seems to make everyone happier.  I’ve had a slew of friends and family that have birthdays so I’ve been working to try to keep up with all these occasions.  Thankfully, I had the This Day Project Life Mini Kit (free during Sale-a-Bration) open on my desk so I decided to use the different card pieces from the kit to whip up some quick and easy birthday card.  All I had to do was add a few stamps, ribbon, etc. and these came together in a flash.


This kit has so many great pieces I’ve order extra kits so I have on hand for future cards, scrapbook pages, whatever.  This mini kit will only be available through the end of March (and you can get it (along with 13 other SAB options) FREE with every $50 order.
Enjoy!
Diana
Pin It!

Monday, February 2, 2015

Creative Crew Blog Hop: Sheltering Tree

I'm so excited this evening! 

I've been nominated by my talented friend Andi Potler over at the Absolute Kreations by Andi Blog to participate in the Creative Crew Blog Hop.  Andi is a fellow RemARKable Stamper that I’ve had the honor of meeting at a few past SU! events as well as being online friends and I love her layouts and fabulous color combinations.  Thanks for the nomination Andi, I’m very honored! 

The rules of this Blog Hop are:
1) to create a project exclusive to the Creative Crew Blog Hop
2) answer a few questions and then
3) to nominate (2) people who inspire me.

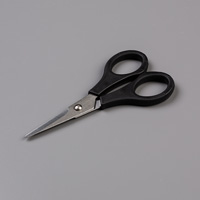
I’ll start with my card because it’s a cheery one, certain to brighten up your winter day.  I started with Pear Pizzaz for the cardbase and then added a piece of DSP from the Stacked with Love Designer Series Paper Stack (love that one side of the DSP has Valentine’s type colors and the reverse is all black and white so you can use it for other things!)  Next I took a piece of Whisper White cardstock and stamped the tree from the Sheltering Tree stamp set (I just got it and had to give it a try).  This is a two-step stamp so it’s really easy to stamp each element a different color and since this is a photopolymer set you can easily see exactly where you’re stamping.  The tree stock and branches is Chocolate Chip and the leaves are Crisp Cantaloupe (I stamped twice without reinking for some lighter shades) as this reminds me of the Cherry Blossom trees that will be blooming this spring.  The grass is stamped with Pear Pizzaz and uses a different stamp in the set.  I decided to frame the tree to look like a picture so I used the Big Shot, On Film Framelits and some Gold Cardstock for a fun frame (with just the right amount of bling!)

I took a few pieces of Thick Baker’s Twine in Crisp Cantaloupe and Pistachio Pudding to tie the bow and attached it with a glue dot.  The greeting is from the Remembering Your Birthday stamp set and was stamped in Pear Pizzaz Ink on Whisper White cardstock and then cut out with the Big Shot and the Project Life Framelits.  I did sponge around the edge of the greeting with Calypso Coral ink before attaching it to the cardfront with dimensionals.

This card really came together quickly but still as enough “umph” to really make someone smile when they see it (this card will be heading off in the mail for a friend shortly, it’s always better when you can spread the joy my mailing the card we make instead of hording them!!)

Now, to answer the questions:

1)  What are you working on?
Currently, I'm working on finishing up my Valentine’s projects includes gift tags for the Aidan’s teachers gifts (we’re going to bake yummy cookies and of course they need to have fun packaging) as well as finishing up the designs for this weekends card class. 

2) How does your work differ from others in your genre?
Boy this is a tough one….I think I really like basic styles that don’t go way over board and anytime I can add some bling I will (love me some glitter and glitz!!!)  I love to emboss pretty much everything I can and add lots of texture to projects that will help catch your eye.  I’ve told friends I have a really hard time with the “vintage” look but do try to put my spin on it.


3) Why do you create what you do?
I absolute love crafting and creating, it’s so much fun to see what you can make using paper, ink, glue, ribbon, and of course glitter  and see how I can brighten someone’s day with a handmade card or gift.  I also love memory keeping so I enjoy documenting memories of my family and all our adventures and experiences so we can remember them for years to come, be it Project Life, My Digital Studio, or traditional scrapbooking I enjoy it all and it all has a place to fit into my quirky life.  I also find that crafting is very calming too me and I can definitely tell when I’m not able to get in the studio as frequently as I would like since I usually feel more stressed (there are frequently times Chris and Aidan ask me if I’m going to work in the studio so that can be my clue it’s time for some “crafting therepy”!  I also love to see the join someone feels when they’re creating something and can just release and have fun in the process.

4) How does your creative process work?
When I’m making something for someone specific I really try to think about the recipient and tailor my project to that person, their tastes, and our relationship.  Otherwise I usually just grab one item and let it be my starting point and see where things go, very freestyle.  I really try to create lots of different things that will appeal to different peoples interests as well as challenging myself as a crafters.   

Here are my nominees:

My super creative friend (and running buddy) Cynthia Richards over on the Ink-a-Doodle Creations - she inspires me with her creativity and fun (and we share several mutual interests) - love this lady and her stuff!

My birthday buddy and friend Maria Pane over at Stampin and Scrappin with Ri Ri because of her beautiful style and love of scrapbooking (her family and Luigi are so cute!) that it motivates me to remember the simple things that make our lives special and beautiful and I love her style. 


If they elect to play - their creations will be posted on Monday, February 9th! Be sure to visit their blogs and check them out.

Below are easy ordering links for the products used on today’s card:

Built for Free Using: My Stampin Blog


Enjoy the rest of your evening,
 
Diana
Pin It!

Monday, January 12, 2015

Stylin' Stampin' INKspiration Card Sketch Challenge: Remembering Your Birthday

Happy Monday!  We had a great weekend that was really busy with lots of family fun that's always great.  We also enjoyed the break in cold weather, even if it was just for a day.  Today it's time for the monthly card sketch over on the Stylin' Stampin' INKspiration blog.  We were given a really fun sketch challenge this month and I used it for a birthday card I needed this month.

I started with Island Indigo cardstock for the cardbase and then added a piece of Going Gray card stock that was embossed with the Big Shot and Chevron Embossing Folder.  Next I took a piece of Gold Foil Paper and cut half  a circle out with the Big Shot and Circle Collection Framelits.  Then I used the Little Letters Thinlits Dies to cut out the H and B and used the negative image for my card.

I added a piece of Island Indigo Chevron Ribbon as an accent.  The greeting is from the Remembering Your Birthday stamp set, it was stamped in Island Indigo ink on Whisper White cardstock and then cut out with the Itty Bitty Framelits (and then I sponged around the edge with Basic Gray ink).


This card really turned out great, I love it's simplicity and since my friend with the birthday is a guy it's a perfect "dude" card.  The other designers came up with some great cards for inspiration so please check them out on the blog and then come play along and see what you can come up with.


Below are easy ordering links for the products use on today's card:

Built for Free Using: My Stampin Blog


Enjoy and have a great week!

Diana
Pin It!

Wednesday, October 1, 2014

Fab Friday Sketch Challenge: Magical Disney Birthday Wishes!

Good morning! We cruised through September and we're officially beginning October, I really can't believe it.  Today I'm sharing the card I made for this weeks Fab Friday Sketch Challenge.  This weekend I had the honor of attending a friends birthday party this weekend to help her celebrate her 50th birthday and since she's a major Disney Fan I decided to use this sketch challenge as the basis for today's card.  I started with Melon Mambo for the cardbase and then added a layer of Basic Black cardstock and then Whisper White that I layered under the Gold Fancy Designer Vellum Foil Paper (I really like how the gold embossing stands out against the white).  For the Mickey head I used the 1 1/4"Circle Punch for the ears and the Big Shot and Circle Collection Framelits for the circles.  I made the bow using the heart punch from the Itty Bitty Punch pack and the 1/8" Handheld Circle Punch for the center.  Of course I had to make the "50" glittery so I used some Gold Glimmer Paper and the Big Shot to cut it out.
 
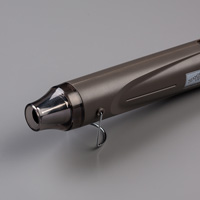
For the accent tails I used some Basic Black Chevron Ribbon and Gold Sequin Trim.  The greeting is from the Remembering Your Birthday stamp set and is heat embossed on Basic Black cardstock using Versamark Ink, Melon Mambo Embossing Powder and the Heat Tool.  After embossing I used the Modern Label Punch before attaching it to the cardfront with dimensionals.
 
This card was lots of fun to make and a big hit and I really believe a special birthday deserves an over the top card (it makes life more fun!)


Below are easy ordering links for the products used on today's card:
 
Hope you enjoy and have a wonderful day!
 
Diana
 

Pin It!

Friday, September 12, 2014

Sketch Frenzy Friday Sketch Challenge: Yee-Haw Birthday Fun!

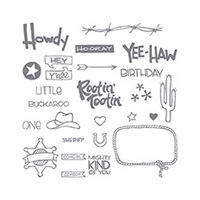
Happy Friday!  This has been a crazy week, I’m training for my first full marathon race next month and while I’ve been training for awhile I really felt the effects of it this week and have just been exhausted so I’m trying to get as much sleep as possible and am feeling better now.  This does mean I haven’t had a whole lot of time in the studio this week but I’m looking forward to the weekend.  Today I’m sharing my card for this weeks Sketch Frenzy Friday sketch challenge (I knew this sketch would be fun so I had to play along).   Stampin’ Up releases a new photopolymer stamp set each month and last month’s set was Yee-Haw and it’s so cute and uber fun and perfect to make “dude” cards so that was the inspiration for my card.  I started with a cardbase of Soft Suede and then added a piece of Crumb Cake.  On the Crumb Cake I stamped the barb wire image in Soft Suede ink (these stamps being photopolymer make lining images up a breeze) and the Yee-Haw in Cajun Craze.

For the three squares I took some Soft Suede and Island Indigo cardstock, cut some squares using the Big Shot and the Squares Colllection Framelits and then embossed it with the Woodgrain embossing folder.  Next I stamped two of the cowboy hats, colored them with Stampin' Write Ink and a Blender Pen and then cut them out with Paper Snips before attaching to the card with dimensionals.  I stamped the greeting and used my snips to cut around the Rootin' Tootin' and sponged around the edges.  The birthday word is from the Remembering Your Birthday stamp set and punched out with the Word Window Punch.

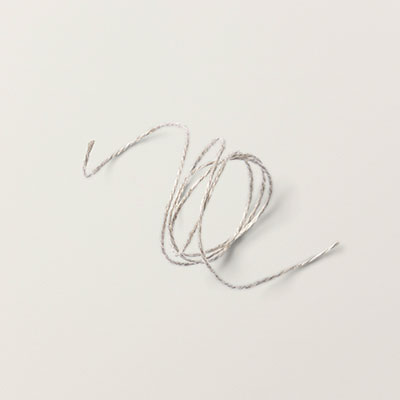
Now I had to make a cute little accent so I made some loops of Linen Thread and tied a knot.  I did add a brad around the knot (I didn't realize that this embellishment was retired but you could easily use a candy dot and candy dot for the same effect) so it looks like a lasso.

This is such a fun card with lot of little elements and texture to draw your eye.  I see lots of other great cards in my future with stamp set, can't wait!  
 
Make sure to check out all the other cards the design team is sharing and come play along, you have lots of options with this sketch layout.
 
Below are easy ordering links for all the products used in today's card:
Diana

Pin It!

Search This Blog