Showing posts with label Paper Piercing. Show all posts

Sunday, January 11, 2015

Can You Case It Color Challenge: Guest Designer

Good morning!  We're looking forward to a beautiful Sunday and a little break from the cold before the next drop happens tomorrow so we'll be taking down our outdoor Christmas lights and getting my long run in to enjoy.  I recently was honored to be contacted by the Can You Case It? challenge blog an was asked to be their guest designer this week for their color challenge this week which was based on a card I shared in November, so exciting!  This is a great group of designers and it's fun to play along with them this week.  As you know I'm all into Valentine's projects right now and there is a fun little set that was released in the main Idea Book back in June but I didn't get it before recently but it's cheeky and perfect for right now, a little humor is always fun.

I started with Crumb Cake for the card base and then added a piece of Pool Party Cardstock that I punched along the edge with the Confetti Hearts Border Punch (this new punch is awesome!!!).  Behind the hearts I added a strip of Gold Glimmer Paper for sparkly little hearts and then tied a piece of Gold Baker's Twine around the cardstock.  Before attaching the cardfront to the cardbase I used the Paper Piercer and the Essentials Paper Piercer Pack to punch a heart shape.

I used the Groovy Love stamp set to stamp two heart shapes, the animal print on Crumb Cake cardstock with Crumb Cake ink and a second with the heart outline with Pool Party ink on Very Vanilla cardstock.  Both hearts were punched out with the Sweetheart Punch.  The greeting ("You Make my Heart go Boom Boom" I love it!!!!) is from the same stamp set and is heat embossed with the Heat Tool and Gold Embossing Powder using Versamark Ink.  I used a dimensional to attach the Vanilla heart to the cardfront.

I have to admit this card turned out so pretty and whimsical at the same time and I know my sweetie will enjoy it!  You should definitely go check out the other cards the design team created using the same colors and then play along, you'll really enjoy it!

Below are easy ordering links for the products used on today's card:

Built for Free Using: My Stampin Blog


Enjoy the rest of your weekend!

Diana
Pin It!

Friday, July 4, 2014

Sketch Frenzy Friday: Be the Star Patriotic Feeling

Happy Friday and Happy 4th of July!  This is such a great holiday and one that my family has celebrated since I was a kid so we have lots of family traditions I enjoy passing on to Aidan.  Since it's Friday it's also time for another Sketch Frenzy Friday sketch challenge and I really decided to play up the patriotic tone of this card to go along with the holiday. I decided to make this card for a friends daughter that just bought her first home and it's such an exciting time.  I started with Night of Navy for the cardbase and then added a piece of Whisper White cardstock that I used the Hearts & Star Decorative Mask (love how easy these are!) and Night of Navy ink to create a fun background, before matting this with Real Red Cardstock. 

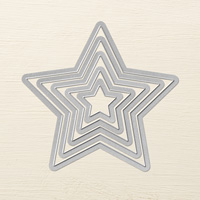
Next I pulled out my Big Shot and the Stars Framelits and cut a large star out of Red Glimmer Paper and then a smaller star that was stamped with the Be the Star stamp set in Night of Navy ink. The greeting is from the Really Good Greetings stamp set and I used Stampin' Write Markers to color directly on the stamp.  I used Paper Snips to cut tails on the ends and then sponged with Smoky Slate ink on the greeting.  I used dimensionals to layer the greeting and stars and then added a little paper piercing around the large star with the Paper Piercing Tool and Eclectic Paper Piercing Pack.

The final touch was to add a few more stars to the top right corner, I stamped the larger one in Real Red ink with the Be the Star stamp set and cut it out with the coordinating framelits and cut the smaller stars out of Champagne Shimmer Paper and the small star punch from the Itty Bitty Accents Punch Pack.

Boy does this card scream patriotic, I love it!!! I have to admit I'm a huge star fan and have been missing those from our tools in recent years so I'm beside myself with all the star items new in this years catalog, I'm sure you're going to get sick of them, but I can't help myself. 

Make sure to check out all the other great projects the design team is sharing and come play along with the fun.

Below are easy ordering links for all the products used in today's card:
Have a happy and safe holiday weekend!

Diana

Pin It!

Monday, March 31, 2014

Last Day of Sale-a-bration 2014: Don't Miss Out

Good morning!  It's another Monday and today is the last day of Sale-a-bration for 2014.  I have really loved all the products that we can earn for FREE this year and this is always the time of year that I get the items that have been on my wish list as well as stocking up on all my essentials, like cardstock, adhesives, etc.  Today I wanted to share a fun card I designed using two of the items you can earn for FREE through today.  The cardbase is Crisp Cantaloupe and I added a layer of Whisper White cardstock.  The greeting is from the See Ya Later stamp set (a Sale-a-bration Freebie) and I used Stampin' Write markers to color in the stamp before stamping.  The designer series paper is Sweet Sorbet (another Sale-a-bration Freebie) and I cut it out with the Big Shot and the Oval Collection Framelits.
 
I used the Paper Piercing tool and Occasions Paper Piercing Pack to paper pierce around the oval.  I used some Silver Glimmer Paper (a weekly deal that ends today!) that was punched out with the 7/8" Scallop Circle Punch and then I added an In Color Boutique Detail element in Pistachio Pudding.
 
I designed this card for a team meeting earlier in the year and it was a big hit, plus you can use the lay out for all types of occasions and color combinations.  I always hate when I miss out on a sale so I want to make sure to give you this last reminder that Sale-a-bration is ending today and you can earn a FREE exclusive SAB item for every $50 you spend, including My Digital Studio downloads, Weekly Deals, Clearance Rack items, everything (AWESOME!!!)  Please let me know if you need any assistance placing your order.
 
Also, just a reminder that today is the last day to sign up for Paper Pumpkin and take advantage of the FREE marker set for all new members (a $14.95 value).  You can get all the details at:  https://mypaperpumpkin.com/en/ and please make sure to select me as your demonstrator.
 
Have a great day!
 
Diana

Pin It!

Friday, January 17, 2014

Sketch Frenzy Friday Sketch Challenge: New Design Team Opportunity, So Exciting!

I'm so excited it's Friday!  Not only is it almost the weekend but I'm so excited to announce a new design group I've been selected to and can't wait to share some great projects with you in the upcoming months.  The Sketch Frenzy Friday Blog offers fun new sketches each week that you can play along with.  This sketch is great since it can be used for so many things and I decided to make another love/Valentine card (I've got hearts and glitter on the brain!)

The cardbase is Basic Gray and I added a layer of Blushing Bride My Digital Studio using the Be Mine Frameable Printable.  I shrunk the page down and then printed it out so I could cut it out with the Big Shot and the Hearts Collection Framelits.  I used the Paper Piercing tool and the Occasions Paper Piercing pack to make the heart outline.  Next I added some hearts that I punched out with the Small Heart Punch and Red and Silver Shimmer Paper (dimensionals were used to pop each of the little hearts up)  The final touch is the sentiment is from the Best of Love Hostess Stamp set (you only have until the end of the month to get this stamp set, so don't miss out!) and it's stamped with Real Red ink. 
Cardstock.  The designer series paper is actually printed from
 
I really like how this card turned out, nice and sweet with just the right amount of glitter which is a requirement for almost all valentine cards (in my opinion).  I hope you enjoyed and that you're able to play along with us this weekend and share all creations using the linky button on the blog.
 
Have a great weekend!
 
Diana
Pin It!

Thursday, November 7, 2013

30 Day Gratitude Card Challenge: Day 7

Welcome back to another addition of the 30 Day Gratitude Card Challenge.  I'm having so much fun with this trying to make a variety of cards for these shares so you have lots of inspiration and I have a variety of cards in my card stash.  Today's card is pretty simple and uses the Simply Sketched stamp set (this is a hostess set that has some beautiful image and greetings, you really want to make sure you get this set, it's perfect.
 
The cardbase is Pool Party and I added a piece of Whisper White cardstock.  I used the Epic Day This and That Designer Series paper and matted it with Calypso Coral Cardstock.  I used the Essentials Paper Piercing Pack and Paper Piercer to pierce holes along both edges of the Calypso Coral layer.
 
The main stamped image was stamped in Early Espresso Ink and then colored in with a Blender Pen and Pool Party and Calyspo Coral ink (I also added some Pear Pizazz to the stem) and as a mat for the stamped image layer.  The greeting is from the same stamp set and the greeting was punched out with the Oval Punch and matted with Early Espresso and the Scallop Oval PunchDimensionals make it a breeze to attach the greeting to the card.
 
I hope you enjoyed this card and it's so great, you can use it as a thank you but just as easily make it a birthday, sympathy card, etc.  Just by changing to the greeting.
 
Enjoy and Happy Thursday!
 
Diana

Pin It!

Wednesday, November 6, 2013

30 Day Gratitude Card Challenge: Day Six, Create with Connie and Mary Color Challenge

Good morning!  It's amazing how not having any after school activities this week has liberated our schedules, I feel like I have lots of extra free time but the change in Daylight Savings Time this weekend is hitting us pretty hard so we've all been falling asleep early, even Aidan.  Anyway, for today's 30 Day Gratitude Card challenge I decided to combine it with the Create with Connie and Mary Color Challenge.  Of course as soon as I saw this color combination I thought of Christmas and our Season of Style Designer Series paper.

The cardbase is Old Olive and I added a layer of Whisper White cardstock.  I matted the Season of Style DSP with Crumb Cake cardstock before wrapping around a piece of 1/8" Old Olive Taffeta Ribbon.  The greeting in the bottom right corner is from the Another Thank You Photopolymer Stamp Set and was colored with Stampin' Write Markers
 
For the main image I stamped the cute little reindeer from the Color Me Christmas stamp set in Early Espresso Ink and colored it in with Stampin' Write Markers.  This piece was cut out with the Big Shot and the Circle Collection Framelits and is matted on a piece of Cherry Cobbler cardstock punched out with the 2 1/2" Circle Punch.  I used dimensionals to attached the circle element to the cardfront.  The final touch was to use the Essentials Paper Piercing Pack and Paper Piercer.
 
This card is great for the holidays, not only is it fairly flat, which makes the post office happy, but you could make this card and have your kids color in the image so the recipient would receive a piece of artwork with their thank you.  I know my parents and grandparents love to get art from Aidan so I try to have him do something in cards we send out, even if it's just his name something.
 
I hope you enjoy and have a great day!
 
Diana

Pin It!

Tuesday, October 15, 2013

Paper Craft Crew Sketch Challenge: Christmas Collectibles

Happy Tuesday friends!  I feel like we're finally starting to dry out and I had such a fun day yesterday, I was able to take a break from work and meet Aidan at school and have lunch with him and his class.  I love that he gets so excited for me to come in and wishes I could every day, I know this isn't going to last forever so I  want to take advantage of it while I can (they grow up way too fast!)  Today I'm back and excited to share a quick and pretty card I made for this weeks Paper Craft Crew sketch challenge.  I loved the clean and simple lines in this sketch and immediately knew what I wanted to do when I saw it.  The cardbase is Pool Party and I added a layer of Basic Black and Whisper White.  I stamped the greeting in the bottom right corner with Island Indigo ink and the More Merry Messages stamp set (I was so happy this stamp set carried over). 
 
For the focal image I started by stamping an ornament from the Christmas Collectibles stamp set in Island Indigo and punched it out with the coordinating Christmas Ornament Punch.  I used a piece of Silver Ribbon as the ornament hanger.  Next I cut out two ovals, one in Pool Party and another in Island Indigo with the Big Shot and the Oval Collection Framelits.  I did embossed the one oval with the Perfect Polka Dot Embossing Folder.  I used dimensionals to attach the ornament and the top oval for lots of dimension.  Next I used the Paper Piercer and Occasions Paper Piercing Pack to pierce ovals in the different layers.  The final touch was to add a Basic Black button as an accent and used some Island Indigo Baker's Twine to tie a bow in the button.
 
This card is nice and simple but has lots of little elements that draw your attention which I love!  This is also a great card when you have to make multiples since it comes together so quickly.  Have you decided on the design for your Christmas cards?  If not hopefully this provides some inspriation, I would love to help you with your card needs so just ask me how.
 
Enjoy!
 
Diana

Pin It!

Saturday, November 17, 2012

30-Day Gratitude Card Challenge: Day 17

Welcome back on this beautiful Saturday.  I'm so looking forward today, not only do I have a hair apt. this morning but I'm having some ladies over for a private party this afternoon and we're going to have lots of fun making Christmas projects.  Today I'm sharing another gratitude card that is so fun.  I started with the cardbase of Soft Suede and stamped the greeting from the Blooming with Kindness stamp set with Early Espresso ink.  Next I stamped the large flower image on Very Vanilla cardstock.  To color the flower I first inked up the flower with Primrose Petals ink and then took a sponge dauber and Raspberry Ripple ink around the edges and Luckly Limeaid to the flower stem.  Next I ran the cardstock through the Big Shot with the Apothocary framelit to cut out the shape.  I used the same Raspberry Ripple ink to sponge around the edge.  I added a Lucky Limeaid printed designer button and attached the cut out piece to the cardbase with part of the right side hanging off so I could trim it down.  The final step was to use the new paper piercing tool to piece holes around the edge of the die cut shape.

I made two of this card this weekend, one was for a friends birthday, the other was this gratitude card, so fun and pretty.

Enjoy and happy stamping,

Diana
Pin It!

Search This Blog