Showing posts with label Festive Flurry. Show all posts

Monday, August 11, 2014

Stylin' Stampin' INKspiration Card Sketch Challenge: Festive Flurry

Good morning!  What a wonderful weekend, not only did we have lots of fun celebrating Chris' 40th birthday, we had an unusual break from the August heat and humidity hear which meant we were able to spend lots of time outside enjoying it with was awesome.  It's back to another week and we were talking that school starts in just 3 short weeks here and we can't believe it will be fall and time to start thinking about the holidays (crazy, I know!)  It was this thought that provided the inspiration for my card for this month's Stylin' Stampin' INKspiration card sketch challenge.  I decided to make a Christmas card (my first of the season) and show off some products that you need have since you won't be able to purchase them after August 27, the Festive Flurry stamp set (and matching framelits), and the Christmas Messages stamp set. These are some of the items that are currently on the carryover list and are available for purchase but only until August 27 so make sure you have these, they are perfect for all your holiday projects!
 
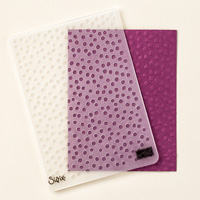
The cardbase is Crumb Cake cardstock and then I took a piece of Pool Party cardstock, embossed it with the Big Shot and the Decorative Dots Embossing Folder, then I sponged all over the cardstock with Crumb Cake ink.  Next I stamped two of the snowflakes from the Festive Flurry Stamp set in Island Indigo ink and cut them out with the Festive Flurry Framelits.  I added a couple Soft Suede Candy Dots to the center of the snowflakes. I used some Champagne Shimmer Paper and the snowflake framelits to cut a piece one size larger for the center snowflake.  The greeting is from the Christmas Messages stamp set and after stamping it with Island Indigo Ink on Crumb Cake Paper I cut it out with the 1 3/8" Circle Punch for easy layering.
 
I really like the simplicity of this card with the added bling (perfect for the holidays) and is "mailable" which will be helpful if you're sending lots of them to friends and family.  I would love for you to come check out the other fabulous cards the designers are sharing for inspiration and come play along in the fun.
 
I also want to remind you, if you don't have a Big Shot now is the perfect time to get one, if you purchase a Big Shot between now through the end of the month you get to select one of five stamp set and coordinating framelit bundles for FREE (awesome) so you can start in on all the fun.  Already own a Big Shot, no worries you can still get in on the savings and purchase one of the bundles for 15% off.  Please me know if you have any questions and how I can help you get started (this would also make a great Christmas gift for the crafter in your life, it's never too early to start shopping!!) 
 
Below are easy ordering links for all the products used on today's card: 
Have a great day and happy stamping! 
 
Diana
Pin It!

Wednesday, December 4, 2013

Stylin' Stampin' INKspiration Blog: Gift Bags and Wrapping

Happy Wednesday!  I know we're all busy getting ready for the holidays and of course that means gift giving and wrapping.  Today over on the Stylin' Stampin' INKspiration blog we're sharing some fun and easy gift wrapping ideas that are sure to WOW any recipient.  Today I'm sharing two of the projects we made at last months Gift Wrapping class.  The first box uses the Tag A Bag Boxes along with the Winter Frost Specialty DSP.  I love that these boxes come with the clear plastic sleeves so they make gift giving so easy.  For the decorative belly band I wrapped a piece of the DSP around the box and then added a lolly made with the Simply Scored Board and DSP, Silver Foil, and two snowflakes stamped with the Festive Flurry stamp set and coordinating Festive Flurry Framelits.  I added some Smoky Slate Chevron Ribbon and Bermuda Bay 1/8" Taffeta Ribbon as accents.  The tag uses the Tags 4 You stamp set and was punched out with the coordinating Label Bracket Punch.


The second item is a decorative gift bag and gift bags really are such a perfect item for wrapping all those odd shaped gifts.  I started with just a plain white gift bag and added a piece of Cherry Cobbler Cardstock, Old Olive Cardstock (that was embossed with the Big Shot and Snow Flurry Embossing folder, and the Season of Style Designer Series Paper.  A piece of Baked Brown Sugar Ruffled Ribbon is a perfect way to cover up the paper edges and adds a perfect accent.  The little reindeer is stamped with the Color Me Christmas stamp set and colored in with Stampin' Write Markers (this would be a great project for your kids to help out with and would make the bags extra special).  I used the Big Shot and Deco Labels Framelits to cut out the reindeer piece and the coordinating mat.  The final touch was to make the tag, which was stamped with the Joy to the World stamp set, cut out with the Chalk Talk Framelits and tied to the gift bag handle with Cherry Cobbler Chevron Ribbon.
 
I hope this gives you a few ideas to help take your gift wrapping over the top this year and reduce your stress.  Still looking for more ideas, make sure to check out the Stylin' Stampin' INKspiration Blog for other ideas.
 
Enjoy,
 
Diana
 
 
Pin It!

Monday, November 25, 2013

30 Days of Gratitude Card Challenge: Day 25

It's another Monday, but at least this is a short work week and I'm looking forward to several days of relaxing and spending time with friends and family, that's what I truly love about this holiday.  Can you tell I'm hard at work on Christmas projects?  Today's gratitude card is awesome in how easy it is but I love all the patterns and dimension.  I used one of the notecards as the cardbase and added a layer of Smoky Slate Textured cardstock before adding a strip of Winter Frost Speciality Designer Series Paper as well as a piece of Whisper White cardstock that was stamped with the Festive Flurry stamp set in Smoky Slate, Island Indigo, and Coastal Cabana ink.  I added a piece of Coastal Cabana Ruffled Ribbon across the center.
 
The greeting is from the Lots of Thanks stamp set and was stamped in Coastal Cabana ink before punching it out with the 1" Circle Punch.  I matted the greeting with some Island Indigo cardstock that was punched out with the Label Bracket PunchDimensionals are the perfect way to attach the greeting over top the ruffled ribbon.
 
The Winter Frost product suite is so soft and elegant it's fun how the patterns are kind of retro and playful but really work together.  What's your favorite product suite from the Holiday catalog?
 
Have a fabulous day,
 
Diana

Pin It!

Monday, November 18, 2013

30 Day Gratitude Card Challenge: Day 18

Good afternoon!  I'm splitting up my post today since I had a fun scrapbook page layout to share this morning, hope you were able to check it out and got a new idea.  This afternoon I'm sharing a fun and simple Christmas thank you card.  I had a Christmas card class a couple of weeks ago and I always use this class to create a second set of cards for myself that are thank yous so I'm all set with all the cards I need after the holiday.  Basically I use the same layout and products and just change up the greeting.  The other great thing about these cards is that we use the note card sets as the base so they're a little smaller than the standard A2 cards and already come cut and scored (with matching envelopes, all in one).
 
To the cardbase I added a layer of Smoky Slate Textured cardstock and then a piece of Whisper White.  I added a strip of Winter Frost Speciality Designer Series Paper along the bottom.  The snowflakes are from the Festive Flurry stamp set and I stamped the bottom layer in Pool Party ink.  Next I stamped the smallest snowflake in versamark and then heat embossed it with a mixture of Silver Embossing Powder and Silver Glitter (love how sparkly this combination is).  After embossing the snowflake I cut it out with the Big Shot and the Festive Flurry Framelits.  A dimensional was used to attach the snowflake to the card so it pops.  The final touch was the greeting, which is from the Lots of Thanks stamp set and was stamped in Island Indigo ink.

I know things are really busy getting ready for the holidays but it's a snap to create matching thank yous while you're making your Christmas cards so you only make the mess once and you're ready to go.  There's plenty of time to make these so please let me know if you need any of the products used in this card, or others and we'll get it to you to begin crafting.

Enjoy,

Diana

Pin It!

Thursday, November 14, 2013

30 Day Gratitude Card Challenge: Day 14

Good afternoon!  Today is bonus day, you get to posts with projects.  I hope you enjoyed this mornings projects for the Stylin' Stampin' Blog Hop.  Now I wanted to share a coordinating thank you card for my 30 Day Gratitude Card Challenge.  The cardbase is Pool Party and I added a layer of Whisper White cardstock.  The greeting is from the Lots of Thanks stamp set and is stamped in Island Indigo ink.  I took several small pieces of Winter Frost Speciality Designer Series Paper to create flags and then covered up where they're glued with a piece of Smoky Slate Chevron Ribbon.
 
I decided to add a fun decorative snowflake to the center using the Festive Flurry stamp set and coordinating Festive Flurry Framelits.  Between the two layers of snowflakes I added a  glitter circle using the Silver Glimmer Paper and the 1 3/8" Circle Punch.  A rhinestone attached to the center of the snowflake adds the final layer of bling.
 
This card is so pretty in person and easy to put together so you could definately make multiples of this card, either for a Christmas card, thank you, etc.  Hope you enjoy the rest of your day, we only have one more day until the weekend.

Pin It!

Stylin' Stampin' Squad November Blog Hop: Christmas


Thank you so much for joining us for the November Stylin’ Stampin’ Squad Blog Hop! This month our projects focus on Christmas. While we yet have to give thanks this month, some of us are already thinking about sending Christmas cards, what kind of packaging to present gifts in and how we want to deck our halls. On this month’s blog hop we are showcasing many of the Stampin’ Up! products that are available in the Holiday Catalog. You will see everything from cards to gift tags to 3-D décor and gift packaging. We hope you enjoy seeing how we use the products to create our projects and feel inspired to come up with some great projects of your own.
Remember you can order all of the products showcased from your Stampin’ Up! Demonstrator.

You should have just left stop number 8 on the Stylin’ Stampin’ Squad blog hop – Tonya B. of Stampin' with Tonya.  If so, you are in the right spot. If a link doesn’t work or you get off track, you will find the full blog hop lineup below.

I absolutely love the Winter Frost product suite in the Holiday Catalog.  My first project is this beautiful Christmas card that uses the Special Season and Christmas Messages stamp sets.  The cardbase is Pool Party and I added a piece of Winter Frost designer series paper that was matted on Island Indigo cardstock (I used the new Envelope Punch Board to corner round both layers).  I stamped the tree in Smoky Slate and used a Two Way Glue Pen and Dazzling Diamonds glitter to add some bling on the tree.  For the greeting I just inked up the stamp with Stampin' Write Markers so I have all the colors.  This layer is matted with Bermuda Bay cardstock.  The final touch was to add a piece of Smoky Slate Chevron Ribbon along with a Bermuda Bay Button and a bow of Island Indigo Baker's Twine.

Of course I had to make a coordinating treat holder and I love these metal tins that are perfect for 12 nuggets (that I wrapped in DSP).  This tin came together really quickly, I added some DSP along the edge of the tin and created a belly band with Island Indigo Textured Cardstock, Winter Frost DSP, and some Whisper White Organza Ribbon.

For the tag I stamped the snowflake from the Festive Flurry stamp set and cut it out with the Big Shot and Festive Flurry Framelits.  I cut the smaller snowflake out of Silver Glimmer Paper.  The greeting is from the new Christmas Tagables Photopolymer Stamp Set and it was punched out with the Artisan Label Punch.  A little Whisper White Baker's twine is perfect to attach the tag to the tin. 
 
This tin is so cute and they make perfect gifts for neighbors, coworkers, mailman, etc.  Anyone on your list would love to receive it!  I hope you enjoyed this month's blog hop projects.  Remember you can continue on the rest of the blog hop, and if you just started here, don't worry, you can work your way around the full hop.  I love these turned out and I definitely have more on my to do list.
 
                                                                    
Enjoy and thanks for stopping by!

http://stuckonstampin.blogspot.com/2013/11/stylin-stampin-squad-blog-hop-christmas.html

Blog Hop Participants:
    1.Pam S. of Stampin' in the Sun
    2.Dawn S. of Dawn's Creative Chalet
    3.Darcy J. of DJ's Stampin' Place
    4.Annie L. of Love Me Cards
    5.Cynthia R. of Ink-a-Doodle Creations
    6.Jamie H. of Unique Ink
    7.Kim R. of Stamping with Kim
    8.Tonya B. of Stampin' with Tonya
    9.Diana E. of Stampin' Fun with Diana
    10.Heidi B of Stuck on Stampin'
    11.Bree R. of Craft-Somnia
    12.Anastasia R. of Stampin' Blondie
    13.Pamela W. of Stinky Tofu
    14.Jennifer B. of NW Stamper
    15.Kristina M. of Mama's Sanity
    16.Shellie G. of Craft SmashUp
Pin It!

Thursday, September 12, 2013

Stylin' Stampin' Squad September Blog Hop: Favorite Tools


 Thank you so much for joining us for the September Stylin’ Stampin’ Squad Blog Hop! This month we are focusing on the tools of the stampin’ trade. Specifically, each of our favorite stamping tools. It’s amazing the kinds of tools that have been created to help us along in our paper-crafting addictions. This month’s blog hop will showcase many of the Stampin’ Up! tools that are now available to us in the 2013-2014 Stampin’ Up! Idea Book and Holiday Catalog and even a couple of products that are so new they aren’t in either catalog. We hope you enjoy seeing how we use the old and new tools and are inspired to come up with some great projects of your own.

You should have just left stop number 11 on the Stylin’ Stampin’ Squad blog hop – Bree R. of Craft-somniaIf so, you are in the right spot. If a link doesn’t work or you get off track, you will find the full blog hop lineup below.

My favorite SU tool is by far the Big Shot and when they released the new Thinlet card dies earlier this summer I knew I was in heaven!  I instantly decided I was going to use these for our family Christmas card and I've already finished making 70 of them. Shortly after the dies were released Patty Bennett, a fellow demonstrator came up with a great way to use the die to make an extended card (see Patty's card and tutorial HERE).   There are two different Thinlet card dies, the circle and label cards.  In addition to the card cut out, each set as several other thinlet pieces, including sayings, arrows, banners, etc.
 
For my first card I used Patty's technique and the Circle Thinlet card die to make this cute birthday card.  The cardbase is Melon Mambo and I added a piece of designer series paper from the Quatrafancy Speciality DSP package to the right side, along with strips of Silver Glimmer paper on both panels.  I also added a stripe of Island Indigo cardstock that was embossed with the Stylish Stripes Embossing Folder.  The greeting is from the Make a Wish stamp set and was punched out with the 2 1/2" circle punch.  I also added a cute little cupcake using the Create a Cupcake stamp set and coordinating Cupcake punch.

When you open up the card there's a cute birthday cake from the Bring on the Cake stamp set and I used the Photopolymer stamp set to stamp the recipients name on the card.  The birthday greeting is also from the Bring on the Cake stamp set.  I have to say these cards are a lot of fun and it gets really addictive to keep adding little elements to is, love it!


The second card I have for you uses the Label Thinlet card die and is a really simple Christmas Card.  After cutting out the card with the die I embossed the right side with the Snowflake Embossing folder.  I added a strip of Winter Frost Specialty DSP to the left side.  The greeting is from the Joy to the World stamp set and the thinlet card die set includes the framelit to cut out the insert for the flip piece.


 I kept it really simple on the inside and just stamped a snowflake on the inside flip piece with the Festive Flurry stamp set and added a rhinestone to the center of the snowflake.  This shows how the second card looks but you can really keep them as simple or as detailed as you want.

I hope you enjoyed my projects for this months hop and you've fallen in love with the Thinlet card dies as much as I have.  They're so much fun, you'll want to use them for every card.

Make sure to continue on to the hop, Jennifer is next and you won't want to miss what she's created.

Enjoy!

Blog Hop Participants:
  1. Shellie G. of Craft Smashup
  2. Pam S. of Stampin' in the Sun!
  3. Tonya B. of Stampin' with Tonya
  4. Dawn S. of Dawn's Creative Chalet
  5. Darcy J. of DJ's Stampin' Place
  6. Pamela W. of Stinky Tofu
  7. Kim R. of Stamping with Kim
  8. Justin K. of JK Cards
  9. Heidi B of Stuck on Stampin'
  10. Jennifer B. of NW Stamper
  11. Bree R. of Craft-somnia
  12. Diana E. of Stampin' Fun with Diana
  13. Jennifer C. of Happy 2 Scrap 4 Life
  14. Jamie H. of Unique Ink
  15. Kristina M. of Mama's Sanity

     
Pin It!

Thursday, September 5, 2013

September Just Cards Class

Welcome back and Happy Thursday!  Today I'm so excited to share the cards we'll be making that this months Just Cards class.  The class is this Sunday, September 8 at 2:00 PM.  We'll be making these five wonderful cards (plus there's the Christmas Card option to help get you started on your holiday cards). 


There's still time to reserve your spot, just let me know by Friday, September 6.  Also, if you can't make it to class but don't want to miss out on the projects, let me know and you can get the card kit to go so you can make these cards at home when your schedule allows.
 
I hope to stamp with you Sunday!
 
Diana
Pin It!

Search This Blog