Friday, July 29, 2016

SSINKspiration Favorite Accessory: It's all about the Emboss!

Happy Friday!  It's been such an interesting week, and with hubby traveling Aidan and I have been having lots of fun.  Today over on the SSINKspiration blog we're sharing some of our favorite accessories and while you would think I would have picked glitter (trust me I love it) my favorite accessory is embossing folders.  Used with the Big Shot embossing folders are a quick and easy way to really elevate a project and it is a rare time I don't use embossing on some piece of a project. 

I started with Soft Suede cardstock for the cardbase and then added a piece of Whisper White cardstock.  On this piece I started by stamping with the Watercolor Wash Background stamp using Crumb Cake ink and then embossing with the Big Shot and Brick Wall Embossing Folder and then sponging around the edges with Rich Razzleberry ink.

For the greeting I used the Lovely, Amazing You stamp set (I love the font of this set and even though its not in the catalog you can still order it online by searching by the name).  I stamped the greeting in Soft Suede ink on Rich Razzleberry cardstock and then cut it out using the Big Shot and Layering Circles Framelits, along with the mat using Soft Suede cardstock and attached the greeting with dimensionals.  To dress of the greeting I added a small string of pearls along the bottom of the greeting to help highlight it.

I used the feather image from the same stamp set and stamped it on Whisper White cardstock and cut it out with Paper Snips before attaching it to the cardfront.  Of course I still needed a little bling so I added a string of Gold Sequin Trim an then few random sequins around the cardfront.

I really like how it looks to have the watercolor image stamped on the embossed piece for an added effect.  The other design team members have made some great cards using their favorite accessories to make sure to go check them out and see what inspires you!

Below are easy ordering links for the products used on today's card:


Have a great weekend!

Diana
Pin It!

Monday, July 25, 2016

SSINKspiration Technique Challenge #SSINKTC35: Watercolor Resist Bab Greetings

Good morning!  We survived the hot and humid weekend and even got to check out the new Star Trek Beyond movie, which we loved.  With the start of the new week it's time for another challenge over on the SSINKspiration blog, this time it's a technique challenge and we're using Watercolor Resist as the technique.  I love this technique, not only since we have some fun UV treated papers that already have printed designs ready for color, or you can make your own using heat embossing.  Hubby had a coworker who recently had a baby and I've been working on the baby gift which of course means we needed a card.
 
I started with So Saffron cardstock for the cardbase and then added a piece of Calypso Coral cardstock as a mat for the Whisper White cardfront.  For the background of the cardfront I used the Playful Backgrounds stamp set and stamped using Pool Party ink.  The greeting was stamped directly on the cardfront using Basic Black ink and the Suite Sayings stamp set.
 
For the main image I started by stamping the cute rubber duck from the Something for Baby stamp Stampin' Write Markers before stamping on Whisper White cardstock.  I cut it out using Paper Snips (since I don't have the Baby's First Framelits but they coordinate so cutting out the baby images are super easy).  Next I used the new Jar of Love stamp set and stamped the medium jar using Basic Black ink on Whisper White cardstock and then cut it out using the Big Shot and Everyday Jars Framelits.  To create the technique background I started by stamping the same bubble image from the Playful Backgrounds set using Versamark ink and heat embossed it using the Heat Tool and White Emboss Powder.  To color in the background I used Pool Party ink and swirled it to create a water look effect (so fun and easy).  I attached the duckie in the jar using a dimensional.  To make the lid for the jar I heat embossed it using Copper Emboss Powder.  The final touch was to add some Copper Metallic Thread looped behind the jar and then attached the jar to the cardfront.
 
I love how this card turned out and how you can use a couple of little techniques and embellishments t elevate the card without going over the top.  There are so many great ways to use this technique for the perfect effect on any project you have so check out the other projects the design team is sharing and then play along and share what you come up for even more ideas.
 
Below are easy ordering links for the products used on today's card:


Enjoy!
 
Diana
Pin It!

Friday, July 22, 2016

Hand Stamped Sentiments Color Challenge: July Paper Pumpkin Birthday Greetings

Happy Friday! Tonight Aidan has a basketball game and we’re looking towards a scorching weekend so I’m hoping that I can take refuge part of the time in the stamp studio, and we’re going to the movies.   Today I decided to play along with the Hand Stamped Sentiments Color Challenge to make a birthday card for a friend.  We’ve been seeing these colors quite a bit lately with the 4th of July so I was trying to stretch to do something not patriotic, but I did end up with a couple of stars but I think that’ll be OK.  I also received this month’s Paper Pumpkin kit last week and while I haven’t been able to play with the kit the stamp set was sitting out and I love the greetings in the set so I decided to use the stamps from this months kit on today’s card (I love that the stamps in the Paper Pumpkin kits are exclusive to PP subscribers, it’s a special treat we get to continue enjoying for being part of the program). 

I started with Whisper White Thick cardstock for the cardbase and then added a layer of Whisper White Cardstock that was attached with dimensionals.  On this piece I started by stamping the strip of dots along the bottom using Dapper Denim ink.  Next I added one of the gold swirl stickers from a past Paper Pumpkin kit (I have some left over pieces sitting on my desk to try to use up so they don’t go to waste).  Next I took a piece of Cherry Cobbler DSP from the Regals Designer Series Paper Stack and cut it out with the 2” Circle Punch.  I used the Big Shot and Stars Collection framelits to cut out a star outline using Dapper Denim cardstock.  Next I embossed the star using the Lucky Stars Embossing Folder and then sponged all over the star using Dapper Denim ink to highlight the star.  I wanted a little more in the image so I punched out a small star using a retired punch and attached the small star with a dimensional.

The greeting is from this month’s Paper Pumpkin kit and after coloring the stamp using Stampin’ Write Markers and stamping on Whisper White cardstock and then cut it out with the Big Shot and Layering Ovals Framelits before attaching it to the cardfront with dimensionals.  To go along with the greeting I felt the card needed a little sparkle so I used some Gold Glimmer Paper and punched another small star and attached it with a dimensional and then I sponged along around the sides of the cardfront with Cherry Cobbler ink for the perfect finishing touch.

The font and greetings in this month’s Paper Pumpkin kit are perfect and fit my personality to a “T” and I can’t wait to continue to use it.  And I know my friend that I made this card for will love it!!  Remember you can sign up for the Paper Pumpkin program anytime and as long as you sign up by the 10th of the month you’ll be included in that month’s shipment, have fun with your monthly surprise!!

Below are easy ordering links to the products used on today's card:


Have a great weekend!

Diana
Pin It!

Wednesday, July 20, 2016

SSINKspiration Christmas in July: Lovely as a Tree

Happy Wednesday!  I know it's only July, but I read last week that there are only 20 Friday's until Christmas, eek!  And the way time has been flying by Christmas and the holiday season will be here before we know it so why not get a head start.  Today over on the SSINKspiration blog it's Christmas in July and the design team is sharing some great ideas to help you get a head start on holiday projects.

Today's card I'm sharing was the Christmas Option project at this month's Just Cards class (I offer a Christmas option each month in class so the ladies can work on Christmas cards all year long so they already have a stash of cards ready to go) and we learned a "new to us" technique, reflection stamping which was a lot of fun.

We started with Soft Sky cardstock for the cardbase and used a piece of Whisper White cardstock for the cardfront.  To start on the cardfront we started by stamping the trees from Lovely as a Tree using Night of Navy ink.  Next we stamped the same image again on a piece of Window Sheet using the same ink and then while the ink was still wet flipping it over and rubbing it on the cardstock (this created the reflection, pretty cool).  Next we took sponge daubers and started gradually adding ink, Old Olive for the grass, Soft Sky and Marina Mist for the sky that was different layers of depth.  After I was done I wrapped a piece of Old Olive Baker's Twine around the cardfront and tied a bow.

The greeting is from the Embellished Ornaments stamp set and was stamped in Marina Mist ink on Whisper White cardstock before cutting it out with the Big Shot and Layered Ovals Framelits and attached it with dimensionals.

This is a really great technique and not terribly difficult and is sure to impress!  Can't believe this was the first time trying it but it won't be my last.

Below are easy ordering links for the products used on today's card:


Enjoy!

Diana
Pin It!

Tuesday, July 19, 2016

Better Together Detailed Floral Birthday Wishes

Good morning!  I hope you had an enjoyable weekend, it was crazy hot here (which is normal for this time of year) so we worked to stay as cool as possible.  Today I wanted to share a card I made for a dear friend using used some new catalog goodies, and showed off one of the new 2016-2018 In Colors, Sweet Sugar Plum.

I started with Sweet Sugarplum cardstock for the cardbase and stamped using the Hardwood stamp set.  Next I took a piece of Very Vanilla cardstock and cut it with the beautiful floral design using the Big Shot and Detailed Floral Thinlits Die (you need to cut it twice, once for the design and once for the edge, both pieces are in the set) and then I stamped all over the cardstock using the floral image from the Timeless Textures stamp set using Crumb Cake ink (I stamped off once to lighten the design) and then sponged around the edges using Crumb Cake ink.  Before attaching the cut out piece the cardfront I wrapped a piece of Sweet Sugarplum 3/8" Ruched Ribbon around it and tied a know (this ribbon is so soft and pretty, I love it!!)

For the greeting, I used the new Better Together stamp set (this set as a greeting for almost every occasion so it's really worth the money to invest in a set that you can use a lot) using Sweet Sugarplum ink on Very Vanilla cardstock and then cut it out using the Big Shot and Layering Circles Framelits (I used the same framelits to cut the scalloped circle mat out of Sweet Sugarplum cardstock).  Before attaching the layers I sponged around the edge using Crumb Cake ink and then attached the greeting to the cardfront with dimensionals.  The final touch was to add a strip of pearls along the bottom of the greeting to fancy it up!

I had fun using all these new catalog items to make this monochromatic card (I even stamped on the envelope to dress it up) that turned out beautifully and I know my friend loved it.

Below are easy ordering links for the products used on today's card:


Enjoy!

Diana
Pin It!

Friday, July 15, 2016

Fab Friday Sketch Challenge: Celebrate Today

Happy Friday!  It’s weeks like this that we’re definitely reminded that it’s summer in the mid-atlantic and all the humidity that goes along with it (wowsers).  I certainly see some time at the pool in our future this weekend, just to stay cool. For some reason things have gotten a little more in control in our schedules, or maybe I’ve adjusted, which has meant I’ve had some additional time in the studio, which I love.  Today I decided to play along with this weeks Fab Friday Sketch challenge and make a card for a dear friend, just because!

I started with Smoky Slate cardstock for the cardbase and then added a piece of Mint Macaron DSP from the 2015-2017 In Colors Designer Series Paper Stack that I matted with Basic Black cardstock.  Next I took a piece of Smoky Slate cardstock and embossed it with the Big Shot and the Sparkle Embossing Folder.  Next I used the Celebrate Today stamp set and stamped the big balloon in Mint Macaron ink on Whisper White cardstock and then stamped the little confetti in Basic Black before cutting it out with the Big Shot and Balloon Framelits.  I tied a double bow using Basic Black Baker’s Twine to the bottom of the balloon before attaching it to the cardfront with dimensionals. I added a couple of sequins from the Metallics Sequins for the mandatory bling.


The greeting is from the Just Kidding stamp set (this was one of the original photopolymer sets that was released so it’s not in the catalog and doesn’t show up on the online store but if you do a search of the title it does pop up and you can order, there are few like that) and it was stamped in Basic Black.  This sentiment is perfect for my friend and I know she’ll appreciate it.

Sometimes you need to send a card, just because, to let someone know you’re thinking of them and this does the job perfectly!

 
Below are easy ordering links for the products used on today’s card:


Enjoy and have a great weekend!

Diana
Pin It!

Wednesday, July 13, 2016

SSINKspiration July Blog Hop: Summer Fun!


Good morning!  It’s so nice having everyone at home this week and getting back into the summer camp/work routine.  We were looking at the calendar last weekend and realized there are only 7 more weeks of summer vacation before Aidan heads off to the 6th grade (how is that possible??)  Today over on the Stylin’ Stampin’ INKspiration blog it’s time for our monthly blog hop (the hop has moved from Thursday to Wednesday) and this month’s theme is all about summer, how perfect is that?  I spent quite awhile looking through my current stamps to find something that inspired me with this theme and wasn’t feeling anything and then I remembered that Aidan just got back from boy scout camp and the new Always an Adventure stamp set and coordinating framelits were just delivered last week, whoo hoo I decided to scrap Aidan’s camp adventures Project Life style!!

As you hop along, please be sure to comment and show some love on every blog! We are always excited to hear from our followers! You should have just left stop number #4 on the Stylin' Stampin' INKspiration Blog Hop - Darcy at Dj's Stampin' Place. If so, you are in the right spot. If a link doesn't work or you get off track, you will find the full blog hop lineup below.

This layout was interesting since I didn’t actually attend camp, so I relied on the one picture Aidan took (really kiddo, need to work on that), what the troop posted, and the departure and arrival pictures I took.  Since I knew it was going to be very heavy on the pictures I made two inserts using the Always an Adventure Bundle, one journaling card, and the rest was left for pictures.
I used most of the same supplies for both the 4x6 and 3x6 card inserts and started with Soft Sky cardstock and sponged along the top with Whisper White Craft Ink to help it look more sky like.  Next I used the stamp set and framelits to cut lots of pieces (and then kept adding and adding until I was happy with the result).  For the clouds, I stamped using Basic Black ink on Vellum cardstock, cut them out with the framelits and then sponged around the edge with the White Craft Ink for some extra effect (the Thin Tip Glue pen worked perfect to glue the clouds to the cards and the adhesive doesn’t show through the vellum, score!!)


I did also swipe the Cucumber Crush pieces for the grass and treelines along the Cucumber Crush ink pad to add additional dimension to the color.  Also, I didn’t use the framelit for the snow cap on the mountains (honestly missed seeing it so I just cut the mountains a second time using Whisper White cardstock and then hand cut the edges so they are not all the same, a little more realistic.


The journaling card is retired (I stocked up) and I just stamped along the top and added a tree and bear and then left it for Aidan to do the journaling (he didn’t want to do that last night, go figure!!)  This way he can record his favorite things about the trip and it will be a piece of his handwriting as a keepsake, double duty!!

 
I really like this stamp set and framelits and see myself using them quite a bit for all our outdoor adventures.  It was also fun when I showed the page to Aidan he loved it and thanked me for making it (I love that he appreciates things like this and enjoys looking through our old albums remembering our adventure, that’s what this is all about).  I will admit these can be kind of “putsy”, meaning I took several hours to just make those two cards and just enjoyed playing.  Don’t know if these are quick and easy, but the more I use them we’ll see.

Below are easy ordering links for the products used on today’s project: 


 Make sure to check out the rest of the blog hop for lots of other great ideas.  If you click the “Next” button, you’ll go to Pamela’s site but you can also access any of the hopper’s site from the full blog list below.
 
http://www.stampinup.net/esuite/home/stinkytofu/blog?directBlogUrl=/blog/2075584/entry/7_13_16_july_blog
 

Blog Hop Participant List:

1. Tobe at The Craft Sea
2.
Jennifer at Jenny G Paper Stamps
3.
Cheryl at Create with Cheryl
4.
Darcy at Dj's Stampin' Place
5.
Diana at Stampin' Fun with Diana
6.
Pamela at Stinky Tofu
7.
Jen at Faith. Grace. Stamp.

Have a great day,

Diana 
Pin It!

Monday, July 11, 2016

Stylin' Stampin' INKspiration Card Sketch SSINKCS35: Lovely as a Tree

Good morning!  Aidan returned from a week at Boy Scout camp this weekend so we were excited to see him and hear all about his adventures (he had a great time, definitely needed a shower and do laundry, slept in on Sunday since he was pretty tired, and had an amazing time).  I guess it was hearing about all his outdoor adventures was the inspiration for today's card for this month's SSINKspiration blog card sketch challenge.

I started with Crumb Cake cardstock for the cardbase and then then added another layer of Crumb Cake cardstock that I embossed with the Big Shot and Woodland Embossing Folder and then lightly sponged over the embossing with Soft Suede ink to really highlight the trees.

Next I added two pieces of designer series paper, using the Regals and Neutrals Designer Series Paper Stacks (this paper has Whisper White in it and since I wanted to use Very Vanilla I sponged all over the DSP using Crumb Cake ink so lighten up the pattern so it matches the Vanilla cardstock better, I'm not a fan of mixing Whisper White and Very Vanilla, it's my own issue).

For the main stamped image I used the classic, Lovely as a Tree stamp set and colored directly on the rubber using Chocolate Chip, Pear Pizzaz, Garden Green, and Always Artichoke Stampin' Write Markers and then stamped on Very Vanilla cardstock.  Then I used the Big Shot and Layering Circles Framelits to cut around the tree, as well as the mat using Chocolate Chip cardstock and then attached it to the cardfront with dimensionals.  For a little added texture I added a double bow I tied using Linen Thread using a Glue Dot.

For the main stamped image I used Teeny Tiny Wishes and stamped it using Chocolate Chip ink and then punched it out using the Classic Label Punch and attached it with dimensionals.  The final element was to add a few pearls under the greeting for an elegant touch.

I love the rustic and earthy look to this card, I'm sure my boy scout who inspired it would approve.  I actually need a retirement card so this is perfect.  The other design team members have shared some great cards for their take on this challenge so go check them out and then play along, we would love to see what you come up with.

Below are easy ordering links for the products used on today's card:


Enjoy!
Pin It!

Saturday, July 9, 2016

Heads Up!! $5 Coupon with every $50 order this month only!! An Sneak Peak of Limited Edition Bundle Coming....

bonus days
Bonus Days are here! For every $50 (US) you spend (before tax and shipping)  between July 7 and July 31, you’ll get a $5 Bonus Days coupon emailed to you that you can use between August 2–31, 2016! 
 
There will also be a special bundle coming out in August so stay tuned for that!  It’s a limited stamp/framelit bundle not in any catalog.
 
Here are the Details from Stampin’ Up:
  • Promotion period: July 7–31, 2016
  • Promotion Deadlines: July 29, 2016
  • Coupon Redemption period: August 2–31, 2016
  • Redemption Deadline:  August 31
  • A valid email address is required to participate in this promotion; Bonus Days coupon codes can only be delivered to participants via email so be sure it’s an email you can access to retrieve your coupon.
  • We strongly recommend that participants both save emails containing their Bonus Days coupon codes AND write down the coupon codes in a safe place—the codes cannot be resent if the participant loses the email, SU cannot recover lost codes.
  • Participants will receive a $5 Bonus Days coupon code via email for every $50 they spend in a single order (catalog price before shipping and tax). There is no limit to the number of coupons participants can receive per order or throughout the duration of the promotion. There is no limit on the number of coupons participants can use on an order during redemption.
  • Bonus Days coupons codes can be used in the checkout process during the redemption period. (you will need to email it to the coupon code if I’m placing the order for you)
  • If your order is over $150, you will still be able to earn host rewards along with coupons.
This a new thing and I’m excited to see how it works out!  Did you know we have 40 $5 accessories?  Or you can just take $5 off of an item you have had your eyes on:)
 
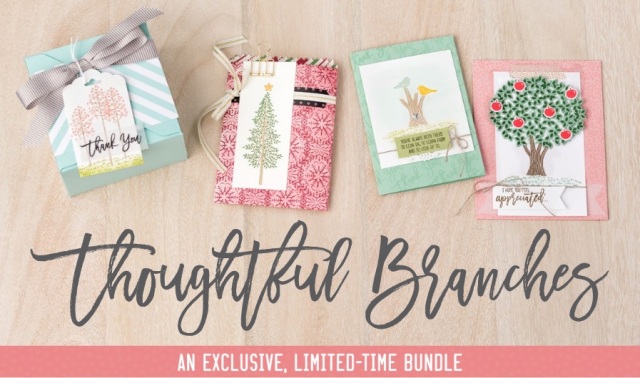
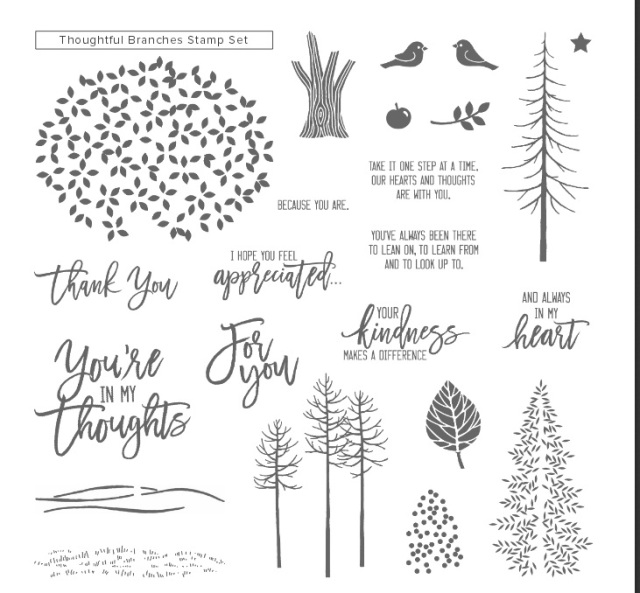
What to buy in August with your coupons?  There’s a limited edition bundle coming out Aug 2 – Aug 31 called Thoughtful Branches
 
thoughtful branches prices
thoughtful banner thoughtful branches 1 thoughtful pic
 
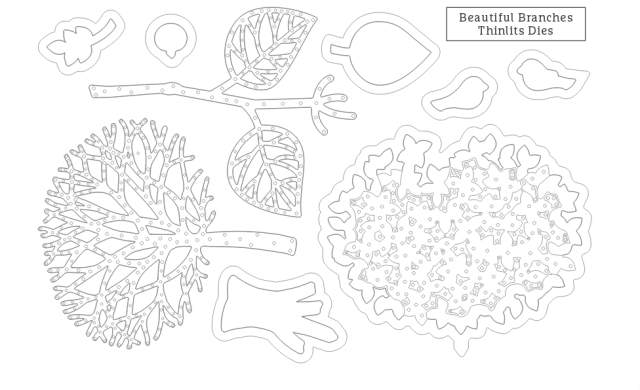
With coordinating Thinlits Dies
To print the flyer, click HERE
 
thoughtful branches dies
 
See the Pinterest Board SU created for this fun set here:
Call or email me your order or shop online HERE!
(703) 403-8244 or cdeichfeld@msn.com
Pin It!

Friday, July 8, 2016

Hand Stamped Sentiments Sketch Challenge #241: Sweet Cupcake

Happy Friday!  It's been a nice quiet week around here with Aidan away at Boy Scout camp and while I've enjoyed the piece we're definitely looking forward to him coming home tomorrow.  I've take full advantage of the quiet this week and got to enjoy some extra time in the studio and played with some of my new catalog goodies and I hadn't inked up the Sweet Cupcake stamp set yet so it had to come out and get inky and used it with this weeks Hand Stamped Sentiments sketch challenge.  Isn't a cupcake just a perfect way to celebrate a birthday?

I started with Wisteria Wonder cardstock for the cardbase and I added a strip of Crumb Cake designer series paper from the Neutrals Designer Series Paper Stack and then I added the little curly Q's using Elegant Eggplant cardstock and the Big Shot and Cupcake Cutouts Framelits.  I stamped the greeting using Elegant Eggplant ink and two sets of the sprinkles using Wisteria Wonder ink.


For the main image I started using Whisper White cardstock and stamped the cupcake base using the three stamp sets using Crumb Cake ink stamped off once (stamp 3), Crumb Cake full strength (stamp 2), and Soft Suede ink (stamp 1).  The cupcake top used:  Wisteria Wonder ink stamped off once (stamp 3), Wisteria Wonder full strength (stamp 2), and Elegant Eggplant ink (stamp 1).  Once everything was stamped I cut them out with the coordinating framelits.  For the mat I used Crumb Cake cardstock, the Big Shot, and Layering Circles FramelitsDimensionals were used to attach the scalloped circle mat a well as the cupcake top.

Cupcakes are awesome in general and one of my favorites so I love this stamp set and matching framelits, really helps make yummy, realistic looking cupcakes so I'm going to have lots of fun with this set!

Below are easy ordering links for the products used on today's card:


Have a great weekend!

Diana
Pin It!

Wednesday, July 6, 2016

Fab Friday Color Challenge 90: Friendly Wishes

Good morning!  One of my favorite things about short holiday weeks is that we're already at the halfway point of the week, feeling kind of tired after all this weekends fun (I'm sure you can understand).  Today I decided to play along with this weeks Fab Friday color challenge.  I love all these bright colors individually but will admit I haven't tried all four together before.  I decided to change things up and go with a very geometric card.

I started with Tempting Turquoise cardstock for the cardbase and then added a piece of Night of Navy cardstock for the cardfront and embossed it with the Big Shot and Polka Dot Embossing Folder.  Next I used the Big Shot and Layering Squares Framelits to cut two larger squares using Real Red and Pacific Point cardstock.  I used some Brights Designer Series Paper and smaller square framelits to cut out squares using the Real Red and Tempting Turquoise DSP. 


For the Pacific Point square I embossed it using the Big Shot and Lovely Lace Embossing Folder before starting to layer the squares.  For the greeting I used the Friendly Wishes stamp set and stamped using Night of Navy ink directly on the Real Red square.  I attached all the squares to the cardfront and used dimensionals just on the smallest square so it pops up.  I want to add a little bling (come on, you're surprised??) so I turned to the Metallic Enamel Shapes and added two of the stars which was just what I needed.


I know this is definitely not my normally style but I really like how this turned out and it's a great way to show off all these colors and how they work together, go figure!  That's one of the reasons I love participating in these challenges, it helps me try new things, you never know what you may like but don't know it yet.

Below are easy ordering links for the products used on today's card:


Enjoy!

Diana
Pin It!

Monday, July 4, 2016

Stylin' Stampin' INKspiration Color Challenge SSINKCC35: Endless Birthday Wishes

Good morning and Happy 4th of July!  Aidan's away have fun out boy scout camp and Chris and I have been enjoying some adventures of our own.  I love holiday weekends since they give us extra family to enjoy relax.  I also have had a little crafting time and am planning more later today.  It's the first Monday of the month, which means it's time for this month's SSINKspiration blog color sketch challenge.  Of course Red, White, and Blue is perfect for today and it's been the theme of several recent projects lately so I decided to embrace these colors but used a often neglected stamp set to be a card that's perfect for birthdays or other celebrations, Endless Birthday Wishes.

I started with Whisper White Thick cardstock for the cardbase and then then added another layer of Whisper White cardstock.  On this layer I sponged around the edge with Dapper Denim ink and stamped in two of the corners using Basic Gray ink and the dots from the Endless Birthday Wishes stamp set.

Next I took a piece of Dapper Denim cardstock and embossed it with the Big Shot and Confetti  Celebration Embossing Folder.  This layer is offset with a piece of Real Red DSP from the Brights Designer Series Paper Stack.  For the main stamped image I stamped the cake image using Basic Black ink on Whisper White cardstock and punched it out with the 1 3/4" Circle Punch and then used my blender pen to color in the cake and then added a little bit of shimmer to the candles using the Clear Wink of Stella Pen.  This piece was attached to the cardfront with dimensionals.

I used a half of a small metallic doily as an accent and then added a strip of Dapper Denim 3/8" Ruched Ribbon (attached using fast fuse adhesive).  The final touch was to add the greeting that is from the same stamp set and was cut out with the Big Shot and Layering Ovals Framelits and sponged around the edge using Basic Gray ink before attaching it with dimensionals to the cardfront.

I love the bright colors and how they really pop against the white, with just a few gray/silver accents.  The other design team members their cards based on these colors so you'll want to go check them out for further inspiration before you create you're project.

Below are easy ordering links for the products used on today's card:


Enjoy your holiday!

Diana

Pin It!

Friday, July 1, 2016

SSINKspiration Red, White, and Blue: Baseball Fun

Happy Friday!  The holiday weekend is just about here and I can’t wait!  Aidan is heading to Boy Scout camp for the week which means we have a “kid free” week and Chris and I are planning some adventures while he’s gone.  Earlier this week we finally had Aidan’s baseball team end of the year party (with all the crazy rain we had this spring there wasn’t a tournament and the end of the season ended with a cancelled game so things were up in the air but we finally got an email that said “The Cubs Win, The Cubs Win”)  I decided to make cards for all of the team coaches for Aidan to thank them for all their support and instruction this year so I decided to use today’s Red, White, and Blue and star them over on the SSINKspiration blog as the inspiration for the card design (plus it fits since it matches the Cubs colors).  Earlier this week a lady shared a card she made using on of this months Paper Pumpkin stamps for a perfect baseball so I was off and running.

I started with Pacific Point cardstock for the cardbase and then added a layer of Crumb Cake Cardstock.  I did a lot of stamping on this piece to really build texture and dimension.  I used the Timeless Textures and Gorgeous Grunge stamp set along with Crumb Cake, Pacific Point, Real Red, and White Craft ink for each of the elements.  Some stamps were stamped off once or even twice before stamping to help soften the coloring.  After about the sixth different stamp I finally had to back away and be done with the background.  I also stamped the greeting on this layer, using a stamp from the Suite Sayings stamp set and used my Real Red Stampin’ Write Marker to color in just the “thanks” part of the stamp before stamping.

Next I added a piece of Real Red Designer Series Paper (from the Brights DSP Stack) and matted it with Pacific Point cardstock.  To make the baseball I started by cutting a circle out of Whisper White cardstock using the Big Shot and Layering Circles Framelits and then I stamped using the Paper Pumpkin dashed circle using Real Red ink and only stamped part of the circle to make the strings on the baseball (isn’t it perfect??)  I attached the baseball with dimensionals to the cardfront and then wanted a little bling (I know…) so I cut a small star using the Star Framelits set and Gold Glimmer Paper and it was also attached with dimensionals.

This card really came together fast (once I stopped stamping layers on the cardfront) and I love the fun baseball and will definitely be using this idea again for other projects, including scrapbook pages.  The other design team members are sharing some fun ideas using this theme so if you have time to check them out.

Below are easy ordering links to the products used on today's card:


Have a great holiday weekend!

Diana
Pin It!

Search This Blog