Wednesday, September 30, 2015

SSINKspiration Halloween Fun: Witches Night

Good morning!  It's the last day of September an we're going to be celebrating all the holidays before we know it.  Halloween is first up and I really believe in getting a head start on holiday projects to help alleviate stress so today's post over on the Stylin' Stampin' INKspiration blog is perfect, it's all about Halloween.  Aidan is still of the age and desire to give holiday gifts to his classmates and teachers.  For Halloween we're doing soaps and candles and he picked which teacher gets which gift (we have 14 teachers on our list for the year).  I wanted to make a fun box for the holiday hand soap so  needed something big and was so happy when I came across a fellow demonstrator Sam from the UK who provided this great tutorial HERE for making a large box with a full size sheet of 12x12 DSP (not only will this box hold a lot but also uses a full sheet of paper so there's no scraps and it helps use up my stash, perfect).


I started with a piece of Happy Haunting Designer Series Paper and used the Simply Scored board to score the box and then assembled it using some Tear and Tape.  To close the top of the box I used the 1/8" Handheld Punch and tied it shut with a piece of Tangelo Twist 5/8" Stitched Cotton Ribbon.

For the box label I started by stamping the large image from the Witches Night stamp set on Very Vanilla cardstock using Basic Black ink and then cut it out with the Big Shot and Lots of Labels Framelits.  I took a piece of Black Glimmer Paper and cut out a just the tops of the same label as a accent.  The striped DSP piece is actually an extra from the Witches Hat Décor Kit (which unfortunately is old out but you a easily use another pattern from the DSP package and cut it out using the same framelit set.

These boxes came together so quickly (I made 7 of them) and are lots of fun.

Below are easy ordering links for the products used on today's project:
Built for Free Using: My Stampin Blog


Hope this idea starts to get you ready for Halloween!!

Enjoy!

Diana
Pin It!

Tuesday, September 29, 2015

SSINKspiration Mystery Supply Challenge: Acorny Thank You

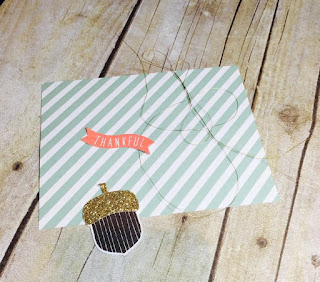
Good morning!  We had a busy and fun weekend, a highlight of which was the Witching Décor Hat class on Saturday, it was a great time and the ladies did a great job on their projects (it’s always more fun crafting with friends)!  Today over on the Stylin' Stampin' INKspirationblog it’s the second addition of our Mystery Basket Challenge, it was so fun last month.  As a reminder, this is kind of like “Chopped”, where each designer that wanted to participate signed up and we were randomly assigned another designer and we mailed the designer 3 items, could be a stamped image, DSP, ribbon, etc. and incorporating those three items the designer needs to complete a project.  Breelin Renwick was the designer who mailed me my mystery basket and I was so excited when I saw my mystery supplies since I don’t have the Acorny Thank You set in the Holiday catalog so it was fun to play with its images. 

I started with Mint Macaroon cardstock for the cardbase and then added a piece of Soft Suede cardstock that I embossed with the Big Shot and the Woodland Embossing Folder. This is such a fun embossing folder and I used Soft Suede ink to sponge all over the embossing to help highlight the trees.  Next I took a piece of Calypso Coral Cardstock and used the Big Shot and Circle Collection Framelits to cut out a circle and then embossed it with the Decorative Dots Embossing Folder (flipped it so the debossed image was showing).  I also used the Circle Framelits to cut out a circle of the Mint Macaroon cardstock from the 2015-2017 In Color Designer Series Paper.  Behind the DSP circle I added several loops of the Gold Metallic Thread.

The acorn is from the Acorny Thank You stamp set and was stamped in Early Espresso ink before being punched out with the matching Acorn Punch.  I love that Bree made the top of the acorn with gold glimmer paper (I used to always use glimmer paper to the top of the acorn from our previous Big Shot Die so it suits me to a tee!!)  The banner greeting is from the same stamp set and was stamped in Calypso Coral ink.

My friends are such enabler’s there are sets I don’t buy right away and then I see all the great projects and ideas and I HAVE to have those items,  I don’t know how long I’ll be able to hold out before getting this set, it’s too cute and super easy!  You’ll definitely want to stop by and check out the other creations the designers came up with using their mystery supplies.

Below are easy ordering links for the products used on today’s card:

Built for Free Using: My Stampin Blog


Have a great day and I hope you enjoyed today’s card!

Diana
Pin It!

Friday, September 25, 2015

Sketch Frenzy Friday Sketch Challenge Meets SSINKspiration Friday Favorites: Six Sayings

Happy Friday!  What a crazy week (I wish I could say this is unusual but it’s getting to be “normal” but with the end of the fiscal year is bringing a little extra stress to the mix that hopefully will only be for a few more weeks).  We have a few activities this weekend and I’m so excited for the Witching Décor class on Saturday, this project is so cute and I know the ladies will really enjoy it!  It was fun to take a break from everything and get in the studio to make my card for this weeks Sketch Frenzy Friday Sketch Challenge.  I decided to have this do double duty and combined this with our Friday Favorites post over on the SSINKspiration blog.  I have lots of favorites but today I decided to show the Deco Labels Framelits cutting out the perfect holiday greeting in the new Six Sayings Hostess stamp set (there are sayings for every upcoming holiday so you really should try to get some friends together for a fun party so you can get this set for FREE!!) 

I started with Soft Sky cardstock for the cardbase and then added a piece of Night of Navy cardstock that was embossed with the Big Shot and the Polka Dot Embossing Folder.  I added a strip of Season of Cheer Designer Series Paper. 

The greeting (it reminds me of a Christmas sweater) is from the Six Sayings stamp set and I used Stampin’ Write markers to color on the stamp before stamping on Whisper White cardstock and then cutting the greeting out with the Big Shot and Deco Label Framelits.  The greeting was attached to the cardfront with dimensionals.  For a fun accent I took one of the new wooden Snowflake Elements and used a sponge dauber to apply some Whisper White Craft ink to color snowflake and then added a rhinestone to the center for the final touch of bling. 
This is my first time using this stamp set, but certainly not my last I love all the greetings they’re so different from each other and will be fun to play with.  The snowflake elements are also really easy to work with; you can use them as is, color them with ink, glitter, etc.  The design team is also sharing some great designs so go check them out and come play along. 


Below are easy ordering links for the products used on today’s card:

Built for Free Using: My Stampin Blog


Have a great weekend,

Diana
Pin It!

Thursday, September 24, 2015

Howl-o-ween Treat: Trick or Treat Wishes

Good morning!  It's been a crazy week and I haven't had a chance share any fun projects so today I thought I would share a cute and super easy Halloween card we made at this months Just Cards Class.  If you haven't noticed I'm really on a Halloween streak and with all the great products in the Holiday Catalog it's hard not to get caught up in all the fun.

I started with Tangelo Twist cardstock and then added a piece of Very Vanilla cardstock and stamped the greeting from the Howl-o-ween Treat stamp set using Rich Razzleberry ink.  Next I added a piece of designer series paper from the Happy Hauntings Designer Series Paper pack and matted it with Tangelo Twist cardstock.

I decided to dress up the card by adding a quarter of a Spider Web Doily to the top left corner using the Thin Tip Glue Pen to apply the glue and then embellished it with rhinestones.  For the cute little skull I used the same Howl-o-ween Treat stamp set and stamped the skull and cross bone pieces on Smoky Slate cardstock using Memento Black Tuxedo Ink.  The coordinating Boo to You Framelits and Big Shot made cutting out the pieces a breeze and I used dimensionals to pop up the skull.

This card was a kit at class and mixes just the right amount of cute and spooky for a fun Halloween Greeting.  Have you started thinking about the cards and projects you want to make for Halloween?  It's certainly not to late, if you know you want to make something, but are lacking ideas give me a call and I can help you come up with the perfect idea and all the supplies you need to impress.

Below are easy ordering links for the products used on today's card:

Built for Free Using: My Stampin Blog


Enjoy!

Diana
Pin It!

Friday, September 18, 2015

Sketch Frenzy Friday Sketch Challenge: Project Life Let's Get Away

Good morning!  I love Friday’s, there’s always a promise of adventure and opportunity that I really look forward to.  I decided to carry that sense of adventure into the card I made for this weeks Sketch Frenzy Friday sketch challenge it’s a little outside my comfort zone, and used animal prints, metallic, and burlap to all play against each other.

I started with Tip Top Toupe cardstock for the cardbase and then added a piece of Basic Black cardstock that I embossed with the Big Shot and Stylish Stripes Embossing Folder.  Next I used a piece of paper from the Go Wild Designer Series Paper Stack and used the Banner Builder Punch to create the tails.  Before attaching the DSP to the cardfront a cut a piece of Silver Foil Cardstock with the Big Shot and the Circle Collection Framelits so I had a pretty silver piece sticking out from behind the animal print.  I also added a piece of 1 ¼” Burlap Ribbon that I distressed by cutting off both sides and pulling some strings away.  I added a piece of Silver Sequin Trim on top of the burlap and then finished it with a knot I tied using one of the edges of the burlap ribbon that I had just cut off.

The greeting is from the Project Life Let’s Get Away stamp set and was stamp on Tip Top Taupe cardstock before being punched out with the Oval Punch and attached with dimensionals.
I card is a little out there but I liked how the saying kind of matched the animal print and made me think of a jungle safari.  What do you think?  The other designers are sharing their interpretation of this sketch for to fuel your creative juices so go check them out and then play along and share what you create.  


Below are easy ordering links for the products used on today’s card:
 
Built for Free Using: My Stampin Blog


Have a great weekend and enjoy the beautiful weather!

Diana
Pin It!

Thursday, September 17, 2015

Fab Friday Sketch Challenge: Project Life Seasonal Snapshot 2015

Good morning!  I swear I blink my eyes and the week flies by, I really need it to slow down (I saw this week that we now have less than 100 days until Christmas, can you believe it??)  I decided to have a little Halloween fun today and made this card using the Fab Friday sketch challenge.   When I saw that doily in the sketch I knew it would be perfect to use the new Spider Web Doilies (I love these!)

I started with Tangelo Twist cardstock for the cardbase and then added a piece of designer series Paper from the Happy Hauntings Designer Series Paper Pack before adding that beautiful doily.  Next I added two pieces of ribbon for a fun accent, a piece of Into the Woods 3/8" Cotton Ribbon and Natural 5/8" Chevron Ribbon (I trimmed both sides of the Natural Ribbon and pulled some strings to distress the ribbon.

For the main stamped image I took a piece of Very Vanilla cardstock and cut a large circle using the Big Shot and Circle Collection Framelits before stamping.  I used the Project Life Seasonal Snapshot 2015 stamp set for the words a bat images (the font for the "wicked" is so fun!).  I used some Basic Gray ink and a sponge to sponge around the edge of the circle for a little extra fun.   I also added a little strip of rhinestones to accent the "night."


For the final touch I used the Sweet Hauntings stamp set to stamp the little poison bottle on Tangelo Twist cardstock and then cut it out with Paper Snips and attached the bottle and stamped images with dimensionals for added dimension.

This is a card that came together really quickly but due to all the little elements it is lots of fun and will really impress (you can keep it a secret how easy it was, haha!!)  I may have to use the layout and elements from this card to make some box labels I'm working on for Halloween teacher gifts (got to get a head start!!)


Below are easy ordering links for the products used on today's card:

Built for Free Using: My Stampin Blog


Enjoy,

Diana
Pin It!

Tuesday, September 15, 2015

Stamp Out Breast Cancer with Paper Pumpkin


To show our support for Breast Cancer Awareness Month, we're going PINK . . . or at least our October boxes are! And because we know our subscribers want to share the love too, we will be making a donation on their behalf to the Breast Cancer Research Foundation (BCRF).

Stampin' Up! will donate
  • $1 for every active Paper Pumpkin subscriber.
  • Plus, an additional $1 for every new subscriber.
Together, we will make a difference!

Here's how you can help:
  1. Subscribe! If you're new to Paper Pumpkin, click here to get started. Your first kit will arrive in a limited-edition pink box that you'll want to hold onto forever-and we'll donate $2 because you're new!
  2. Stay active if you're a subscriber so we can donate $1 for you. Only those who receive the October shipment will be counted for the donation.
  3. Spread the word! Help us get as many new subscribers as possible. Every current subscriber adds $1 and for new subscribers it's doubled, so let's get the word out and raise as much as possible.  This is a great time to give the gift of a Paper Pumpkin subscription, perhaps to the friend, child, etc. that enjoys crafting.
Remember, those who get the October kit will not only be donating to a good cause, but they will also get a one-time only, pretty pink Paper Pumpkin box! No one will want to miss it. Promise.

More About BCRF

The Breast Cancer Research Foundation (BCRF) advances the world's most promising research to eradicate breast cancer. Founded by Evelyn H. Lauder in 1993, BCRF has raised more than $550 million to fuel discoveries in tumor biology, genetics, prevention, treatment, survivorship and metastasis, making it one of the largest non-governmental funders of breast cancer research in the world. This year BCRF has invested $58.6 million in research, to support over 235 researchers at leading medical institutions across six continents, including $11.6 million to the international Evelyn H. Lauder Founder's Fund focused on metastasis. By spending 91 cents of every dollar on research and public awareness programs, BCRF remains one of the nation's most fiscally responsible nonprofits. BCRF is the only breast cancer organization with an "A+" from CharityWatch, and has been awarded Charity Navigator's highest rating of four stars 13 times since 2002. For more information, please visit: www.bcrfcure.org.

Mini spoiler alert! The October project inside the pink box is just as awesome as always, but we should probably let you know that it is not a pink project. That's all we're saying. ;)

I can't wait to get my kit, who wants to join me?
Pin It!

Monday, September 14, 2015

Stylin' Stampin' INKspiration Sketch Challenge SSINKCC25: Joyful Season

Good morning!  Fall has come and I 'm loving the decreased humidity and cool breezes, my run was so pleasant yesterday morning.  As we start another week it's time for a sketch challenge over on the Stylin' Stampin' INKspiration blog.  I really liked the clean simple lines of this sketch and thought it would be great for showing off one of the new holiday stamp sets, Joyful Season. The images in this set are for two step stamping which makes it super easy to color in this cute little bird and other bits and pieces in the set.

I start with Cherry Cobbler cardstock for the cardbase and then added a piece of designer series paper that I had sitting on my desk (it was from a past Paper Pumpkin kit that was part of an envelope liner and I decided to trim it down so I could use some of the paper on another project.


I took a piece of Whisper White cardstock for the main image and stamped the outline of the bird using the Memento Tuxedo Black ink and then colored the inside with Cherry Cobbler ink for the body and Pumpkin Pie for the beak.  The branch was stamped in Chocolate Chip ink.  For the greeting it's from the same stamp set and stamped with Night of Navy ink on Crumb Cake cardstock and then cut out with the Big Shot and Project Life Labels and Cards Framelits before attaching it to the cardfront with dimensionals

Of course this card needed some bling so I added a couple pieces of ribbon, a piece of the new Gold 3/8" Glitter Ribbon and I colored a piece of Whisper White 3/8" Stitched Satin Ribbon with Night of Navy ink so it matched the greeting.  The final touch was to add a Metal Rimmed Pearl on top of the ribbon flags.


The images and text in this stamp set are so great, so many options!  Come check out the other design team cards for more inspiration and then play along and share what you create so we all can enjoy.

Below are easy ordering links for the products used on todays card:

Built for Free Using: My Stampin Blog


Have a great day!

Diana

Pin It!

Friday, September 11, 2015

Sketch Frenzy Friday Sketch Challenge: Witche's Night

Happy Friday!  I like these short weeks as it helps get us back into the routine and we're looking forward to a nice and relaxing weekend (what can be better) and since we'll be home I'm looking forward to some quality crafting time (yeah).  I've been having so much fun with all the great items in the new Holiday catalog, it's really reinvigorated my joy in crafting which is lots of fun.  Today I'm sharing a card using lots of Halloween products from the catalog to create my card for this weeks Sketch Frenzy Friday sketch challenge.  I have to admit, when I first saw this sketch I was a little worried that this card could get really busy but once I decided to embrace it I really had fun.

I started with Smoky Slate cardstock and used the Project Life Corner Rounder Punch on the cardbase, as well as the designer series paper I used as the background, it's from the Happy Haunting Designer Series Paper and I added a piece of coordinating DSP for the large flag.


The greeting is from the Witches' Night stamp set (this is great set that coordinates with the Witching Décor Project kit and may be order looked but it has some great large images that are so easy).  After stamping the greeting using Tuxedo Memento Black ink on Very Vanilla cardstock I cut it out with the Big Shot and Lots of Labels Framelits.  I sponged around the edge of the greeting using Tangelo Twist ink before attaching it to the cardfront.  I added a knot I tied using the Tangelo Twist 5/8" Striped Cotton Ribbon up at the top.  For the other elements, I used the Sweet Hauntings stamp set to stamp the little potion bottle and the Howl-o-ween Treat stamp set (and coordinating framelits) for the little spider.  Both of those elements were attached to the card with dimensionals.


I love all the great Halloween products in this catalog and how they work so well together and to help you make quick and easy projects that everyone will enjoy (that's what it's all about).  I'm starting to work on Halloween kits for Aidan's teachers and class this week (yes I need to do things early so I'm not as stressed) and know that I'll be using these stamps and accessories for lots of other projects, can't wait!!

Below are easy ordering links for the products used on today's card:

Built for Free Using: My Stampin Blog


Have a fabulous weekend!

Diana
Pin It!

Thursday, September 10, 2015

Stylin' Stampin' INKspiration Blog Hop: Welcoming Fall


Good morning!  It’s amazing how the start of school naturally gets us all thinking about fall, the beautiful colors, cooler weather, and of course Pumpkin Spice invasion (haha!!)  Just as we’re sad to say goodbye to summer we’re welcoming Fall with open arms.  It’s this arrival of fall that we’ve decided to focus on for this months SSINKspiration blog hop.  All the designers are excited to share some great projects to help get you in the spirit of the season change and all the upcoming holidays we have to look forward (and prepare for)!

 As you hop along, please be sure to comment and show some love on every blog! We are always excited to hear from our followers! You should have just left stop number #1 on the Stylin' Stampin' INKspiration Blog Hop - Tobe at The Craft Sea . If so, you are in the right spot. If a link doesn't work or you get off track, you will find the full blog hop lineup below.

I decided to change things up this month and not make a card (I know crazy!) and great this cute little gift bag using our Muslin Bags as the base (and the cool thing is, you could do everything I did on this bag on a card and come up with an equally stunning card. 

I started with a Muslin Bag and cut a piece of the paper backing from a DSP package (or other piece of cardboard would work, this is so your ink doesn’t bleed through your bag onto the back) and used the Dots and Stripes Decorative Mask and a Sponge Dauber and applied ink in Blackberry Bliss, Soft Suede, Tangelo Twist, and Mossy Meadow to create the patter on the bags.  Note:  you can also stamp on these bags using our inks, just make sure to have something on the inside and hold the stamp down a little longer without moving it so you get a good stamp (it’s pretty cool!!).

For the tag I started by cutting a circle out of Soft Suede cardstock using the 2” Circle Punch and then embossed it with the Big Shot and Woodgrain Embossing Folder.  For the leaves I used the new Vintage Leaves stamp set (so pretty) and coordinating Leaflets Framlits (you can get them in a bundle and save 15%) and used Blackberry Bliss, Hello Honey, and Tangelo Twist for the leaves.  The greeting is cut using the Greeting Thinlits, Big Shot, and Mossy Meadow cardstock.  I added a piece of Gold Sequin Trim (I’m becoming addicted to this stuff) and a knot tied with the Blackberry Bliss 5/8” Striped Cotton Ribbon as the final touches.  To attach the decorative piece to the bag all I did was add several strips of Fast Fuse Adhesive and attached it to the bag, awesome!!

These bags are a pretty good size and can hold either some yummy candy treats, a couple of small candles (I have some fall scented votives that would be perfect and the scent may actually come through the bag for a little hint of the fun inside).  The colors and textures on this bag are so pretty and simple to pull together.

Below are easy ordering links for the products used on today’s project:

Built for Free Using: My Stampin Blog


Make sure to check out the rest of the blog hop for lots of other great ideas.  If you click the “Next” button, you’ll go to Leanne’s site but you can also access any of the hopper’s site from the full blog list below.

http://literallymyjoy.blogspot.com/2015/09/fall-blog-hop.html
Blog Hop Participant List:

  1. Tobe at The Craft Sea 
  2. Diana at Stampin Fun with Diana
  3. Leanne at Literally My Joy
  4. Jennifer at Jenny G Paper Crafts
  5. Jenn at Happy 2 Scrap 4 Life
  6. Kim at Stamping with Kim
  7. Bree at Craft-somnia Momma

Enjoy,

Diana
Pin It!

Monday, September 7, 2015

Stylin' Stampin' INKspiration Color Challenge SSINKCC25: Lovely Amazing You

Happy Labor Day!  It's going to be a great day to relax and squeeze out those last few moments of summer, can't wait!  Of course I'm planning on a little crafting time today as well, and I started out with this months color sketch over on the Stylin' Stampin' INKspiration blog.  I have to admit, after yesterday's color sketch when I pulled up the colors for today's challenge I laughed since they were almost the same, just changed the yellow so I wanted to give you something completely different using such similar colors.

For this card I started with Hello Honey cardstock for the cardbase and matted Very Vanilla cardstock with some Chocolate Chip cardstock for a nice frame.  On the cardfront I started with the Lovely Amazing You stamp set and stamped the feather image a couple of times using the Pool Party ink  I also used the Gorgeous Grunge stamp set and stamped some of the splotches using Hello Honey Ink.

Lots of great embellishments really add some depth and texture, starting with the Hello Honey 5/8" Stitched Cotton Ribbon and I ruffled it up and then used the Handheld Stapler to add a couple of staples to make sure the ruffles stay in place and add a metallic element.  I also added some Linen Thread behind my greeting element.

For the greeting I once again used the Lovely Amazing You stamp set and stamped it with Chocolate Chip ink on Pool Party cardstock and then cut it out with the Big Shot and Circle Collection Framelits.  I created a mat using some Chocolate Chip cardstock and the 2 3/8" Scallop Circle Punch.  A few pearls were attached along the bottom of the greeting to really draw your eye to it and I used dimensionals to attach the greeting so it could stand up over the ruffled ribbon.

This stamp set was one of the last monthly photopolymer stamp sets released and it's only available while supplies last and the font on the greetings are just perfect, I'm so happy to have this set in my collection so don't miss out and order your stamp set soon.

Below are easy ordering links for the products used on today's card:

Built for Free Using: My Stampin Blog


Hope you can come and play along with our color challenge, there are so many possibilities.

Happy stamping,

Diana
Pin It!

Sunday, September 6, 2015

Kinda Eclectic Thankful Greetings

Happy Sunday!  I know Labor Day weekend is the official end of summer and it always makes me sad but I look forward to the cooler weather and pretty colors of fall, why can’t we have it all??  I’m taking a great from all the weekend fun to share the card I made using the awesome stamp set, Kinda Eclectic.  This set as some great designs that really work well together, even if I wouldn’t have thought of putting them together in the first place (does that make any sense?) 

 I started with Pool Party cardstock for the cardbase and then added a piece of Whisper White cardstock for the cardfront.  Along the bottom I stamped the little polka dots (they actually have letters printed in the dots if you closely) all along the bottom.  Next I used the big sunburst image and stamped it in the center using So Saffron ink.  Next I cut a 2” piece of Whisper White cardstock and punched on the top using the Ornate Tag Topper Punch and then stamped the sunburst again on the tag a little off center.  My plan was to line up the tag when I finished so it looks like one solid image over the two pieces of cardstock.  I stamped the greeting in Chocolate Chip ink and then stamp the larger butterfly on a scrap of Whisper White cardstock using Pool Party ink and punched it out with the Elegant Butterfly Punch.  I used a little Mono Tombo Adhesive down the center of the butterfly’s back to attach it to the tag so I could bend the wings up for dimension and then added some rhinestones for the body of the butterfly.  The final touch on the tag was a piece of Chocolate Chip ¼” Cotton Ribbon threaded through the hole.

Before attaching the tag to the cardfront I took a piece of Chocolate Chip Designer Series Paper (from the Neutrals Designer Series Paper Stack) and punched a circle with the 2” Circle Punch to go behind the tag and then loops some Silver Metallic Thread and attached it to the cardfront so it peaks out from behind the tag.  The tag was attached with dimensionals as the last step for a fun effect.

Now, my thought behind this card was it would be perfect to send to a special friend and then they could remove the tag and use it as a bookmark to get added enjoyment from the card.  I’ll admit I don’t know if someone would actually remove the tag and use it but it will be cool to find out. 

Below are easy ordering links for the products used on today’s card:

Built for Free Using: My Stampin Blog


Have an enjoyable Sunday and Labor Day!
 
Diana
Pin It!

Friday, September 4, 2015

Sketch Frenzy Friday Meets SSINK Product Focus: Spider Web Doilies and Lots of Halloween Fun!

Good morning!  Another Friday is here and it’s holiday weekend Friday, whoo hoo!  As we get ready to say good bye to summer (had a blast and can’t believe it’s over) I can tell fall is definitely on the way for this weeks Sketch Frenzy Friday sketch challenge I decided to combine it with the Stylin' Stampin' INKspiration Product Focus, the oh so cute Spider Web Doilies.  You know I love all holidays and really get into the spirit so this years Holiday Catalog has be over the edge with excitement with all the great products to help this upcoming holiday season.  When we first saw the catalog at convention and I saw the Spider Web Doilies I knew I had to have them but crazy me thought they were a Big Shot Die, in reality these are already cut out for you so they’re so easy and you can use them for so many options (hint:  flip them over and they’re white, BAM now you can use them outside of Halloween).  These doilies are going to be crazy popular so make sure when you order them to get a back up set (I did so you don’t run out!!)

I started with Tangelo Twist cardstock  for the cardbase and then added a piece of Very Vanilla cardstock that was embossed with the Big Shot and new Woodland Embossing Folder (this embossing folder has so many possibilities I took some Smoky Slate ink and a sponge and rubbed the raised parts of the tress so they look a little spooky.  Next I took a piece of Happy Haunting Designer Series Paper and matted it with Basic Gray cardstock before attaching it to the cardfront.  I cut a small square of Very Vanilla Cardstock and matted it with Basic Black cardstock for the perfect mat for my potion bottle.  The potion bottle is from the Sweet Hauntings stamp set and was stamped with black ink on Smoky Slate cardstock before cutting it out with Paper Snips and attaching it to the cardfront with dimensionals.

For the greeting element I started by making a mat piece of it using the Tangelo Twist cardstock and embossing it with the Big Shot and Chevron Embossing Folder.  The “boo” greeting is from the Boo to You Framelits and was cut out of the new Basic Black Glimmer Paper (so pretty).  I used the new Fine Tip Glue Pen to attach the greeting and it works like a charm!!  I added a couple of spiders that were stamped from the Howl-o-ween Treat stamp set (which coordinates with the Boo to You Framelits so they were super easy to cut out (and you save 15% when you buy the bundle) and used dimensionals to pop both those little suckers up.  The final element I added was the Spider Web Doily, I used just a quarter of one and once again the Fine Tip Glue Pen was perfect for attaching this to the cardfront (notice I waited to the end so I could have the web coming from the far corner of the cardbase and onto the cardfront.  The final touch was to add a few rhinestones of various sizes to the spider web for some extra texture and dimension.

This card turned out so fun, it’s busier than some I create but I love every element (but had to finally tell myself to back again and stop adding things, do you ever have that problem??) The Happy Haunting Product Suite is so fun and all the products work perfectly to help you create the perfect project, without searching for products to match and compliment, AWESOME!!!

Below are easy ordering links for the products used on today’s card:

Built for Free Using: My Stampin Blog


Have an enjoyable holiday weekend!

Diana
Pin It!

Tuesday, September 1, 2015

SSINKspiration Holiday Catalog Countdown: Sweet Hauntings


Good Afternoon!  We’re back from a wonderful vacation and successfully completed the first day of school yesterday, it’s going to be a great year in the 5th grade!  Today I’m also really excited because the 2015 Holiday Catalog was officially released this morning and oh my, I’m in love!!  My wish list is a mile long and I’ve really enjoyed the early opportunity to order and play with new catalog products that we demonstrators are offered.  Today on the Stylin’ Stampin’ INKspiration blog we’re sharing lots of great ideas using products from the Holiday catalog to help share our excitement!  Since Halloween is the first holiday that’s coming up that we’re I naturally head first and this was a card I made for a recent swap I was in and knew you would love it! 
 
I started with Rich Razzleberry cardstock for the cardbase and then added a piece of Very
Vanilla cardstock and I stamped the greeting from the Sweet Hauntings stamp set in Momento Tuxedo Black ink.  Next I added a piece of designer series paper from the Happy Hauntings Designer Series Paper Package (this paper is so fun and perfect for Halloween).  I also used one of the new Spider Web Doillies and cut it into quarters and attached it to the card front using the Fine Tip Glue Pen (this is a must have new item in the catalog, perfect for all the little greetings, embellishments, etc. that are so popular right now).

I created this cute potion bottle using the same stamp set and stamped it on Rich Razzleberry cardstock before cutting it out with Paper Snips and attaching it with dimensionals.  For a little bling I added a strip of Silver Sequin Trim along the bottom (maybe it’s some of the potion that’s spilled out of the bottle) and used the Fine Tip Glue Pen to attach the sequin trim as well.

I have to say, this card comes together really easily and uses just a little bit of several different embellishments for a really fun card, that’s not too spooky.  I’ll be making lots of other cards and treats using these products in the near future, can’t help it!!

Below are easy ordering links for the products used on today’s card:

Built for Free Using: My Stampin Blog


I hope this card has you starting to think a little about the holidays and don’t miss out, place your orders early so you have everything you need for the perfect holiday project. 

Enjoy!

Diana
Pin It!

Search This Blog