Thursday, February 14, 2013

One More Valentine Share, For the Kiddo!

Good evening!  I hope you’re having a fun day, showing all your friends and family how much you care for them today (and every day).  Valentine’s Day has a whole new meaning and freshness when you have kids.  I have so much fun making gifts for Aidan and other kids in our lives and have so much fun seeing how the kids embrace the holiday.  Aidan was up very early this morning and we had to exchange gifts first thing this morning (think of like Christmas) and was so excited about the cards and thoughts that people put into each item.  I thought I would hop back online and share with you the card and gift I made for Aidan this year.  First of all you have to know that Aidan loves glitter and believes you can never have too much (a kid after my own heart!)  So this card uses the Pool Party Coredinations cardstock and I ran it through the Big Shot with the Hexagon embossing folder (I love how you can sand this paper and see the core color of the cardstock for some extra dimension.  The scalloped heart is from the More Amore Speciality DSP and are laser cut.  I also added hearts punched from the same DSP with the small heart and large heart punches. 
I also used Red and Silver Glimmer paper and the Typeset Alphabet Bigz Die for the XOXO.  The greeting was from the valentine treat bundle and I thought it was perfect for a kid’s valentine and I used Dazzling Diamonds and a two way glue pen to add glitter round the edge of the heart.  Aidan was so excited and loved the card.
The second project I’m sharing is a little treat bucket that held all of Aidan’s Valentine’s treats.  I love to get the little pails from the Dollar Spot of my local store and while initially I would buy all the different holiday versions but now that I have so many I like to get plain ones that I can dress up as necessary so their more versatile so I got a silver pail with polka dots.  All I did was add a strip of More Amore fabric that I just tore and tied a big fluffy bow.  Nice and simple.  Aidan like it but I think he liked the Pokemon cards in the pail more than the actual pail itself.
 
Enjoy the rest of your special day! 
Diana
Pin It!

Double Easel Valentine Card, Sending Loving Thoughts

Happy Valentine’s Day!  Today I’m sharing the card I made for my hubby that was so fun to make.  So when you make cards all the time there tends to be some pressure to make each card “better” than the one before and I wanted to make something fun.  I received one of these double heart easel cards at last months Leadership Conference and it had such a WOW factor that I immediately decided that I wanted to make a version of this card for Chris.  This card comes together quite easily with the Hearts Collection framelits and the Big Shot and there are several tutorials online.  Other products I used on this card are:

Stamp Set(s):  Loving Thoughts, Heart (Single Stamp Set)

Paper:  Very Vanilla, Crumb Cake, Basic Black, Real Red, Polka Dot Parade DSP, First Edition Speciality DSP, Red Glimmer Paper, Champagne Glimmer Paper

Ink:  Versamark, Basic Black

Embellishments:  Champagne Shimmer Paint (used to make shimmer mist), Large Heart Punch, Soft Suede Taffeta Ribbon, Brights Glimmer brads, Silver Basics Designer Buttons, 1/8” Basic Black Tafetta Ribbon, Black Embossing Power, Heat Gun, Small Heart Punch

I even made a matching envelope for this card (so easy with the Simply Scored and Diagonal Scoring plate) and decorated to coordinate with the card so I can’t wait to see how Chris likes it.

I hope you have a special day and I want to let you know how much I love and appreciate each person who has touched my life.  Enjoy being showered with love by your friends and family!

Diana
Pin It!

Wednesday, February 13, 2013

Seasonal Sayings Valentine Greetings

Happy Wednesday!  I had so much fun making the projects last week for the Stylin’ Stampin’ Blog hop that featured fabric this month that I just couldn’t stop. Today I’m sharing one of the cards we made at this month’s Just Cards class that was a big hit with the ladies.  I decided you could always use another Valentine card and since I had a scrap of More Amore fabric sitting on my studio desk this card came together very easily.  I started with a cardbase of Very Vanilla and sponged around the edge with Crumb Cake ink, then added a layer of Basic Black underneath my Real Red main layer.  To this piece I stamped with the Seasonal Sayings stamp set (another great stamp set that carried over from the Holiday catalog) which Basic Black ink.  Then I ran a piece of Sticky Strip across the cardstock and just ruffled the fabric all along the front of the card and wrapped the edges around the back. 
 
The heart element was created with taking a piece of Basic Black cardstock and running it through the Big Shot with the Hearts a Flutter framelit for the scalloped heart and then added a heart punched with the Large Heart Punch and Silver Glimmer paper.  The small heart was punched with First Edition Speciality DSP and the Small Heart punch.
 
This card was definetely a hit in class and I reminded the ladies that while I don’t really sew I love the Stampin’ Up! fabric not only because of the fabulous designs but I like to use it like ribbon and it’s very economical considering that you get three large fat quarters in each package of fabric for only $9.95 and I just tear off strips to use like ribbon.  You should definitely check it out!
Enjoy,
Diana
Pin It!

Tuesday, February 12, 2013

Recycled Valentine Treat Tin

Good evening!  This is one of my busiest weeks of the year, not only do we have Valentine’s Day, which I love but the day after is my son, Aidan’s birthday so I’m busy trying to wrap up projects, gifts, etc. and I’m a little behind.  Tonight I thought I would share a tin I recycled to create this fun Valentine gift.  One of my co-workers is a huge tea drinker and the only tea he drinks comes in the great metal tins and recently I found a stash of several dozen empty tins in his office (apparently he has an equally large stash at home so if you’re local and would like some of these tins let me know and I can probably hook you up).  Anyway, I decided to decorate this tin for Valentine’s day.  I wrapped the tin with Pool Party Cardstock and More Amore Specialty Designer Series paper.  Next I took a piece of cotton ribbon (loved that this ribbon carried over so it’s still available) and I cut off both edges and tore it off so I had some distressed edges and layered this ribbon with the Real Red 1/8” Taffeta Ribbon and tied a knot.  The tag is one of the tags I made in MDS2 with the More Amore digital kit and I just added a red glimmer heart punched out with the small heart punch. 

For the top of the tin I wrapped around the edge with Primrose Petals Stitched Satin Ribbon and added a piece of Basic Gray cardstock that was embossed with the Big Shot and the Chevron embossing folder.  The rest of the decoration is one of the Real Red laser cut hearts from the More Amore Specialty DSP, layered with a large heart punched with the DSP and a Raspberry Ripple cardstock and the Scalloped Heart of Hearts Embosslit.  The final embellishment was made by punching two scallop circles with the new 7/8” scallop circle punch, crumpled them and sponged with Crumb Cake ink and I added a Primrose Petal Dalia for the center.
This tin is so cute and is full of special treats, which I can’t share so I don’t spoil the surprise for my special friend.  There’s still time to make a special gift or card for your loved ones to let them know how much you love them, I can help with any details you need, just let me know.
Enjoy,
Diana
Pin It!

Thursday, February 7, 2013

Stylin' Stampin' Blog Hop: Fabric Madness!!


Good morning and welcome to another additional of Stylin’ Stampin’ Squad Blog Hop.  This month we’re featuring fun projects using Stampin’ Up! fabric.  Fabric is a great way to add texture and dimension to a project and even if you’re not a sewer (like me) you’ll still enjoy crafting with it and I love all the great patterns SU offers.  You may be joining me from Bree’s blog, doesn’t she do fabulous work?  If you’re just starting hear, don’t fear you can continue around and not miss any of the fabulous projects. 
The first project I’m sharing with you is a card that uses two different fabric patterns from the More Amore fabric package in the Spring catalog. I started by using my Big Shot to cut out the large scalloped heart with the Hearts Collection framelits and used the heart fabric.  I will warn you when you’re using the fabric you’re going to have to add an extra shim or two to cut through the fabric.  Since this heart is so big I ended up making a 6x6 card by taking a 6x12 piece of Very Vanilla cardstock and folding it in half.  I sponged around the edge with Crumb Cake ink to soften the edges (I love doing this and added this to every element on this card).  Next I took a piece of Pool Party Coredinations cardstock and ran it through the Big Shot with the Chevron embossing folder and lightly sanded to highlight the pattern.  Next I added a strip of fabric with the small print and hearts and just used sticky strip down the edge and then ruffled the fabric as I go.  I just like to tear the fabric when I’m using it on cards so it has frayed edges so I don’t have to worry about cutting straight and it adds texture.  Next I added the fabric heart and then layered it with a heart cut with the same framelits and First Edition Specialty DSP (crumpled the heart and distressed it with Crumb Cake ink and sponged with Primrose Petals ink around the edges.  I also spritzed the heart with Champagne shimmer mist I made so it lightly sparkles (hard to tell from the picture).  Next I cut a Crumb Cake heart out with the Scalloped Heart of Hearts embosslit. 

The greeting is from the newly released Best of Love stamp set, it’s so fun seeing what stamp images SU chooses to pull from the archives for us to use again and was stamped with Real Red ink on Primrose petals cardstock.  I was able to punch the greeting out with the Full Heart punch and used dimensionals to make the greeting pop.

Now this card is way too big to fit our standard envelopes so I made one to fit using the More Amore Speciality DSP, the Simply Scored, and the Diagonal Scoring Plate (so easy!).  To decorate the envelope I added another strip of the More Amore Fabric as well as two of the scallop laser cut hearts from the DSP package and cut out coordinating hearts with the hearts framelits and DSP. 

This card is so lovely I can’t wait to give it for valentine’s, do you think it’s a little too girly for my hubby???

I do have one more project to share with you, I decided to take two of the large scalloped hearts cut with the same fabric and made a little pillow.  I added a lot of the same elements so that it coordinates with the card.  The key was to fully decorate the top heart before sewing and stuffing it so that the brads, etc. could all be pushed through the fabric so they’ll stay in place.  I added another heart with the First Edition DSP that was distressed the same way as the card and added a piece of Victorian Trim and Primrose Petals Stitched Satin ribbon that were each ruffled.  Next I added a bow made with the Pool Party satin ribbon (that’s free during SAB) with an Antique Brad in the center. 


In the top corner I added two tickets from the That’s the Ticket stamp set that were punched out with the Ticket Duo punch (each ticket was also sponged with Crumb Cake ink) and attached with the heart with a 3/16” Metallic Brad.  The final touch was to add a Pool Party Button (also free during SAB, along with the ribbon) and tied a bow with linen thread before attaching it with a glue dot.

This pillow came out just as I pictured, nice and soft and very girly, love it!!!  Hope you enjoyed this month’s project and make sure to check out all the rest of the fabulously creative people on the hop, you’ll have lots of ideas on how to use fabric on your next project.  Click the link below to see Darcy's projects.

Blog Hop Participants:
  1. Shellie G. of Craft Smashup
  2. Annie L. of Love Me Cards
  3. Nancy B. of Lady Stamps-A-Lot
  4. Rose C. of Stamp with Rose
  5. Tonya B. of Stampin' with Tonya
  6. Dawn S. of Dawn's Creative Chalet
  7. Pamela W. of Stinky Tofu
  8. Kim R. of Stamping with Kim
  9. Justin K of JK Cards
  10. Heidi B of Stuck on Stampin'
  11. Jennifer B of NW Stamper
  12. Bree of Craft-somnia
  13. Diana E of Stampin' Fun with Diana
  14. Darcy J of Dj's Stampin Place

Enjoy!

Diana 


Pin It!

Monday, February 4, 2013

Patterned Occasions, Get Well Greetings

Good morning friends!  Well the football season is officially over wow was that an interesting game last night, what fun!  Today I'm sharing another quick and easy card made with the Patterned Occasions stamp set. I have to admit that I overlooked this stamp set when the Sale-a-bration brochure was first released but it has quickly become one of my favorite sets since it has so many sayings and cute images, plus it's FREE and who doesn't like that?   For this card I started with a Crumb Cake card base and ran a piece of Basic Black cardstock through the Big Shot with the Chevron embossing folder before adding some 1/4" Real Red Stitched Grosgrain Ribbon.  I used Stampin' Write markers to color in the bandage and greeting on the stamp set and then used another marker to color in the heart.  This piece was punched out with the 1 3/4" circle punch and then layered on a piece of Real Red cardstock that was cut out with the Window Frames framelits and embossed with the Perfect Polka Dot embossing folder and then a piece of First Edition Speciality DSP that was cut out with the same framelits, crumpled and then sponged with Crumb Cake ink. 
 
This is such a cute card, it would certainly brighten up anyone's day who's a little under the weather.  You'll definitely want to make sure to add this stamp set to your collection so make sure to grab it before SAB ends.
 
Enjoy,
 
Diana

Pin It!

Friday, February 1, 2013

Easy MDS2 Valentine Treats

Happy Friday, TGIF!!!!  I'm looking forward to a great weekend, I'm taking a photography class and can't wait to learn some new things to do with my camera but I'm kicking the weekend off tonight with an Introduction to My Digital Studio 2 class and I can't wait to share some of the fabulous new features of this program.  It really makes gift giving a breeze.  I love to give treats for Valentine's and have been working to get them all done early so I wanted to make something simple for Aidan's teachers so I used the More Amore Ensemble and took the little card elements and added some heart images and stamped greetings to make these cute little bag toppers (I love the ability to color and crop stamps in MDS2 so you can make just what you need).  Then all I did was attach the pieces to cardstock and stapled them to cello bags that I filled with different candies!


Who wouldn't love to get these little treats?

There's still time to make your valentine projects and with MDS2 it's a snap.

Enjoy,

Diana
Pin It!

Thursday, January 31, 2013

$1 One Dollar Digital Content Discs While Supplies Last – My Digital Studio

Digital Content Discs for Just $1 – One Dollar – Yes that’s right. But only while supplies last so hurry.  This amazing clearance won’t last long. SHOP HERE


Now might be the perfect time to try the FREE 30 Trial of My Digital Studio 2 – Download it and let me teach you = FREE

Avant-Garde Collection DVD (item 125841)


Cheerful Treats Digital Content CD (item 124237)


Express Booster Pack DVD (item 124889)


His & Hers Collection DVD (item 125842)


October, December, Whenever Collection DVD (item 124485)


Simple Snapshots Content CD (item 127185)


Sweet Retreat Collection DVD (item 125840)


Don't miss out on this awesome deal to add to your MDS content collection, the possibilities are endless!
Pin It!

Wednesday, January 30, 2013

Sweetheart Topiary, Simple Home Decor

Good morning all!  So I love to decorate for the holidays and put up my Valentine decorations while I'm taking down the Christmas decorations.  I also like to create at least one new thing to add to my decorations each year.  Last year Robin Merriman shared this fabulous topiary with sweetheart candies (see Robin's creation HERE) and I knew I wanted to make one as well, unfortunately I ran out of time last year so I bought the candies on clearance last year and have had it on my list of things to do since.  So during my Christmas vacation I bought the styrofoam cone and started planning my project.  This is so easy to put together, it just takes some time (perfect if you want to watch a great movie).  I used my hot glue gun to glue the hearts in place (I was amazed at how heavy the cone became once it was covered in hearts).   To decorate the top I made a huge bow with Wisteria Wonder Ruffled Ribbon and added a small heart punched out of silver glimmer paper to the center. 
 
Aidan loved the cone without any decorations (he said it was "perfect" love him!) but I wanted to add a little so I stamped some hearts from the Hearts a Flutter stamp set and cut them out with the matching framelits and glued them on the cone (this is a great way to hide any imperfections in the candy gluing) along with more silver and red glimmer hearts.  This cone is so cute and looks perfect on the mantel with the lights and other decorations.
Enjoy,
 
Diana

Pin It!

Monday, January 28, 2013

Fun and Easy Valentine Treats

I'm excited to share another project I completed this weekend for Aidan's school class.  I love making little treats for the kids for every holiday and am not looking forward to the day Aidan no longer wants to share these with his friends.  This project used the Happy Valentine Heart single stamp set bundle Stampin' Up! offered earlier this month along with the 1x8 cello bags.  I used both Valentine's M&M's and Sweettarts for the candy and just stamped the heart, punched it out with the large heart punch and then tied them to the bags.  I used Real Red 3/8" taffeta ribbon (retired) for the bow and Whisper White baker's twine to tie the heart to the bow.  The final touch was a rhinestone for a little bling. 
 
These turned out so cute and was super easy to make a 27 of them in no time.  I also love having this project done early since I have lots of other projects I want to complete.
 
Enjoy!
 
Diana

Pin It!

Sunday, January 27, 2013

Fab Friday Sketch Challenge: Oh, Hello

Good evening friends!  What a great weekend, I had a last minute event cancellation which means we had a completely free weekend, a rarity with us so we were able to work on some projects, relax, and I even got to spend several uninterrupted hours in the studio this afternoon and had fun working on several fun projects.  Today I'm sharing the card I made for this weeks Fab Friday Sketch Challenge.  I was so excited when I saw this color challenge and immediately started thinking about valentine's, then I decided to step out of the box and try something different and since I had the Oh, Hello stamp set sitting on my desk just waiting to be inked up things quickly came together.  I started with a Crumb Cake cardbase and stamped the flag image along the border in Crumb Cake (definitely need to use the stamp-a-ma-jig to get it lined up).  Next I stamped the oval chevron image in Pool Party ink on Very Vanilla cardstock and the greeting is stamped with Cherry Cobbler.  Since my new oval framelits are in my order to be delivered this week I used my Paper Snips to trim around the oval.  I matted the oval on a piece of Pink Pirouette cardstock that I cut out with the Big Shot and Labels Collection Framelits before embossing it with the Lacy Brocade embossing folder.  The sponged around both layers with Crumb Cake ink.

The flower was colored with Stampin' Write markers directly on the rubber before stamping and then I cut it out with Paper Snips.  It's hard to tell from the picture but I also paper pierced around the label with the paper piercing template (love these!)  The final touch was to add small pieces of the Victoria lace trim and Pool Party SAB ribbon as little flag tails.

This card is so delicate, springy, and fun, I love it!  Make sure to stock up on all your favorite new items during SAB so you can earn Sale-a-bration items for FREE!

Have a great week,

Diana
Pin It!

Friday, January 25, 2013

Patterned Occasions Make Quick and Easy Cards

Good morning friends, we've reached other weekend, yeah!  It's been crazy this week, Chris was out of town so Aidan and I have been on the go and while I've been working in the studio I haven't been able to share any projects with you, so this morning I'm sharing a fun and cute card I made with one of the FREE Sale-a-bration stamp sets.  Patterned Occasions is a fun set with lots of cute images, perfect for any occasion, plus they fit into several of our punches which made layering a breeze. 
 
This card has a card base of Tangerine Tango and I took a piece of Whisper White cardstock and ran it through the Big Shot with the Chevron embossing folder (one of my favorites).  The patterned paper is from the Sycamore Street DSP (also free with a $50 order) and matches the color of denim.  I also added a piece of Tangerine Tango stiched ribbon (yep, you guessed it, another FREE sale-a-bration item, there are so many fun items to choose from).  The stamped image was inked with Stampin' Write markers and punched out with the 1 3/4" circle punch and matted with a piece of Pool Party cardstock punched with the Scallop Circle Punch.  I used the white gel pen to add little dots in each of scallops for a little extra detail and attached the whole thing to the card with dimensionals, so fun!
 
This card is so cute and cheery so it will definately brighten someone's day.  I hope you enjoy and please let me know if you want to place an order to earn any of these free items, this is a perfect time to stock up on all the staples for your studio or puchase those items that have been on your wish list, there's no limit to the amount of free items you can earn.
 
Enjoy and have a nice weekend,
 
Diana
Pin It!

Tuesday, January 22, 2013

Sale-a-Bration Starts Today, Join Today and Save Even More!

Do You Love a GREAT DEAL? Well how about this one:


Did you know that beginning today (January 22nd) you can select $156.50 in Stampin’ UP! product for just $99 (no shipping either!).

JOIN THE FUN – Instant gratification HERE

Did you know you can select any of the following as part of that $156.50
1. Dude, You’re Welcome Stamp Kit
2. Single Stamps – 10 new ones unveiled
3. 25th Best of Stamp set – Birthdays
4. Anything except hostess items from the 2013 Spring catalog (Yes you can include bundles!!!)
5. Anything except hostess items from the Big 2012/13 Catalog

SO WHAT’s the catch??

TRUTHFULLY??? Nothing – There is not obligation when you join Stampin’ UP! just lots of opportunities.

Did you know ALL new Demonstrators enjoy

1. 30% discount – instant savings on their first order
2. 20% savings on all future orders
3. Opportunity to earn FREE stamps, product gift certificates and cash
4. Opportunity to earn Rising Star
5. Two FREE months of a web and blog
6. Opportunity to do as little or much as they want based on goals, desires, and what benefits entice you.
7. Opportunity to just walk away

However most people find the benefits worth sticking around for.

Did you know that as a Demonstrator you can enjoy

1. A chance to earn hostess benefits on personal purchases
2. Being part of a company where you own purchases count for incentives, titles, overrides and more
3. Being on board for our 25th anniversary
4. Knowing about specials before the public
5. Preordering product before the public
6. Access to Stampin’ Connection – our online demonstrator only community with over 250,000 samples
7. Access to the SU website (demonstrator only side)
8. Opportunity to attend Convention – think amazing inspiring weekend – this year our 25th Anniversary party
9. Earning an income doing what you love
10. Enjoying tax benefits on your crafting supplies
11. Opportunity to earn incentives
12. Opportunity to earn new 2013 stamps and product during Sale-a-bration
13. Opportunity to extend amazing deals to your family & friends

ANYONE Can join – there is no experience required just the desire to enjoy a great deal.

Previous demonstrator???

1. If it has been 90 days or more since you dropped you can rejoin under anyone you choose.

2. Regardless of how long you have been out – if the person who originally sponsored you is no longer a demonstrator you are free to join under anyone you choose.

I love what I do and have been doing it for 5 years! I would love to help you enjoy Stamping UP! benefits that meet your needs, priorities and desires.

I have a great welcome/get started packet for all demonstrators regardless of why you are joining.

YOU CAN JOIN IMMEDIATELY ONLINE – Click HERE

Please let me know if you have any questions before you take advantage of this fabulous deal – just ask away!

cdeichfeld@msn.com or (703) 403-8244

Here is a Reminder of the Current Specials and New Products that you can choose to add to your custom kit.
Pin It!

The Largest Sale of the Year Starts Today, Sale-a-Bration 2013 is Here!


I'm so excited Stampin' Up's yearly Sale-a-Bration sale has started today, whoo hoo!  Starting today, through March 22 you can pick out a FREE item for every $50 you spend from a specially deisgned selection of stamps, paper, accessories, and digitial content, there's no limit to the amount of free items you can receive during this sale. 

This is a great time to purchase thos items that have been on your wish list and stock up for your upcoming projects.

Here's a link to the exclusive SAB brochure, HERE.

Plus you can year additional items for FREE by asking your friends to join you for a party, plus they can receive free items as well, AWESOME!  Please contact me soon to schedule a personalized party for you and your friends.

I thought I would share a card I made recently with three of the free SAB items, Vintage Verses Stamp Set, Sycamore Street Designer Series Paper, and Sycamore Street Ribbon & Button Pack, so fun!

Pin It!

Thursday, January 17, 2013

The Party Has Started....Best of Stamp Sets Released

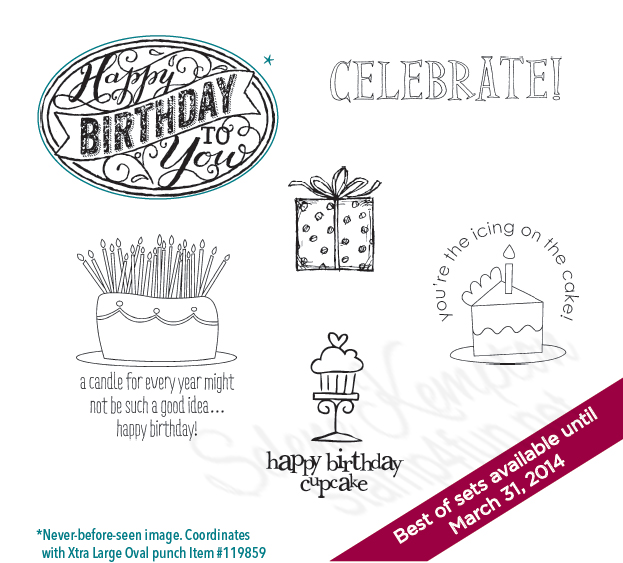
As part of Stampin' Up!s 25-year anniversary celebration, we're bringing back some of our favorite stamp images from the last quarter century and combining them into 12 sets, which will release-one set per month-during 2013. Even better, along with some great classic images, each "Best of" set will also include a never-before-seen image!

All Best of stamp sets will include 3-5 images, including a never-before seen image, and will be priced at $14.95. While one Best of stamp set will be releaed per month (with a new theme each month), all of the Best of sets will be available until March 31, 2014.   All Best of stamp sets are available in Clear-Mount only.

As a special incentive to collect the Best of stamps, starting in February we're including a 25-year proof of purchase sticker with every Best of set and you can download a collectors card. Collect six stickers, and send it in to redeem a FREE set of your choice valued up to $14.95! Free sets must be redeemed no later than April 30, 2014. So shall we see January's stamp set, Best of Birthdays?


These stamps are so cute! Don't forget to download your collectors card and save your proof of purchase stickes and you'll be on your way to earning a stamp set of your choice free (retail value $14.95 or less).

Let me know if you would like to order this set, or go on my online store anytime.
Pin It!

Wednesday, January 16, 2013

January Just Cards Class

Good evening!  I wanted to pop in to share with you the fabulous projects we'll be making at Sunday's Just Cards class.  There are so many fabulous new products in the spring catalog I can't wait to share them with you.  There's still time to RSVP and reserve your spot so don't miss out!


Hope to see you Sunday!
 
Diana
Pin It!

Monday, January 14, 2013

Your Paper Pumpkin Has Arrived!


Sweep away the mundane-your creativity carriage awaits!

I'm Paper Pumpkin . . .

I come to your door each month (a fully decked-out creativity carriage). I'll help you to escape your life with some paper fun.

I come in a sweet box, but you'll really love what you find on the inside:

* All the stamps, ink, paper, and accessories to create pinable projects. Create stuff like cards, journals, décor, and more!

Paper Pumpkin by Stampin' Up! is a new monthly kit program that anyone (even you) can enjoy!
It's so easy to get started. Simply sign up for the program starting Monday, January 14 by visiting www.mypaperpumpkin.com and click Get it. Every month a new, surprise project kit arrives at your doorstep. Just think of the anticipation of creating a fun project to pin, showoff, and share with your friends and family-every month!

Of course, you'll want to know more. So here's the nitty gritty:
•Each month we send you a unique, surprise kit with a project-cards, journals, décor, and more! (We've even color-coordinated, measured, and cut everything for you!)

•Each kit includes stamps, ink, paper, and accessories-everything but adhesive.

•Each kit gives you a 30-minute creativity escape.

•We will ship your Paper Pumpkin on or around the 15th of the month.

•You need to sign up for a kit by the 10th of the month to get that month's kit. If you sign up on the 11th of the month, your first kit will come the next month. (Let's say you sign up on May 10th, we'll send your kit around May 15th. If you sign up on May 11th, we'll send your first kit around June 15th.)

•A Paper Pumpkin membership is $19.95 per month (and shipping is included!)
•There's no commitment, you can cancel your monthly Paper Pumpkin at anytime. You can also skip a month if you want.

•Starting in early March, we'll offer a Try-It kit if you'd like to try Paper Pumpkin for one month.

A Free Gift in Your Very First Kit

The Welcome Kit is the very first Paper Pumpkin you will receive in your first month of membership. The Welcome Kit includes a free gift-a clear acrylic block!
This is a great program to help provide you a creative project each month, with little work on your part.  Get a group of friends together for a monthly Girls Night where you call create your Paper Pumpkin projects together and have fun!

Make sure to contact me if you have any questions!

Thanks,

Diana
Pin It!

Sunday, January 13, 2013

Easy Events Valentine Swap

Happy Sunday friends!  I'm back from Orlando and while I had a great time in Orlando and learned so much I'm so happy to be home and spending time with my family.  I have one more swap card to share with you from this weeks Leadership Conference.  This is a card I made for an organized swap that I've been in for several events and the ladies are fabulous talents and make great cards.  I decided to use the Easy Events stamp set which is a very versatile stamp set for any occasion and is updated with lots of products from the new Spring catalog.  The cardbase is Pool Party and I embossed with the Perfect Polka dots embossing folder and Big Shot.  Next I cut a heart, out of Real Red Core'dination cardstock, with the Hearts Collection Framelit, embossed it with the Hexagon embossing folder and then sanded it.  I cut out some hexagons out of the More Amore Speciality DSP.  I also added a strip of DSP from the same paper pack (since it's distressed around the edge of the 12x12 piece of paper I sponged around the other edges with Primrose Petals ink so it was uniform and matted that on a piece of Sahara Sand cardstock that I punched with the Scallop Border punch.
 
For the main stamped image I stamped it in Basic Black in on Very Vanilla cardstock and sponged around the edges with Sahara Sand ink.  I used a blender pen and classic ink pads to color in the image.  To dress things up I added little tags of Primrose Petals Stiched Satin and Victorian Lace ribbon and I used dimensionals to attach the greeting to the card due to all the ribbon and heart layers.
 
I love how this card turned out and so did my swap ladies.  I'm still working on valentine's and may be having to make more of these, we'll see.
 
Happy Sunday,
 
Diana
Pin It!

Saturday, January 12, 2013

Vintage Hearts Send Loving Greetings

I'm back and I have to say I'm having an absolutely amazing time!  Last night was the pajama party and it was so fun hanging out with the ladies in our pj's and partying the night away.  I'm back with another card I made for a swap.  This was for an organized valentine swap and I definitely wanted something soft and girly.  I embossed the Crumb cake layer with the Lacy Brocade embossing folder and then used a sponge dauber to add Whisper White craft ink to help make the embossed image "pop".  The ribbon flag is this fabulous new 1 1/4" two-toned pink ribbon and I used a strip of sticky strip to help hold the pleats.  Next I cut out hearts with the Hearts collection framelits and crumpled up the black heart and then spritzed it with the champagne shimmer mist I made and crumbled up the heart cut with the First edition DSP and then sponged it with Crumb Cake ink.  The pink heart was cut and embossed from the scalloped heart embosslit and I sponged on Rose Red ink.  The final touch was to add the greeting from the That's the Ticket stamp set and I heat embossed it with black embossing power, Versamark, and the heat gun.  The card was assembled with a ton of dimensionals so it has lots of texture and dimension.
 
This was the second design for this card swap and I have to admit I LOVE IT!  We'll actually be making this card at this months Just Cards class so you won't want to miss out.
 
I'm heading home today and while I'm having a great time I can't wait to get home and see my boys, miss them a ton.
 
Enjoy,
 
Diana
Pin It!

Friday, January 11, 2013

A Sale-a-bration Sneak Peak

Good morning friends!  I'm back and am loving the warm weather, fabulous.  I'm back to share another card I created to swap, this one is a sneak peak from this years Sale-a-bration stamp sets. This card also uses my current favorite item from the Spring catalog, the hexagon embossing folder, love this shape!  The stamped images are from the Feeling Sentimental stamp set that you can earn for FREE with a $50 order in less than two weeks.  What's even better, the designer series paper is Sycamore Street and the ribbon is from the Sycamore Street ribbon and button bundle.  Don't recognize these accessories, well they're sale-a-bration items as well, which means you can get them for FREE, how awesome is that!  You are not going to want to miss out on these items the colors are so bright and cheery, definitely my style!
 
I hope you enjoy and start working on your wish list so you can earn all the fabulous, exclusive items once Sale-a-bration starts.  If you want to get even more for free?  Contact me to schedule your own provide party with friends and you and your friends can get FREE products, it's almost like Christmas hasn't ended.
 
Enjoy,
 
Diana
Pin It!

Search This Blog