Monday, September 30, 2013

Fab Friday Sketch Challenge: Full of Halloween Fun

Good morning!  What a fabulous weekend.  We got back from our cruise yesterday and had so much fun, it was great to rest and relax and just enjoy time as a family.  We love Disney cruises and would highly recommend it.  I have lots of pictures and adventures to share but we have to get back into the routine.  Today I'm sharing my card for this weeks Fab Friday sketch challenge.  This was a nice simple challenge so it really gives you some creative flexibility.  I have Halloween on my mind this week so I decided to use this challenge to make a fun-filled Halloween card.  The cardbase is Pumpkin Pie and I added a piece of Witches Brew Designer series paper.  For three of the four elements I used the Label Bracket Punch to punch out three different patterns from the same package of DSP.  I added different stamped images from the Halloween Hello stamp set as fun elements on each of the panels.  The fourth panel uses the Tags 4 You stamp set and was punched out with the same punch, attached with dimensionals and I added rhinestones for accents.
 
The final touch was to add a strip along the bottom so I took a piece of Very Vanilla cardstock and stamped the candy corn image from the Halloween Hello stamp set and colored it in with Pumpkin Pie and Summer Starfruit.  The last touch was to add a piece of Summer Starfruit Stitched Satin Ribbon.
This card is so fun and festive, it would sure to make anyone get into the Halloween spirit.  I love to send Halloween cards to friends and family since it's not a huge card sending occasion so it's more of a surprise.  You should give it a try and brighten someones day when they receive a special card you stamped, wrote in, and mailed (instant happiness for you and the receiver).
 
Take care,
 
Diana


Pin It!

Friday, September 27, 2013

Spread the Joy and Lots of Fall Fun!

Happy Friday friends!  I hope you've had an enjoyable week.  As you're reading this our cruise ship has docked in Nassau and we're enjoying a day in the sun in the Bahamas, so relaxing.  As you may know, Stampin' Up! announced a new contest where you can design images and submit them and if selected your images will be made into an actual stamp set and offered for sale (how cool is that?)  The first contest was for entries by Stampin' Up! employees and Emily Montoya's submission was selected as a winner and became the Spread the Joy stamp set that was released for sale in July.  Unfortunately since this stamp set isn't in one of the catalog's it's easy to overlook it but it has some absolutely wonderful images that are very fresh.  So I decided so  show you one of the great images from this set.
 
This card came together came together easily and starts with a Sahara Sand cardbase.  I added a layer of Chocolate Chip cardstock and I embossed the top of it with the Big Shot and the Pretty Print Embossing Folder.  I added a layer of Sweater Weather Designer Series Paper.  I've been working on another project using the Tasteful Tablescape kit so I had all the elements out on my desk and thought that this strip of birch paper ribbon and ruffled it up nice.  Next I added some Linen Thread and tied on a Pumpkin Pie button.  The greeting is from the Spread the Joy stamp set and was stamped in Chocolate Chip ink and matted on a piece of Pumpkin Pie cardstock.
 
This card is full of texture and dimension, which is so fun.  I love each element and they work so well together. 
 
I hope you have a wonderful weekend and are able to spend some time relaxing and creating.
 
Diana

Pin It!

Wednesday, September 25, 2013

New Halloween Photopolymer Stamp Set - Just Released in Time for All Your Crafting Needs


Go ahead and say, "Bite me!" all you want-our newest photopolymer stamp set gives you permission. With creepy splotches, spiders, and webs, our Bite Me set will help you go all out on Halloween projects or party favors.

Bite Me Photopolymer Stamp Set
Item Number:  134622
 
Price: $13.95 US
Bite Me Photopolymer Stamp Set
We recommend clear block sizes A, G, H, and E (not included in the set).

Our photopolymer stamps offer a versatile all-clear stamping option. You’ll find that our photopolymer is top-quality and gives a perfectly stamped image every time. The stamps stick amazingly well to our clear blocks and are easy to place just where you want them. And best of all, you get to enjoy tons of images for a great price!
 
You still have time to order this set to complete your Halloween treat and gift projects, you can order it directly from my STORE.
Pin It!

Tuesday, September 24, 2013

Stampin' Stylin' INKspiration Blog: Special Season Christmas Card


Happy Tuesday!  I don't know about you but I have so many things on my To Do list and projects I want to make that I need to work ahead of the holidays, for example, I'm wrapping up all my Halloween gift projects and our family Christmas Cards are all made (minus the family picture).  This allows me time to work on other projects and create fun and fabulous classes to help inspire you.  As a result I tend to work way ahead of the current season so today's topic on the Stampin' Stylin' INKspiration Blog, Christmas Cards, is perfect timing.

As soon as I saw the Special Season stamp set in the Holiday catalog I knew it would make absolutely beautiful card without a lot of effort.  I used the Winter Frost Speciality Designer Series Paper for the colors of this card and started with a Coastal Cabana cardbase.  Next I added a layer of the DSP.  The main focal image is from the Special Season stamp set and was stamped in Smoky Slate ink and is matted with a piece of Island Indigo Cardstock, and then a layer of Brushed Silver Cardstock.  I used dimensionals to attached the entire stamped image stack for some added pop.  The greeting is from the same stamp set and is stamped in Island Indigo ink and then I cut around the edge for a nice delicate effect.  The final touch was to add a small bow tied with the Bermuda Bay 1/8" Taffeta Ribbon.
 
This card is so soft and beautiful, I love it and it's easily something that you could make a lot of which is perfect for Christmas cards.  I hope you enjoy and please, go over to the Stampin' Stylin' INKspiration blog and check out some other great, beautiful Christmas cards for inspiration.
 
Enjoy,
 
Diana

Pin It!

Monday, September 23, 2013

Hand Stamped Sentiments Color Challenge: Gently Falling Meets Really Good Greetings

Good morning and welcome to the start of another week.  This is a really exciting week for us as we're going on a short vacation at the end of the week and we haven't told Aidan about it so it's going to be a huge surprise and it's driving me nuts not telling him.  Thankfully I've had some time in the studio so I still have lots of great projects to share so never fear.  Today I'm sharing my card for this weeks  Hand Stamped Sentiments Color challenge.  This is a fun color combination and when I first saw it I immediately thought of Christmas, but then I decided to do something different.  I used the Gently Falling stamp set for the three pieces of Very Vanilla and I stamped all the leaves (with the two step stamps it makes it a breeze to color in) and then cut them apart after stamping so they flow.  I matted these pieces on a layer of Gumball Green cardstock and added them to the Baked Brown Sugar cardbase.

I added a piece of Raspberry Ripple Stitched Satin Ribbon for texture.  The greeting is from the Really Good Greetings stamp set and I used the Stampin' Write Markers to color directly on the stamp to add multiple colors at once (I have to admit this was one of the first techniques I learned with stamping and it instantly WOW'd me, and still does).  I used the Big Shot and the Oval Collection Framelits to cut out the greeting, and sponged around the edge with Crumb Cake ink before attaching it to the card with dimensionals.  The final touch was to add a few half pearls, because everyone loves a little bling!
 
This card turned out so great and you could easily change the greeting for anything, birthdays, thank you, thanksgiving, etc, and keep everything else in the card the same, and changing up colors offers even more possibilities.  I hope you enjoyed and make sure to check out some of the other great creations for the challenge, such great ideas.
 
Happy Stamping,
 
Diana

Pin It!

Friday, September 20, 2013

Paper Player's Sketch Challenge: Perfectly Grungey Halloween Wishes

Good morning!  Today I'm looking forward to the start of another action packed weekend after finishing up the work week in a few hours.  Today's card is for this weeks Paper Player's Sketch challenge and is all about kid's, which I love!  Since I've been hard at work on Halloween projects for the past couple of weeks I immediately thought of the cute little pumpkin from the Perfectly You hostess stamp set and knew it would be perfect for my little pumpkin, or yours!  The cardbase is Basic Gray and I added a layer of Very Vanilla Cardstock.  At the bottom I added a strip of Witches Brew designer series paper along with the coordinating Witches Brew Washi Tape (this stuff is so easy to use and addictive).  The greeting is from the Perfectly You hostess set and was stamped in Pumpkin Pie ink and punched out with the Hexagon Punch.  I decided to mat the hexagon with a piece of Witches Brew DSP that was punched out with the Label Bracket Punch.  I used dimensionals on both the hexagon and bracket piece so it really pops.

For the top corner I decided to use my go to stamp set, Gorgeous Grunge and stamped the images in Pumpkin Pie, Summer Starfruit, and Smoky Slate.  I had to use another piece of Washi tape to help balance the project and finished it off with a few randomly placed rhinestones, love the sparkle (Aidan loves to use rhinestones and glitter on his projects so I had to include them).
This card is really clean and simple and so fun, all the little ghosts and pumpkins will love it!  I've noticed that I haven't used my Big Shot in the past several projects I've worked on which is so rare, but it's fun to change things up and show you can make cute and fun projects with just a few simple items.
 
Enjoy and have a wonderful weekend.
 
Diana


Pin It!

Thursday, September 19, 2013

Two New Photopolymer Stamp Sets Now Available!


Stampin' Up! has just released two new adorable designs in our exclusive, trendy new photopolymer stamp collection! Check them out:
Flyer_photopolymer_Map_Sept1713_NA

Flyer_photopolymer_Greetings_Sept1713_NA

Check them out, plus all the other great photopolymer options now available, on my shopping website!   These sets are completely clear and so easy to work with.

Enjoy!
Pin It!

Wednesday, September 18, 2013

Fab Friday Color Challenge: Grateful Sympathy Greetings

Welcome back to the middle of the week!  I have to tell you, with the cooler weather I'm really embracing the fall feelings and loving all the signs of fall.  I decided to embrace fall, with a twist for this weeks Fab Friday Color Challenge.  I started by making this card a Thanksgiving card and pulled out my current fall favorite Truly Grateful stamp set to stamp the wood grain chevron background image and the acorn that I cut out with Paper Snips.  But since I've made a few Thanksgiving cards already I decided to change things up and make this a sympathy card and used the Best of Greetings stamp set for the perfect greeting.  Of course I couldn't not use the awesome Gorgeous Grunge stamp set (have I made you see how amazing this set is with all my recent projects???) to create the Tangerine Tango Lines and Chocolate Chip splotches.

I added a piece of Sweater Weather DSP (this paper has such a unique color combination, one I wouldn't have considered but it really works well) that was matted on Crushed Curry cardstock that was sponged with Chocolate Chip ink, as well as a strip of burlap ribbon that I trimmed off the edges and frayed it.  The greeting is punched out with the Large Oval Punch and matted with a piece punched with the Decorative Label Punch.
 
I really like how this card turned out and could see this easily being made into a Thanksgiving, birthday, thank you, just about any type of card you need, so fabulous. 
 
Hope you enjoy and happy stamping!
 
Diana


Pin It!

Monday, September 16, 2013

Stylin' Stampin' INKspiration September Scrapbook Sketch Challenge: Back to School, MDS Style


Good morning friends!  We were very busy this weekend and were able to enjoy some fabulous weather and family time.  I was so excited for this months scrapbook sketch challenge over on the Stylin' Stampin' INKspiration blog.  I've decided to complete my entire 2013 scrapbook in My Digital Studio and while I'm a little behind where I would like to be I love that I can work on my pages anytime and anyplace. 

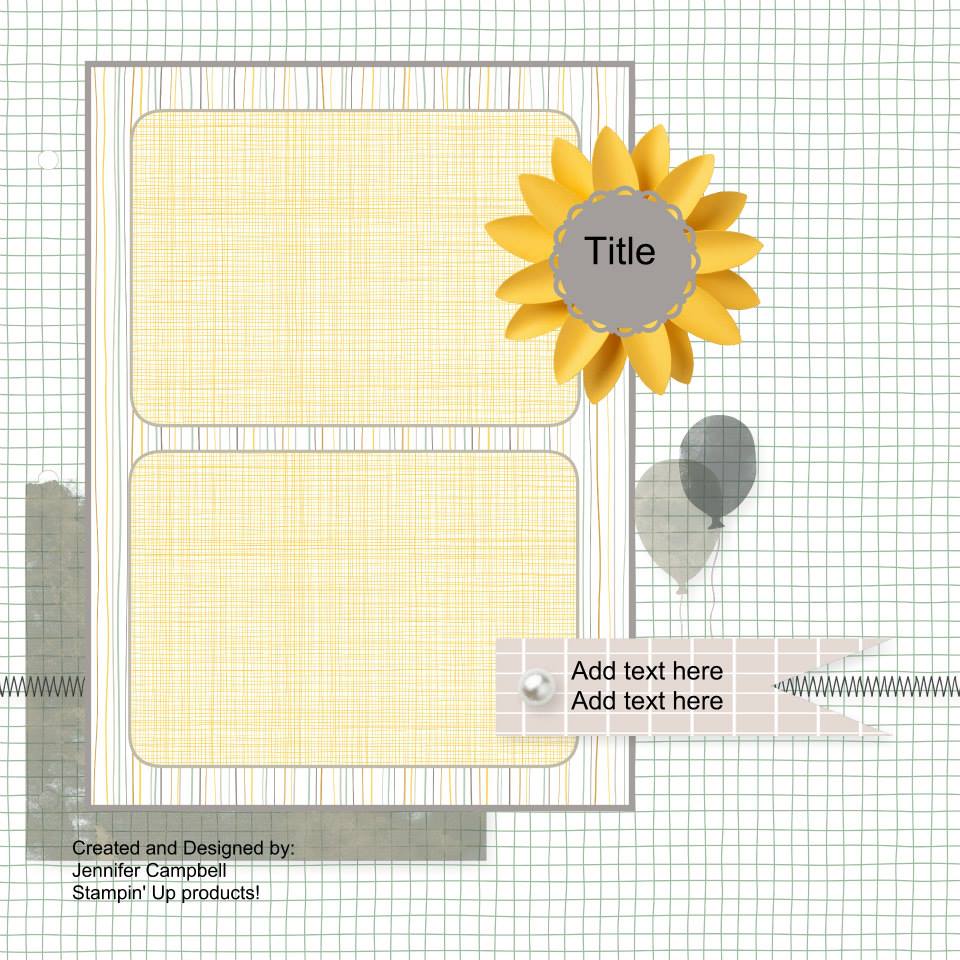
When I saw this month's scrapbook sketch I knew it would be perfect to document Aidan's first day of school earlier this month.  We're so proud of Aidan and we was so excited to start 3rd grade.  Not only was he looking forward to seeing all his school friends but he was over the moon excited when he found out he was assigned to the teacher he really wanted. 

This sketch is pretty straight forward and I'll just provide the details below on all the MDS supplies that were used on this project.  I was also really excited about this layout since this is the first layout I created in MDS starting with an entirely blank page, normally I start with a pre-designed template and add, delete, and modify to make it my own.

You really need to give My Digital Studio a try, it's a great tool for all sorts of crafting needs, and you can try a FREE 30 day trial, I promise you, you'll love it!

Background
     Designer Series Paper\_Designer Kits\Family Fun Photobook - designer series paper\Family Fun Photobook - pattern 15

Embellishments
    _Designer Kits\Piece of Cake - embellishments\Piece of Cake - half circle big 10 (re-colored)
    _Designer Kits/12x12 family album/Family Photobook-04 (re-colored)
    _Designer Kits\Piece of Cake - embellishments\Piece of Cake - circle 2 (re-colored)
    Staple & Stitching/Staple
    _Designer Kits/12x12 family album/Family Photobook-12
    _Designer Kits/12x12 family album/stitching 2
    _Designer Kits/12x12 family album/stitching 2
    _Designer Kits/12x12 family album/bow 1
    Staple & Stitching/Very Vanilla - Stitching Straight
    Antique Brads\Antique Brads - brad 4
    _Designer Kits/12x12 family album/stitching 3 (re-colored)

Stamps
    _Designer Kits/12x12 Family Album/stamps-24, Color = BRAVO BURGUNDY 128,71,80
    _Designer Kits\Neon Notes\Neon Notes - awesome day, Color = 230,WATERMARK 255,255,255

Punches
    Borders\Scallop Edge Punch, Fill Color = LUCKY LIMEADE 170,172,62
    Basics\1.25 Circle Punch,  Filled with: Designer Series Paper\Patterns\Old Olive Patterns 3

Photos
    Designer Series Paper\_Designer Kits\Family Fun Photobook - designer series paper\Family Fun Photobook - pattern 18
    C:\Users\Public\Pictures\Kodak Pictures\2013\DSC05205
    C:\Users\Public\Pictures\Kodak Pictures\2013\DSC05208

Page 17 Supply ListBackground
     Designer Series Paper\_Designer Kits\Day in the Life - designer series paper\Day in the Life - 7

Embellishments
    Striped Grosgrain Ribbon\Early Espresso
    Button Bouquet\Kiwi Kiss Button Bouquet - button1 (re-colored)
    Baker's Twine\Baker's Twine - Crumb Cake bow

Stamps
    _Designer Kits\Back to School\Back to School - grunge overlay, Color = CHOCOLATE CHIP 104,73,71
    _Designer Kits\Old School\Old School - a+, Color = PUMPKIN PIE 255,130,1
    _Designer Kits\Convention 2013\Convention 2013 - banner 2, Color = PUMPKIN PIE 255,130,1
    _Designer Kits\My First Day\My First Day - first day of school, Color = CHOCOLATE CHIP 104,73,71

Punches
    Basics\Scallop Circle Punch, Fill Color = OLD OLIVE 138,151,71
    Basics\1.25 Circle Punch, Fill Color = ISLAND INDIGO 0,126,135

Photos
    Designer Series Paper\_Designer Kits\Day in the Life - designer series paper\Day in the Life - 6
    Designer Series Paper\First Edition - designer series paper\First Edition - 4
    C:\Users\Public\Pictures\Kodak Pictures\2013\First Day of 3rd Grade\DSC06838
    C:\Users\Public\Pictures\Kodak Pictures\2013\First Day of 3rd Grade\DSC06841
    C:\Users\Public\Pictures\Kodak Pictures\2013\First Day of 3rd Grade\DSC06844

No matter if you choose to scrapbook with traditional tools or digital this is a great layout you've got to give a try.  Make sure to share your project on the blog and check out what other's create, so fun.

Enjoy,

Diana
Pin It!

Friday, September 13, 2013

September Special: 15% off Butterfly Bundle

Who doesn’t love butterflies? No one, that’s who. Butterfly shapes are great on projects for any occasion. So make sure to get in on our current offer: bundle and save 15 percent on this butterfly stamp set and punch between August 29-September 30, 2013!

Bundle ItemDescriptionRetail Price15% Savings PriceAmount Saved!
135311Butterfly Bundle (Clear-Mount)
Papillion Potpourri Clear-Mount Stamp Set
Bitty Butterfly Punch
$30.90 USD
$39.90 CAD
$26.27 USD
$33.92 CAD
$4.63 USD
$5.98 CAD
135312Butterfly Bundle (Wood-Mount)
Papillion Potpourri Wood-Mount Stamp Set
Bitty Butterfly Punch
$34.90 USD
$44.90 CAD
$29.67 USD
$38.17 CAD
$5.23 USD
$6.73 CAD

Get the Butterfly Bundle today!
Pin It!

Thursday, September 12, 2013

Stylin' Stampin' Squad September Blog Hop: Favorite Tools


 Thank you so much for joining us for the September Stylin’ Stampin’ Squad Blog Hop! This month we are focusing on the tools of the stampin’ trade. Specifically, each of our favorite stamping tools. It’s amazing the kinds of tools that have been created to help us along in our paper-crafting addictions. This month’s blog hop will showcase many of the Stampin’ Up! tools that are now available to us in the 2013-2014 Stampin’ Up! Idea Book and Holiday Catalog and even a couple of products that are so new they aren’t in either catalog. We hope you enjoy seeing how we use the old and new tools and are inspired to come up with some great projects of your own.

You should have just left stop number 11 on the Stylin’ Stampin’ Squad blog hop – Bree R. of Craft-somniaIf so, you are in the right spot. If a link doesn’t work or you get off track, you will find the full blog hop lineup below.

My favorite SU tool is by far the Big Shot and when they released the new Thinlet card dies earlier this summer I knew I was in heaven!  I instantly decided I was going to use these for our family Christmas card and I've already finished making 70 of them. Shortly after the dies were released Patty Bennett, a fellow demonstrator came up with a great way to use the die to make an extended card (see Patty's card and tutorial HERE).   There are two different Thinlet card dies, the circle and label cards.  In addition to the card cut out, each set as several other thinlet pieces, including sayings, arrows, banners, etc.
 
For my first card I used Patty's technique and the Circle Thinlet card die to make this cute birthday card.  The cardbase is Melon Mambo and I added a piece of designer series paper from the Quatrafancy Speciality DSP package to the right side, along with strips of Silver Glimmer paper on both panels.  I also added a stripe of Island Indigo cardstock that was embossed with the Stylish Stripes Embossing Folder.  The greeting is from the Make a Wish stamp set and was punched out with the 2 1/2" circle punch.  I also added a cute little cupcake using the Create a Cupcake stamp set and coordinating Cupcake punch.

When you open up the card there's a cute birthday cake from the Bring on the Cake stamp set and I used the Photopolymer stamp set to stamp the recipients name on the card.  The birthday greeting is also from the Bring on the Cake stamp set.  I have to say these cards are a lot of fun and it gets really addictive to keep adding little elements to is, love it!


The second card I have for you uses the Label Thinlet card die and is a really simple Christmas Card.  After cutting out the card with the die I embossed the right side with the Snowflake Embossing folder.  I added a strip of Winter Frost Specialty DSP to the left side.  The greeting is from the Joy to the World stamp set and the thinlet card die set includes the framelit to cut out the insert for the flip piece.


 I kept it really simple on the inside and just stamped a snowflake on the inside flip piece with the Festive Flurry stamp set and added a rhinestone to the center of the snowflake.  This shows how the second card looks but you can really keep them as simple or as detailed as you want.

I hope you enjoyed my projects for this months hop and you've fallen in love with the Thinlet card dies as much as I have.  They're so much fun, you'll want to use them for every card.

Make sure to continue on to the hop, Jennifer is next and you won't want to miss what she's created.

Enjoy!

Blog Hop Participants:
  1. Shellie G. of Craft Smashup
  2. Pam S. of Stampin' in the Sun!
  3. Tonya B. of Stampin' with Tonya
  4. Dawn S. of Dawn's Creative Chalet
  5. Darcy J. of DJ's Stampin' Place
  6. Pamela W. of Stinky Tofu
  7. Kim R. of Stamping with Kim
  8. Justin K. of JK Cards
  9. Heidi B of Stuck on Stampin'
  10. Jennifer B. of NW Stamper
  11. Bree R. of Craft-somnia
  12. Diana E. of Stampin' Fun with Diana
  13. Jennifer C. of Happy 2 Scrap 4 Life
  14. Jamie H. of Unique Ink
  15. Kristina M. of Mama's Sanity

     
Pin It!

Tuesday, September 10, 2013

Quick and Easy Halloween Treats, Perfect for Every Occasion!

Good morning!  People who know me know that I'm a huge planning and really enjoying being ahead of the game for everything possible.  As such I'm always working ahead on holiday projects so I can share ideas and inspiration to help you come up with the perfect gifts for your friends and family.  I love to make fun treats for every holiday and love that my son still enjoys giving his friends these gifts (I'm dreading the day he becomes "too big" to do it, boo!)  Today I'm really excited to share some great quick and easy Halloween treat ideas that you can whip up quickly and people will be sure to love.  All these ideas involve candy because let's be honest what's Halloween without lots of candy treats?
 

This first treat uses the Pumpkin Pie Goodie Gear Simply Created Kits (item #132792 and you can make 10 treats for only $4.95).  The kit comes with the bag, Crumb Cake die cut tag, Pumpkin Pie patterned sticker strips, and Island Indigo Baker's Twine.  All I did was stamp the images from the Halloween Hello stamp set (colored in the candy corns and cut out the bat and greeting).  This came together so quickly you could very easily take care of treats for your kids class, your coworkers, etc. in no time.


The second treat I have for use is a treat tube and uses the 1x8 cello bags and I added three Smarties candies (you could easily add M&M's, other small candies, or even pencils).  I tied a decorative knot with the Basic Black Chevron Ribbon.  For the fun tag I used a strip of Witches Brew designer series paper and the Simply Scored Board to create a lolly.  The greeting is from the Halloween Bash stamp set and was colored in with Stampin' Write Markers before being cut out with the Big Shot and the Labels Collection Framelits.  I used my hot glue gun to glue all the layers together so they're nice and secure and I attached the tag to the tube with a piece of Linen Thread.


My third treat is a favorite, this is actually the treat I'm making for Aidan's class gift this year and is a great way to use lots of designer series paper (we know we all have a huge stash of paper that's just waiting to be used).  This is a classic sour cream container and you can find lots of videos online on how to make these.  I did alter it slightly, I used paper that was 4" x 5 1/4" Witches Brew Designer Series Paper (I changed it so I could get six containers from each piece of DSP.  I used Sticky Strip to attach the tube together and added a fun size bag of M&M's inside.  A paper crimper was used on both ends for some added detail.  The greeting is again from the Halloween Bash stamp set and I used the Decorative Label Punch, Scallop Oval Punch, and Oval Punch to punch out each of the layers.  A piece of Basic Black 1/4" Taffeta Ribbon attaches the tag to the candy container.


My last project is a super cute Halloween box that uses the Pop n' Cuts Die and the Big Shot.  Tonya Bell came up with this fabulous box using this die and I just had to try it out, check her project out here).  Once again I used the Witches Brew Designer Series Paper.  The inner box is made with Pumpkin Pie cardstock and will hold lots of yummy goodies.  I used the oval punch to cut out the holes at the top and used a piece of Summer Starfruit 3/8" stitched satin ribbon for a fun touch.  For the front of the box I used the Halloween Hello stamp set for the greeting as well as the little candy pieces (I cut them out with Paper Snips and attached them with dimensionals so they pop up).  A small piece of coordinating DSP and some Witches Brew Washi Tape help finish off the design.


Here's a side view of the treat box.

I hope you enjoyed the treat projects I shared today and that it inspired you to create some fun and yummy treats for Halloween (or any other holiday, these can all be changed with the colors, paper, and stamps for any occasion). 
 
Thanks for stopping by and enjoy,
 
Diana
Pin It!

Monday, September 9, 2013

Hand Stamped Sentiments Sketch Challenge: Lots of Thanks

Good morning and welcome to another Monday!  What a beautiful weekend, not only did we get to check out a great fruit market that's new to us and spend some family time but I also got some fun crafting time which was really needed and I can't wait to share my projects with you.  Today I'm sharing the card I made for this weeks Hand Stamped Sentiments sketch challenge.  I decided to embrace this challenge and switched up my usual card for a 5" square card.  I used the Afternoon Picnic Designer Series Paper as the inspiration for my color combination and started with the Wisteria Wonder cardbase.  Next I added a layer of Coastal Cabana before adding a piece of DSP that I sponged all over with Crumb Cake ink to help distress it.  I used several different patterns of paper from this same pack since they work so perfectly together.
 
Behind the half circle layer I added a paper doily that was also sponged with Crumb Cake.  I added some candy dots along the curve of the circle for some fun bling.  The flower is from the Everything Eleanor stamp set and I stamped the small flower with Wisteria Wonder ink and then colored it in with a blender pen and Wisteria Wonder and Crushed Curry ink.  After cutting the flower out with Paper Snips I added small little pearls to the center of the flower.

There are three layers of flags as a fun accent on the card, one is designer series paper, another is Victoria Lace Trim Ribbon, and then I used the Lots of Thanks stamp set to stamp the greeting a on piece of Very Vanilla cardstock and sponged around the edges.
 
This card is so soft and pretty, it's perfect!  Also, since this is a square card you could make a perfect matching envelope with designer series paper and the new Envelope Punch Board, check out the video below for all the details on this new product.
 
 
Hope you enjoyed this weeks card and make sure to play along, it's a lot of fun.
 
Have a great week!
 
Diana

Pin It!

Friday, September 6, 2013

Paper Players Sketch Challenge: Truly Grateful

We've made it to the end of the week, it always amazes me how difficult it is to get through a week, even if it was short due to a holiday, I guess I really just enjoy weekends!  I'm back again today to share a card I made for this Paper Players Challenge and it was really fun.  It's amazing how we were celebrating summer just last week and now I'm fully embracing the upcoming fall while still enjoying the warm weather and it really inspired this card.  The cardbase is Crumb Cake and I added a layer of Cajun Craze that was randomly stamped with the Gently Falling leaves as a background.  Next I added a piece of Early Espresso Core'dinations cardstock that was embossed with the Woodgrain Embossing Folder and the Big Shot as well as a piece of Victoria Lace Trim Ribbon
 
The main focal image is from the new Truly Grateful stamp set. I stamped the wheat image with Chocolate Chip ink and then used Stampin' Write Markers to roughly color in the image before cutting the image out with the Big Shot and Deco Label Framelits.  To help distress and soften the image I sponged all over the piece with Crumb Cake ink.  I stamped the acorn with Crumb Cake ink and cut it out with my Paper Snips
The greeting is from the same stamp set (I absolutely love how our stamp sets coordinate with each other and you can make fabulous projects with just one set), and was stamped with Cajun Craze ink on Crumb Cake ink, punched out with the Modern Label Punch.  I used dimensionals to pop up the greeting and added little pearls as accents.

This card is so soft and fresh, I love how it turned out.  I send cards to family for almost every holiday, just so they know we're thinking of them so this his helping me come up with potential designs for this years Thanksgiving card, we'll see.
 
I hope you enjoy and there are some really great cards on the Paper Players Blog for this challenge so make sure to check it out for lots of great ideas!
 
Enjoy and have a great weekend!
 
Diana
Pin It!

Thursday, September 5, 2013

September Just Cards Class

Welcome back and Happy Thursday!  Today I'm so excited to share the cards we'll be making that this months Just Cards class.  The class is this Sunday, September 8 at 2:00 PM.  We'll be making these five wonderful cards (plus there's the Christmas Card option to help get you started on your holiday cards). 


There's still time to reserve your spot, just let me know by Friday, September 6.  Also, if you can't make it to class but don't want to miss out on the projects, let me know and you can get the card kit to go so you can make these cards at home when your schedule allows.
 
I hope to stamp with you Sunday!
 
Diana
Pin It!

Wednesday, September 4, 2013

Stylin' Stampin' INKspiration Blog Post: My Paper Pumpkin

Welcome back friends! We survived the first day of school and Aidan had a great day.  He loves his teacher and all his classmates so we're so excited for a wonderful year.  I love the excitement kids bring to each new school year and always try to embrace that belief in a fresh start in my life as well.
 
Today over on the Stylin' Stampin' INKspiration blog the design team is showcasing lots of great things you can make using the stamps from the My Paper Pumpkin kits.  I love these kits!  They are so fun, I actually get excited to get them in the mail each month and I actually opened one of the kits out in the street by the mailbox, just so I could see what that month's project was going to be.  The great thing is that all the work is done for me, no designing, cutting, or prepping, and you get unique stamps that are only available in the kits to use on lots of other projects. 
 
For my card today I used stamps from the August kit (Petal Pusher) as well as the Welcome Kit.  The bicycle image is from the August kit and was stamped in Basic Grey ink and cut out with the Deco Labels Framelits and the Big Shot before sponging around the edge with Calypso Coral ink. 
 
The cardbase is Pool Party and I added a layer of Whisper White that I stamped with the splatter image from the Paper Pumpkin Welcome Kit with with Pool Party ink.  I also used the Gorgeous Grunge stamp set to use the small splatter image with Basic Gray and the lines in So Saffron (they remind me of road tread, which is fun!)  The greeting is also from the Welcome Kit and was stamped in Real Red ink, this greeting is so versatile.  The final touch was to add strips of So Saffron and Calypso Coral cardstock that was cut out with the Big Shot and the Tasteful Trim Bigz XL die.

A card like this is perfect to send to a friend, when there is no special occasion, just to say "hey, I'm thinking of you" and isn't it so special to let our friends and family know what they mean to you.  I love the Paper Pumpkin program and all the fun it brings, and I really encourage you to give it a try, you can cancel at anytime but what a great creative outlet and one you can do with friends, kids, etc. that will really bring you joy.  Make sure to head on over to the Stylin' Stampin' INKspiration blog for lots of other great ideas using images from these kits.

Enjoy,

Diana
Pin It!

Monday, September 2, 2013

Fab Friday Sketch Challenge: Falling for Tags 4 You

Good evening and I hope you had an enjoyable Labor Day weekend!  We had such a relaxing time, Aidan got to enjoy the pool before the end of the season, we hosted a soda float party for some wonderful friends and neighbors, Mommy and Daddy each got some time at home to relax, and we even went up to Baltimore and enjoyed a nice dinner in the Inner Harbor.  I was also excited to be able to send some quality time in the studio and had lots of fun playing with some of the fun new products in the Holiday catalog.
 
For this weeks Fab Friday Sketch challenge I decided to make a fall card since we all know the days of the hot weather will soon be ending.  The products in the fall suite are so awesome and work fabulously together.  I started with a cardbase of Pool Part and I sponged around the edge with Crumb Cake ink (I'll just say it now, I sponged pretty much every layer with Crumb Cake to help soften them).  Next I added a piece of Chocolate Chip cardstock before the Very Vanilla layer.  This piece was stamped with the Magnificent Maple stamp and then randomly with the splatter from the Gorgeous Grunge set (I love this set and am using it all the time right now!!!)  Next I added a piece of Sweater Weather designer series paper that was matted on Crushed Curry cardstock.

For a fun accent I added pieces of Natural 7/16" trim and Early Espresso 1/8" Taffeta Ribbon.  The greeting is from the new Tags 4 You stamp set and coordinates perfectly with the matching Label Bracket Punch.  I used dimensionals to make sure the greeting really pops.
 
This card was so fun and has lots of different elements that work so well together.  This is such a fun, simple sketch make sure to check it out and see what you can come up with.
 
Hope you have a great week and good luck with the first day of school tomorrow!
 
Thanks,
 
Diana

Pin It!

Search This Blog